I recently taught Paul Jackson’s Cut Pleats Across Cut Pleats technique applied to alter book pages at the Form and Function From Afar Conference. You can still sign up and watch the recorded content from three days of presentations. Here I am showing the folding and cutting steps we took to make the finished piece, which combines imagery from both sides of a sheet of paper on a single side. It is a magical way to transform paper and images into something new. The possibilities for pleat placement as well as alterations you can make after folding and twisting are nearly endless.

Begin with a sheet of paper that has contrast between side A and B. Here I am using a piece of marbled paper that is white on the back side. Begin folding with the colorful side face up. If you are folding for the first time consider using at least an A4 or letter size sheet of paper.

Fold the paper in half and then fold each edge to the center fold to divide it into fourths.

Rotate the paper 90 degrees and fold in half, then in quarters just like you did in step 2.

Turn the paper over and you will have a series of mountain folds, 3 horizontal and 3 vertical. We are going to concentrate on these folds for the next several steps.

Create pleats by folding each mountain fold to the center point between mountains. Fold pleats in both directions.

Rotate the paper 90 degrees and create pleats in the same was as before. You now have 9 pleats that intersect with each other at 90 degree angles.

The next two steps are all about cutting. You will cut the pleats on the mountain folds between valley folds. Fold back the paper along a mountain fold as shown then cut the mountain fold perpendicular to it as shown. Repeat for all 9 intersections with the paper oriented as shown.

Here is what the paper looks like once the first set of cuts has been made.

Rotate the paper 90 degrees and cut the other set of intersecting mountain folds as shown.

Unfold the paper and you should have + shaped cuts where the mountain folds intersect. There will be 9 of them.

Now we will do a series of folds to help create the final magical reveal. Start with the first pleat as shown and fold down each section (there are 4 now that we have cut into the pleats), making them fold in opposite directions as shown.

Stand the second row pleat up and fold down the four sections as shown, making sure they fold down opposite each other.

Lift and lay down the third pleat as before then rotate the paper 90 degrees.

Lift the first pleat (the one nearest you) along the mountain fold and the two layers will open up revealing the image from the other side. This is the magical step.

Repeat lifting and unfolding the second pleat in this direction to reveal the second row of images.

Finally, repeat with the top pleat to reveal the last row of imagery. Use a bone folder to gently press down the pleats.
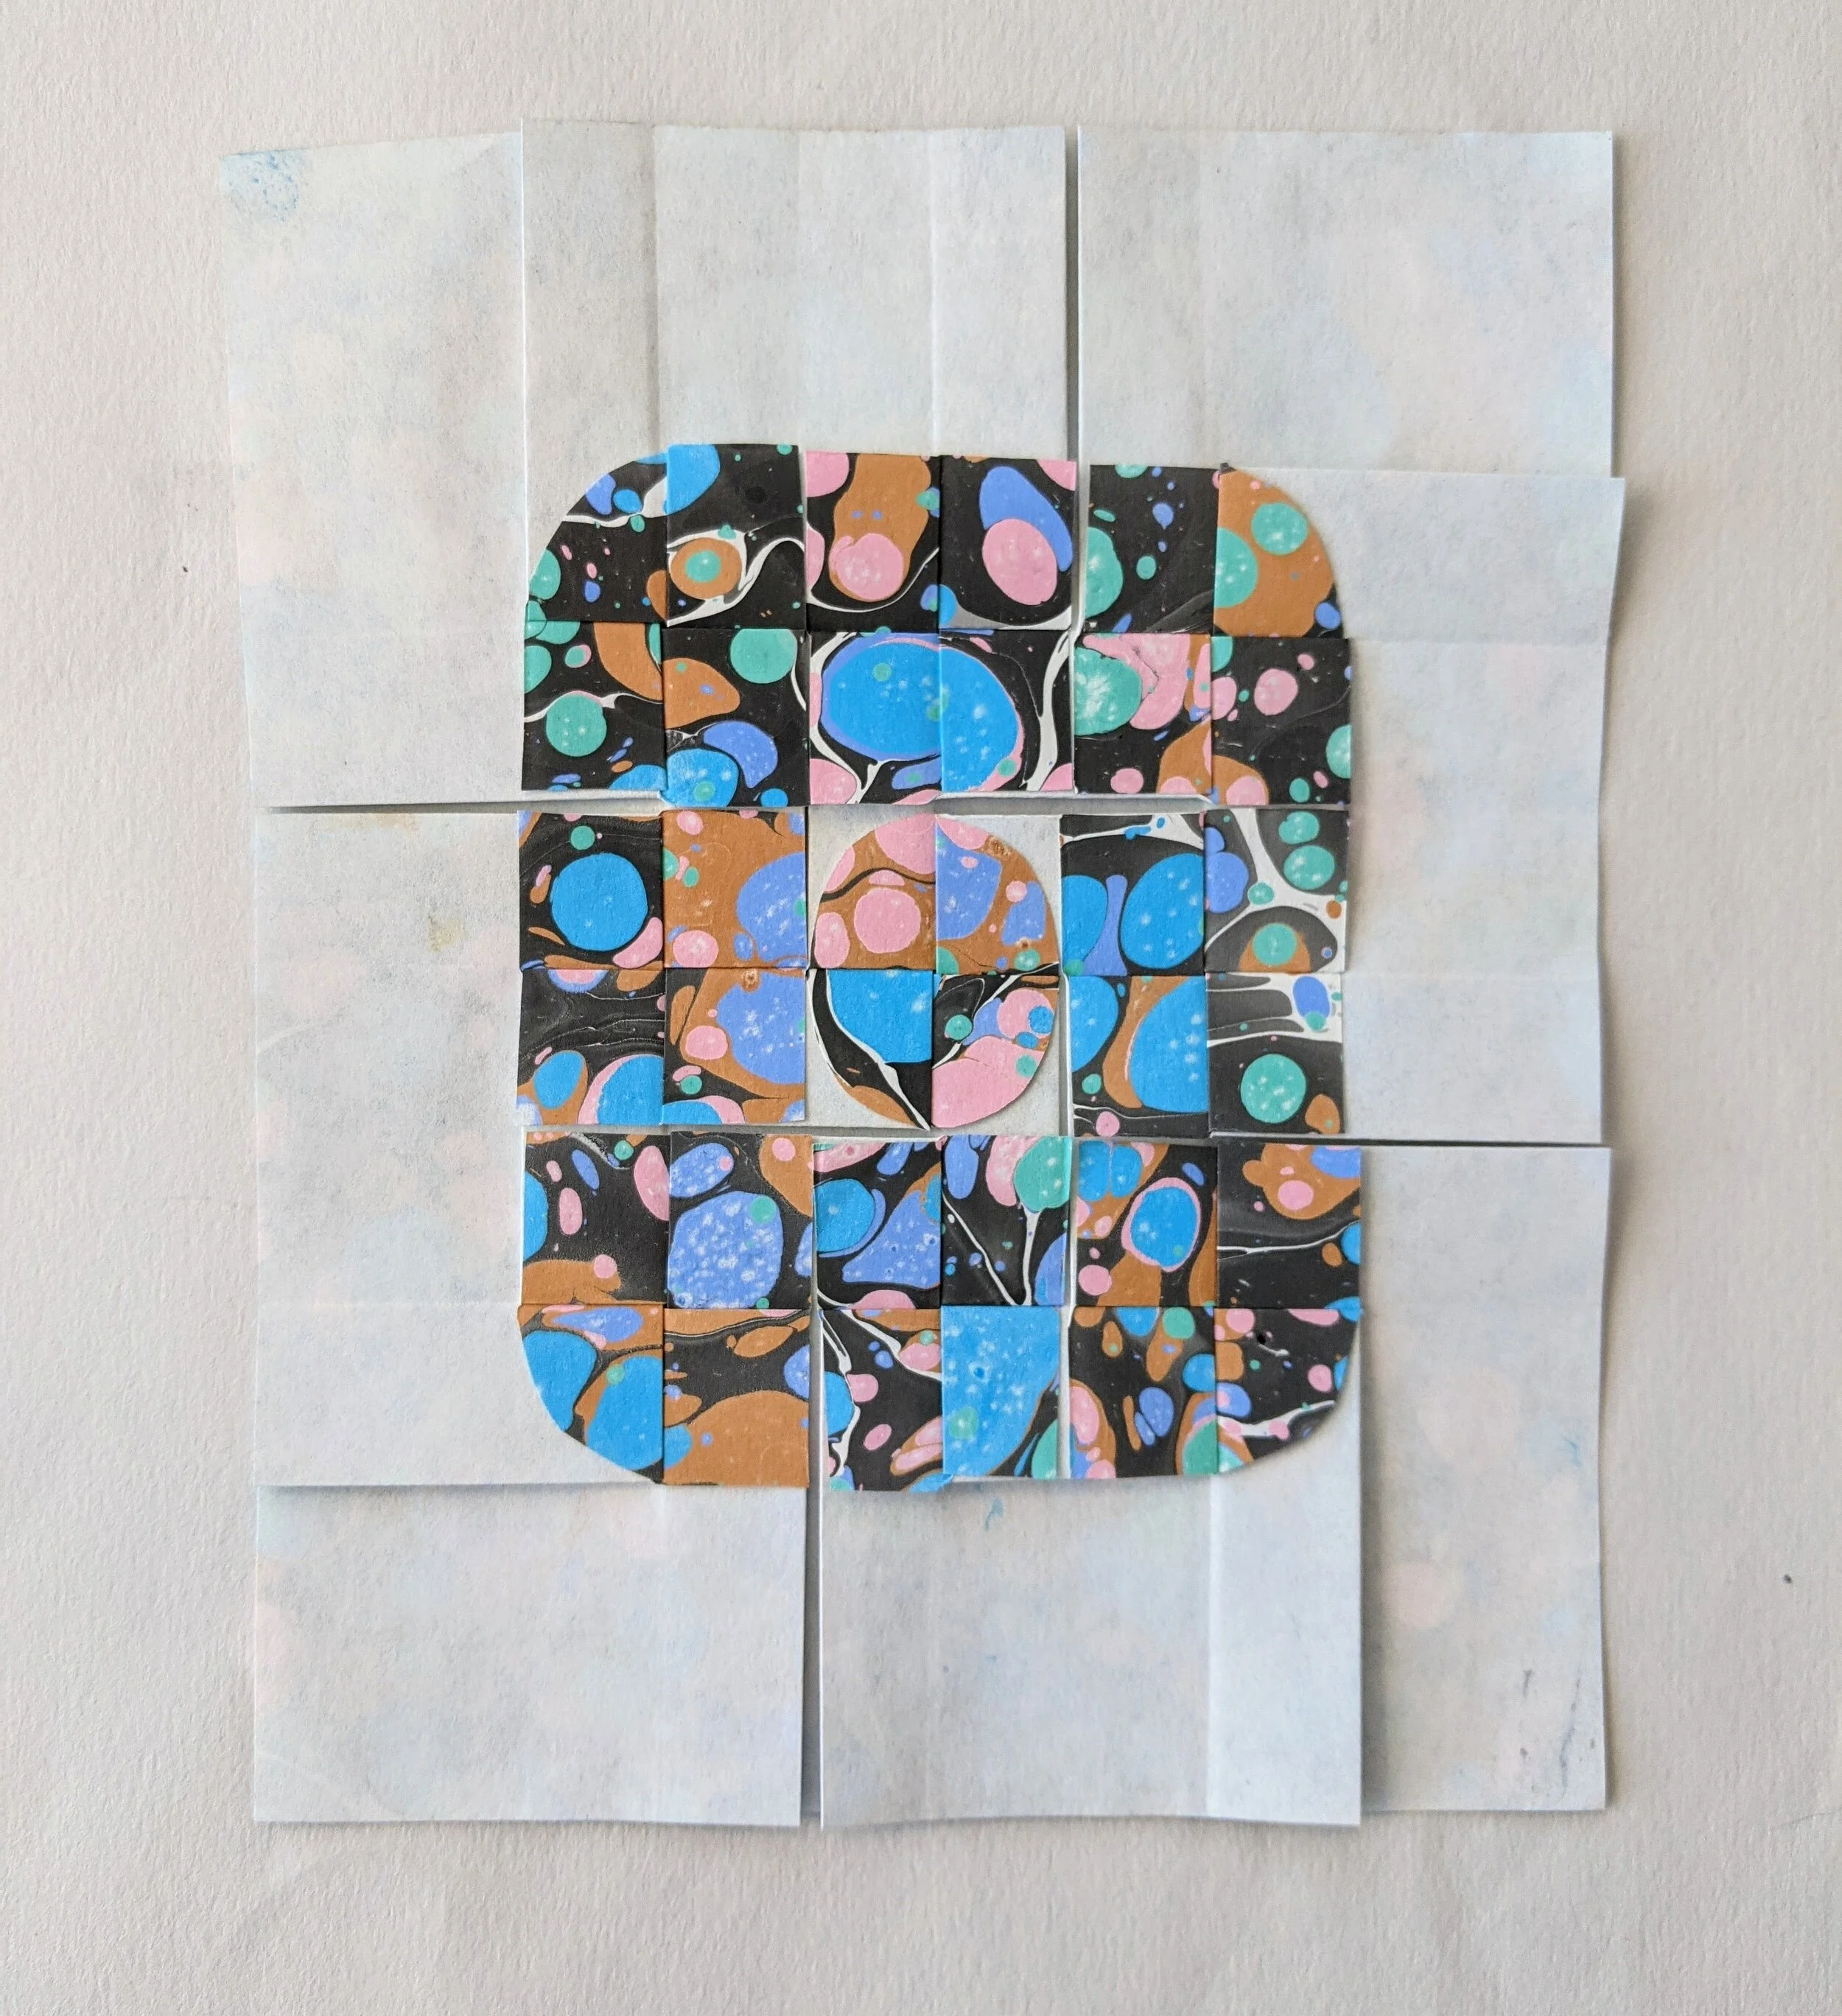
There are many ways to modify the finished piece. Here is an example of cutting curves on the four corners and the center rectangle that my friend Lauri showed me. Try folding back or forward the corners of each rectangle to modify it as well. You can also fold fewer pleats or place them at different spots on the paper. The only rule you have to follow is that when two pleats cross they must do so at a 90 degree angle.
This blog is a supplement to the Form and Function From Afar Conference video. If you are having problems following with just the photos and text here I recommend you check out my video at the conference.