Weaving Day 8

I really did a deep dive today creating a fun design that I have wanted to try for almost a year. I drew the first image and wondered if it could be woven. Indeed it can. There are actually several approaches, but this is a good beginning. Enjoy the optical illusion.

Drawing that weave is based on.

Version 1 of the weave. Stay tuned, tomorrow you can see another version.

Weaving Day 7

I tried this weaving several ways to try and get interesting patterns. There are so many variables in paper weaving; paper width, angle the weft strips go through the warp, shape of the warp and weft strips, pattern of weaving (plain over under or skipping warp strips). It makes doing just one weaving a day a series of decisions that may not be apparent in the results you see.

Here are just a few of the things I tried with the same strips of paper today. Can you see the differences?

Weaving Day 6

I am in the mood for hearts, I guess. I wove some red lined graph paper. First I cut out 2 hearts, one along the vertical axis and a smaller one on the diagonal. I think the results are fun, but I decided to outline the smaller heart as most of the strips ended on the back side and the edge was a bit lost in it all.

Weaving Day 5

Today I wove paper with boxes that actually is starting to make the patterns I want to make. You can see in the images the paper I used followed by the weaving and a closeup.

Weaving Day 4

I spent part of the day at Bainbridge Island Artisan Resounce Network making Valentine's cards for local volunteers. Of course, I had to weave some of them.

Weaving day 3

I played with 45 degree angles today. Using ledger paper with lines and grids makes for a dynamic result. I also cut the finished weave into an oval shape.

Weaving day 2

I explored some vintage lined ledger paper today and played with how the lines interact. The strips were cut at a 30 degree angle to the lines. I am going to explore cutting the strips wider tomorrow for more pattern ideas.

Triangular prism Box

I have been playing with the Fujimoto Cube for a while now and wrote about some variations I created here. Recently, I realized that this origami structure can be applied to an equilateral triangle to make a triangular prism box. Below are the stepouts for this box.

I started with paper that was in a ratio of 3:4 or 6 x 8 inches. After getting the first 60 degree angle drawn in the top and bottom left squares, I trimmed the top and bottom sections as shown in image 4. Then I drew all the other 60 degree angles and scored them all. You do not need to draw any of the red lines shown, just fold or score them except for the first 60 degree angles that need to be drawn in pencil so you can trim. The last image shows the whole process with steps that should make sense with the images I have provided.

I suggest using sturdy paper (cardstock weight or maybe elephant hide paper) for this box. Enjoy!

Crane Books Revisited

Playing with half cranes just keeps getting more interesting. Even after 10+ years of exploration there is still more to learn from this simple origami shape.

Read More

Spiral Boxes

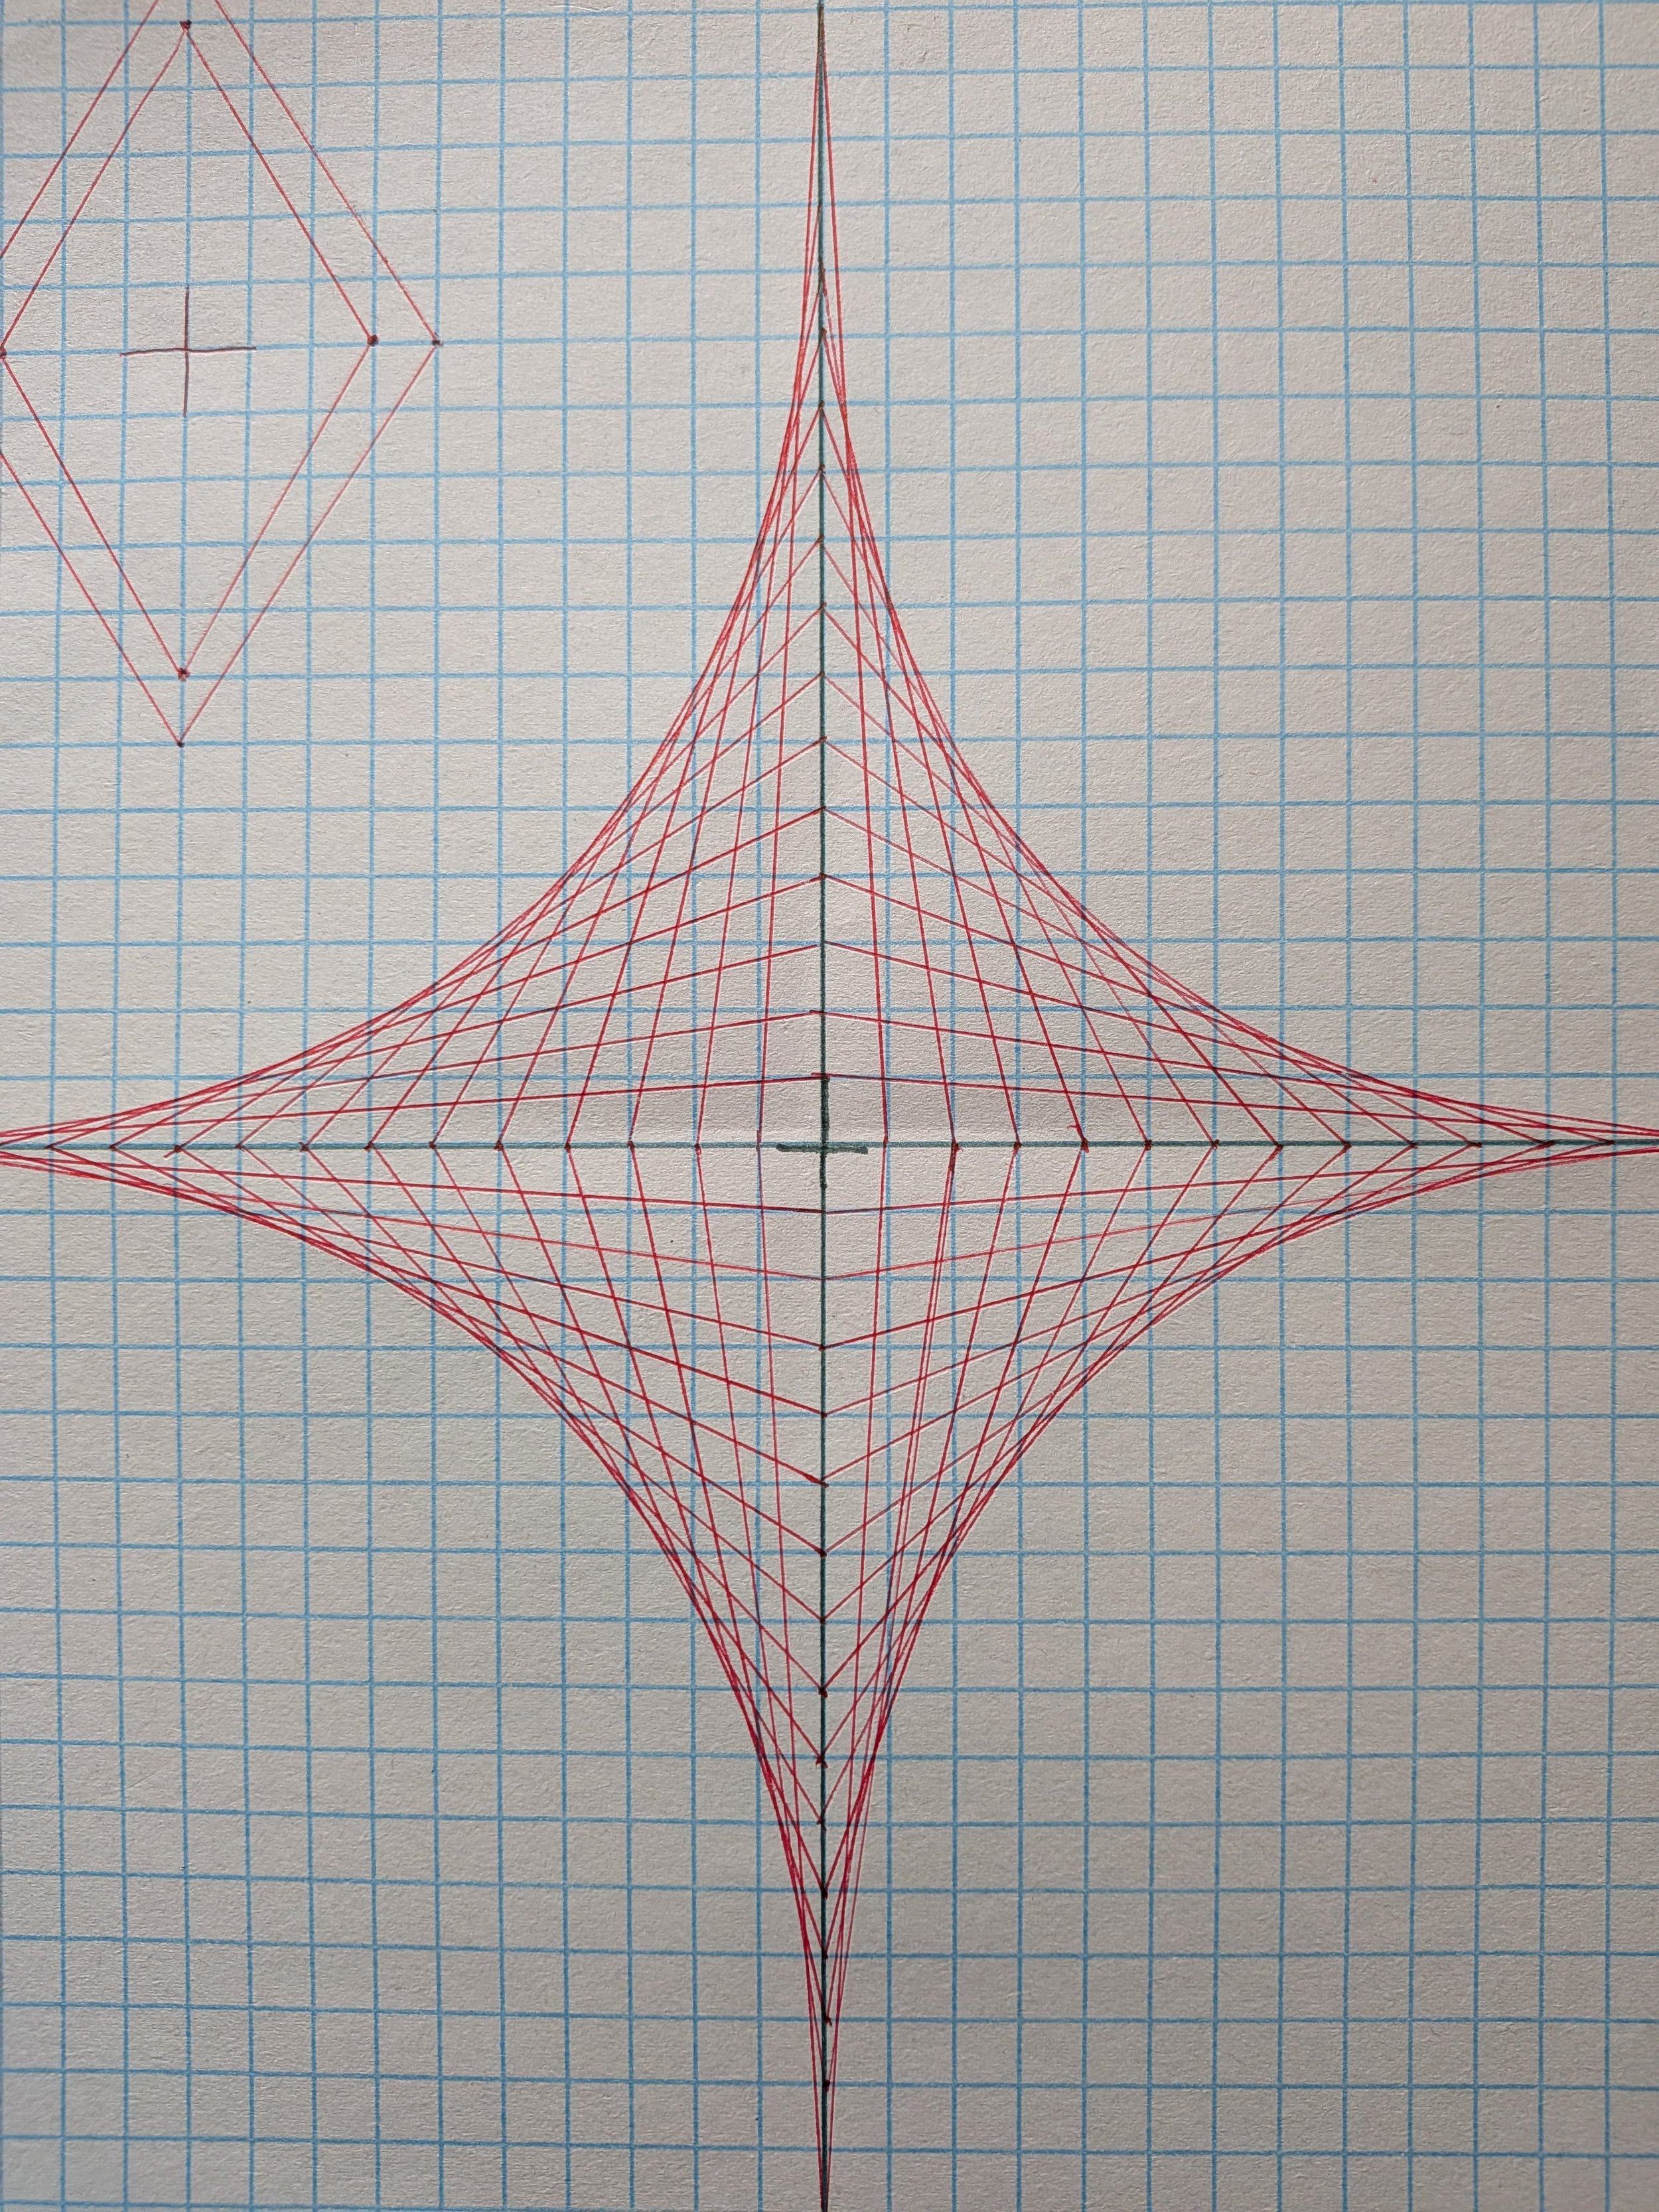
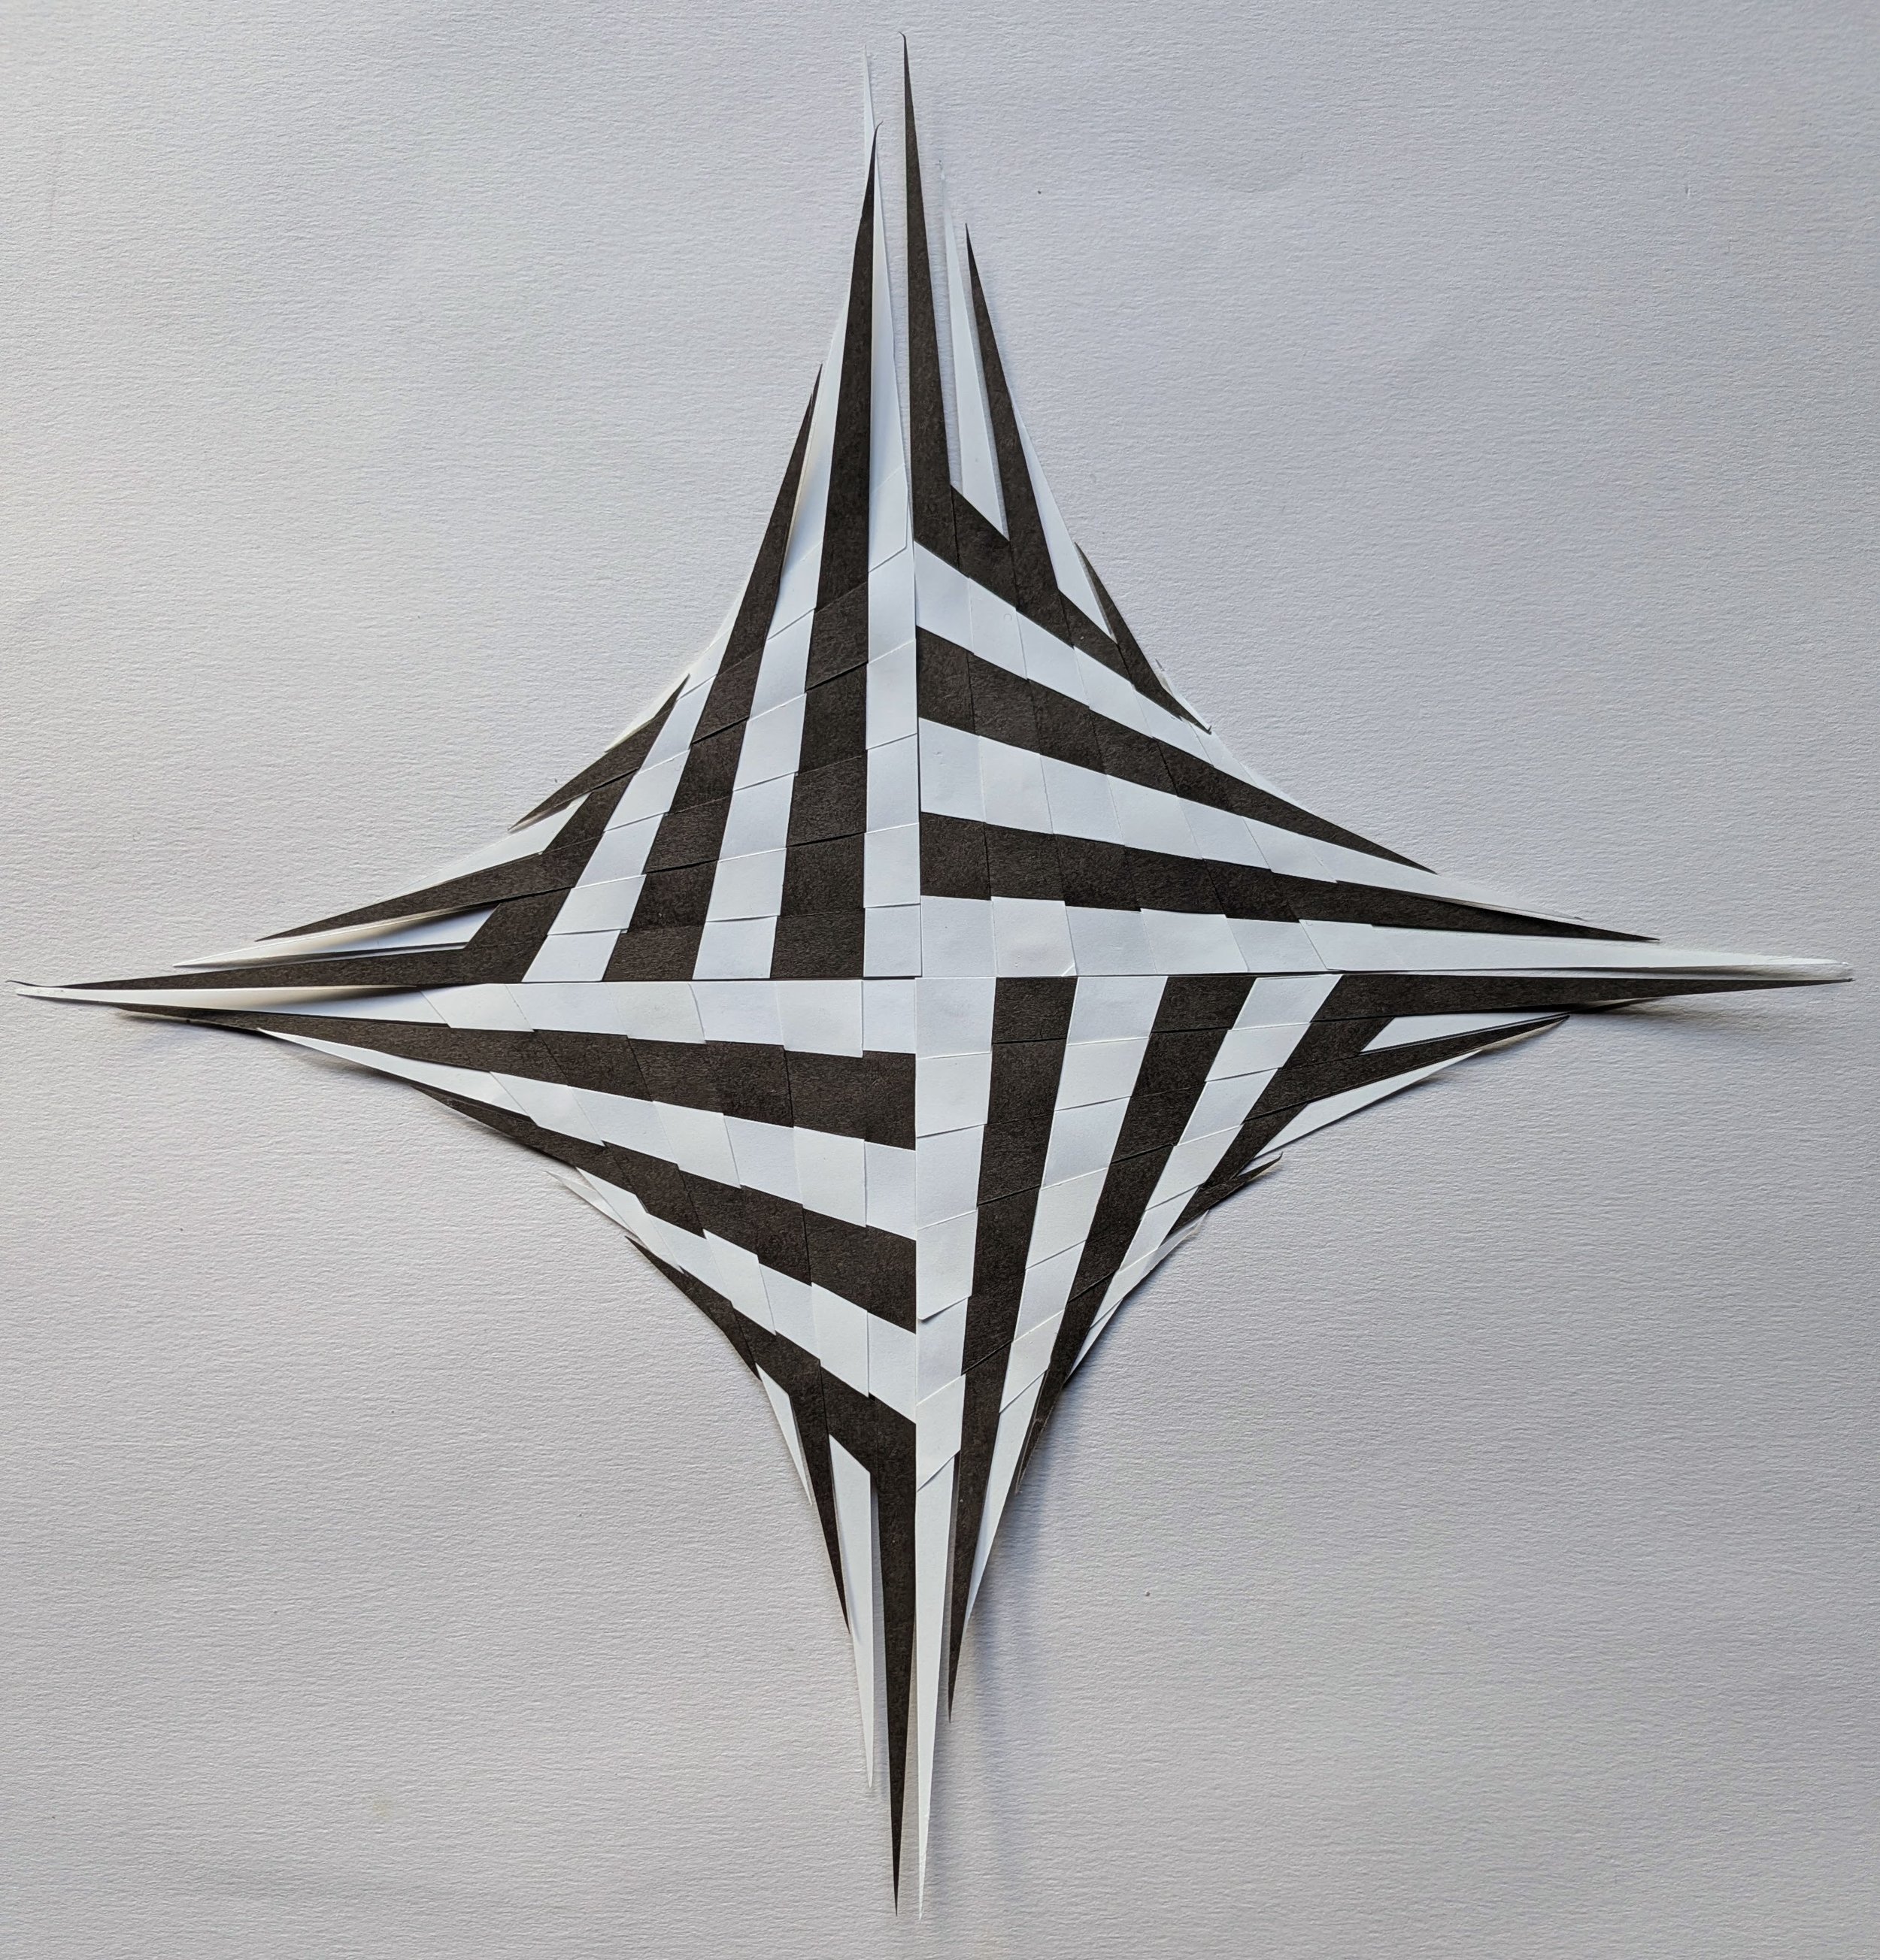
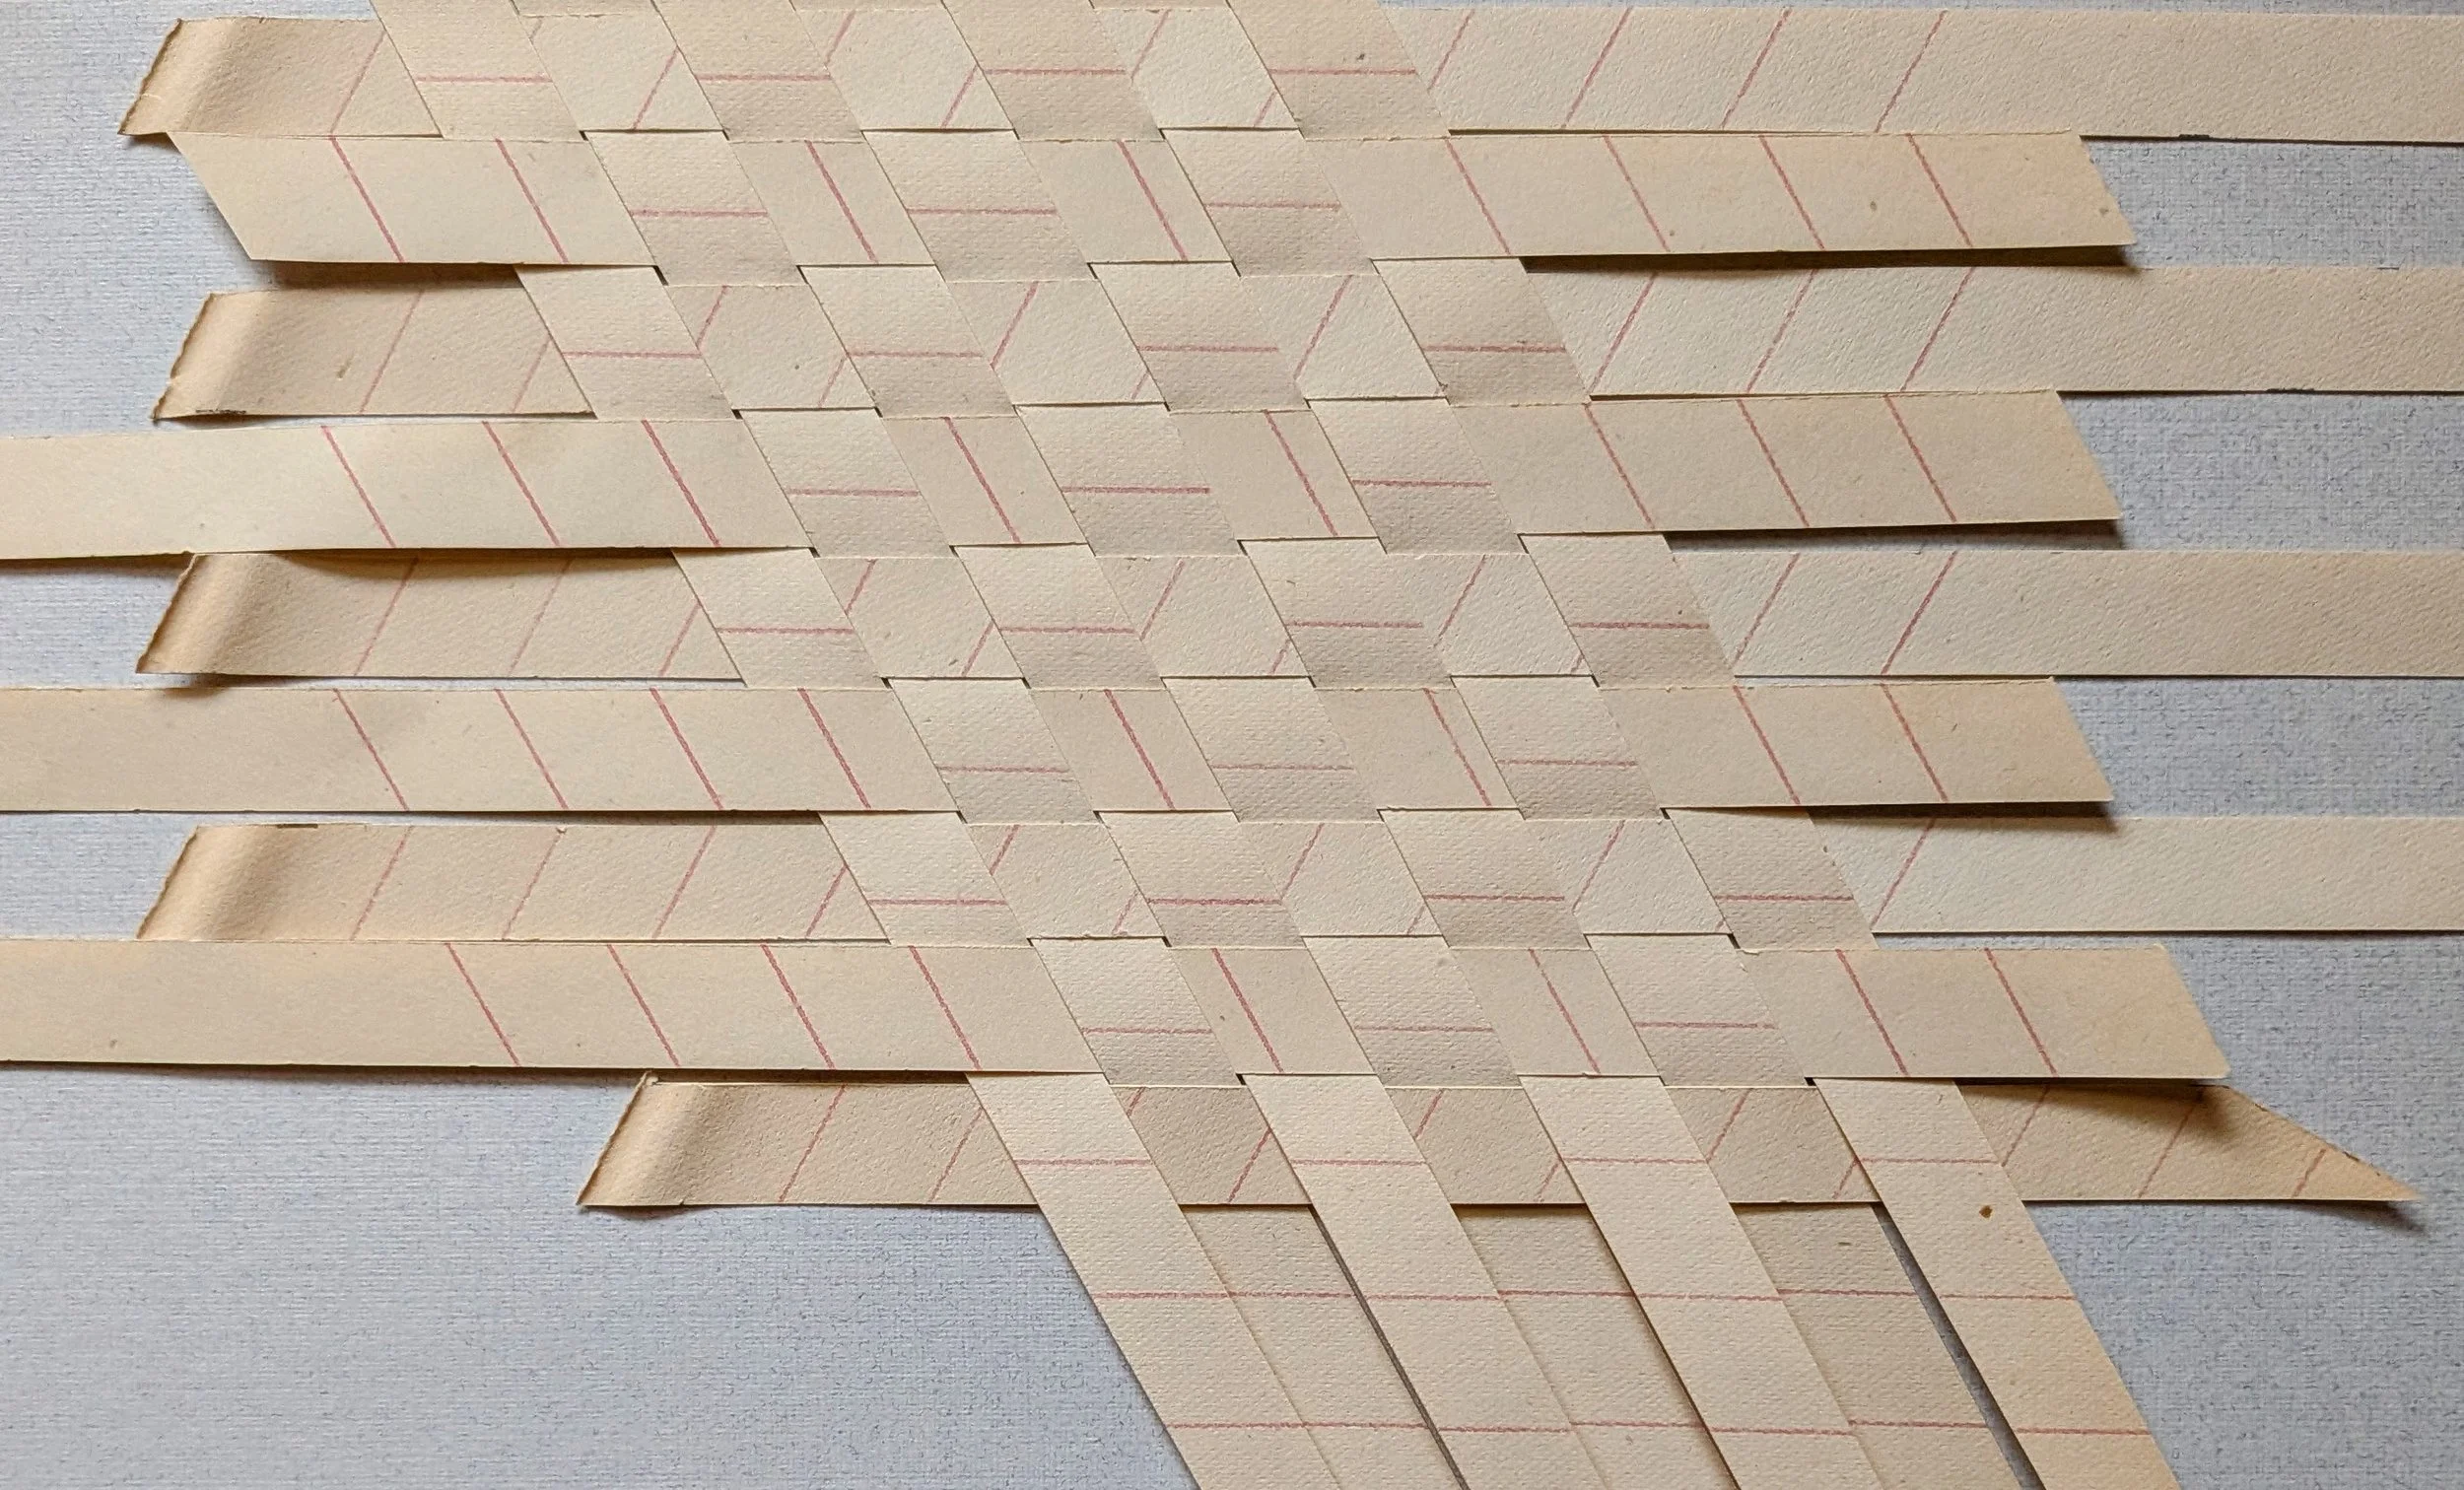
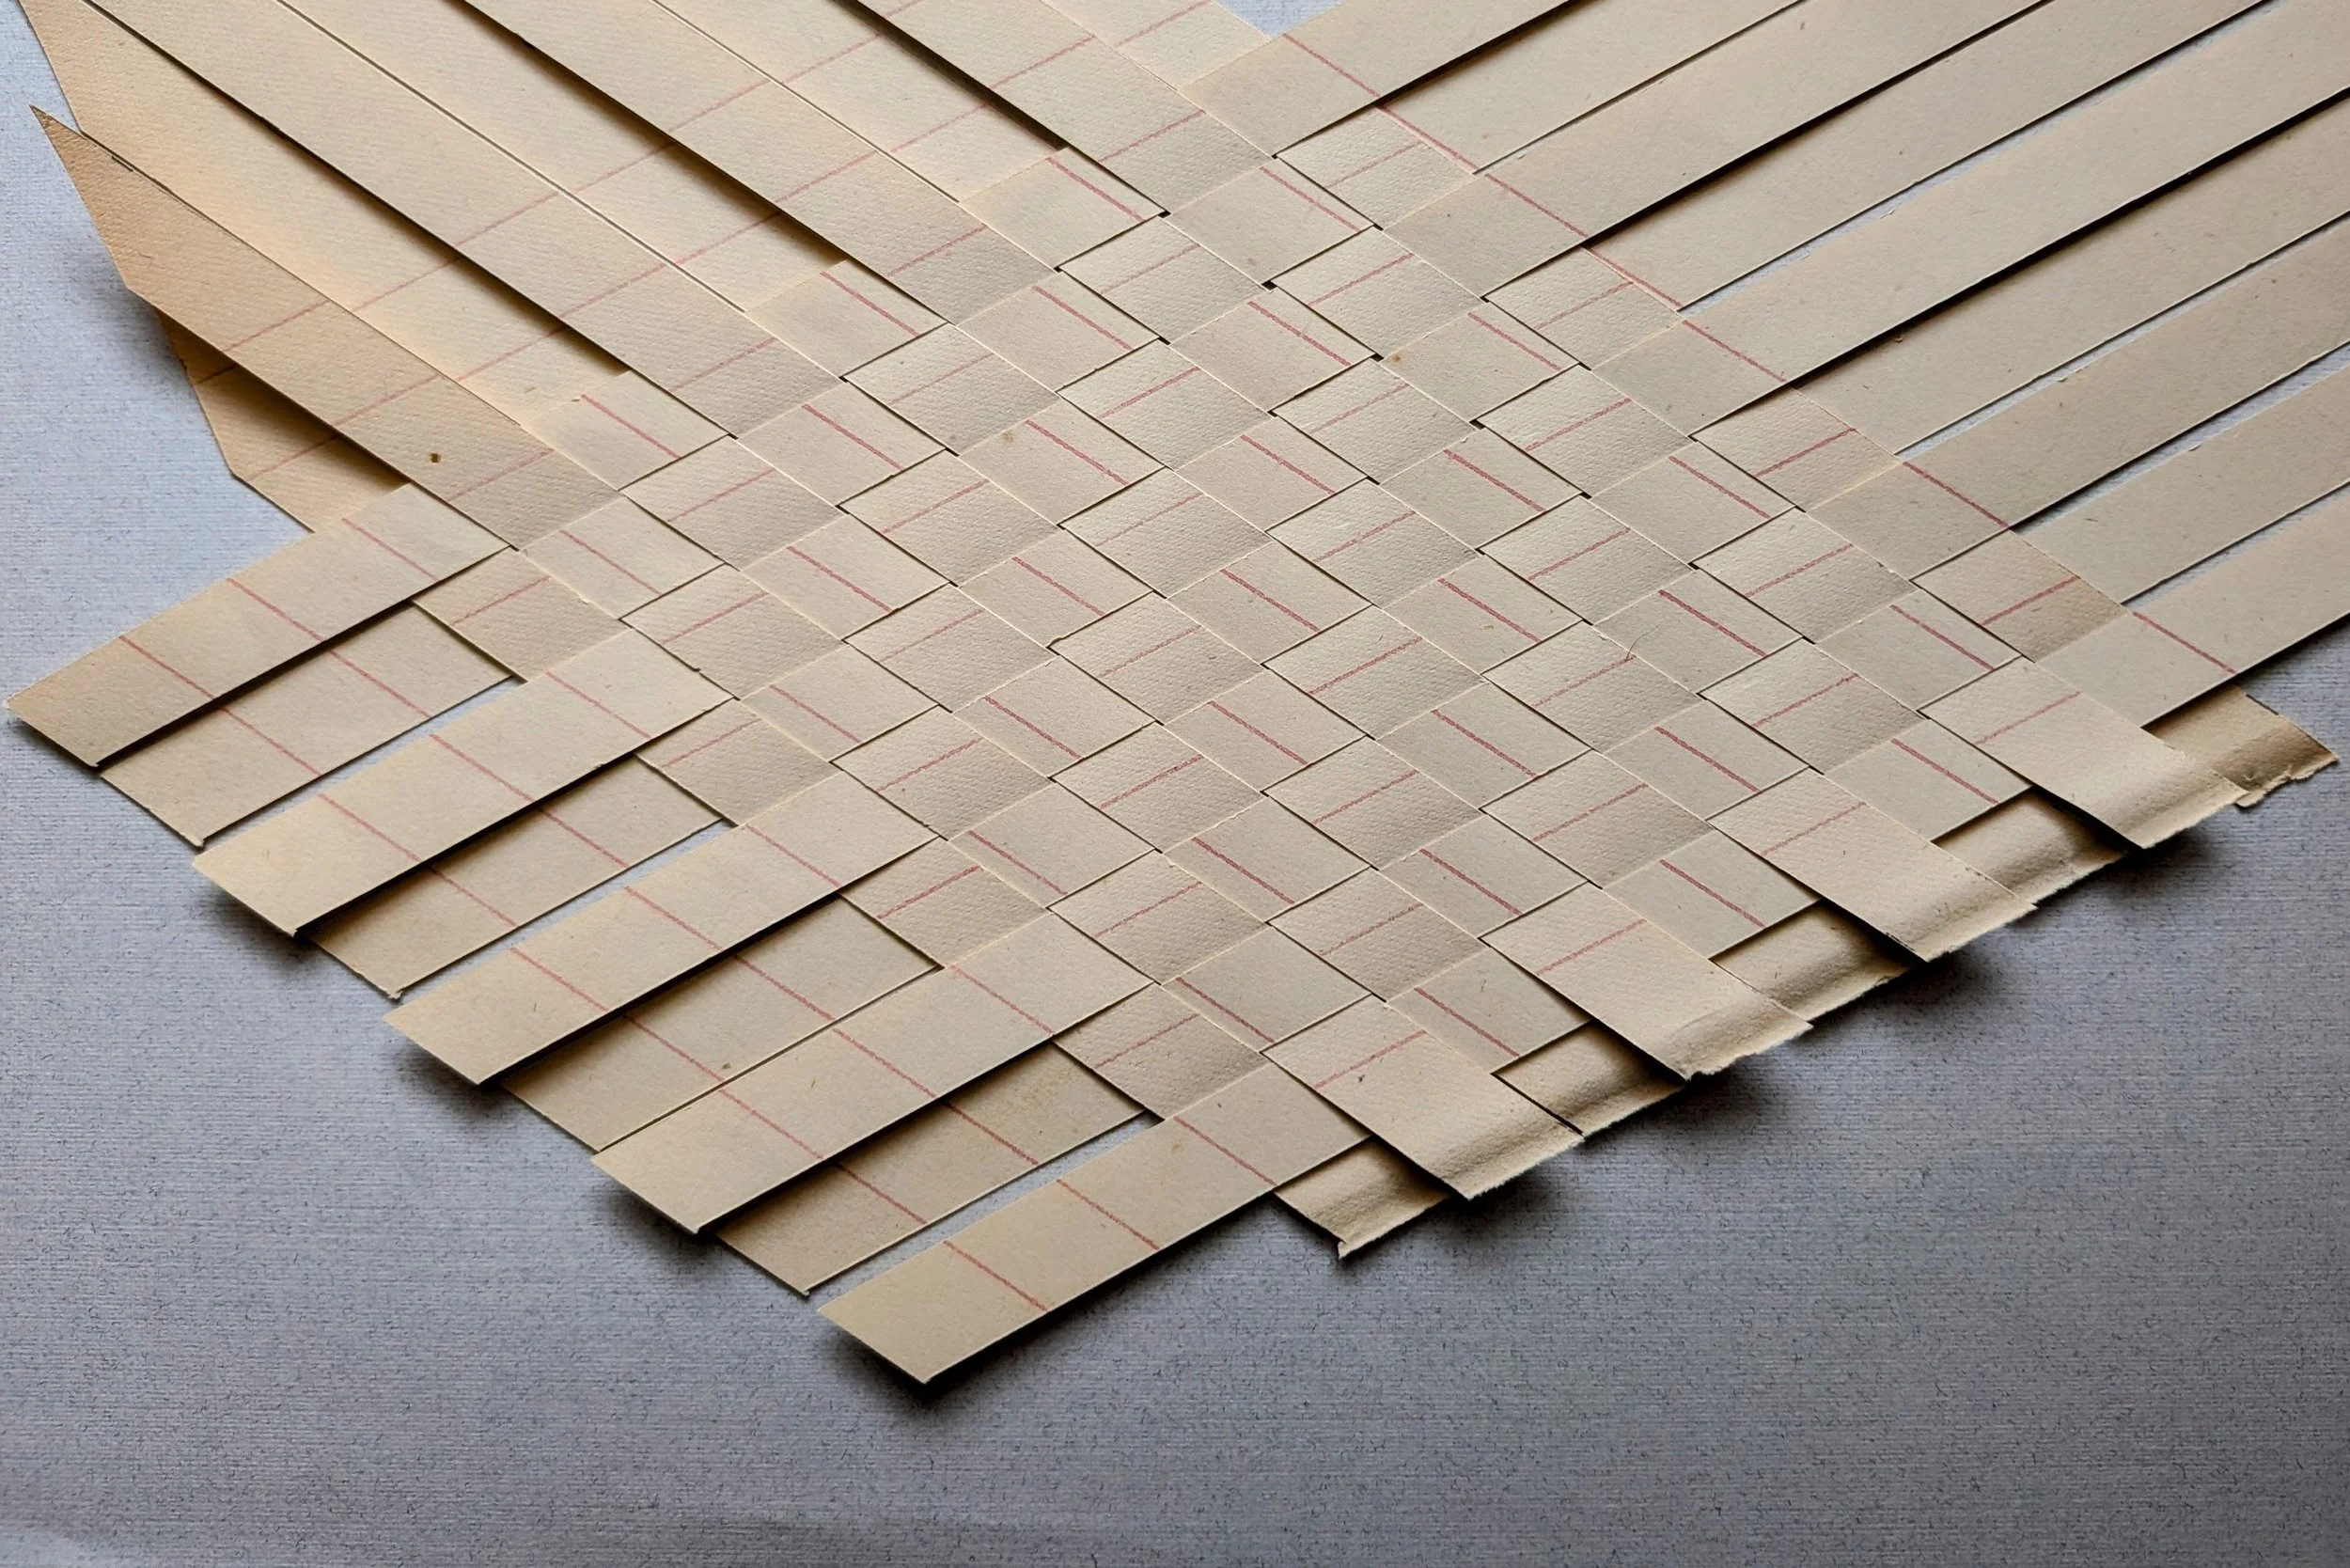
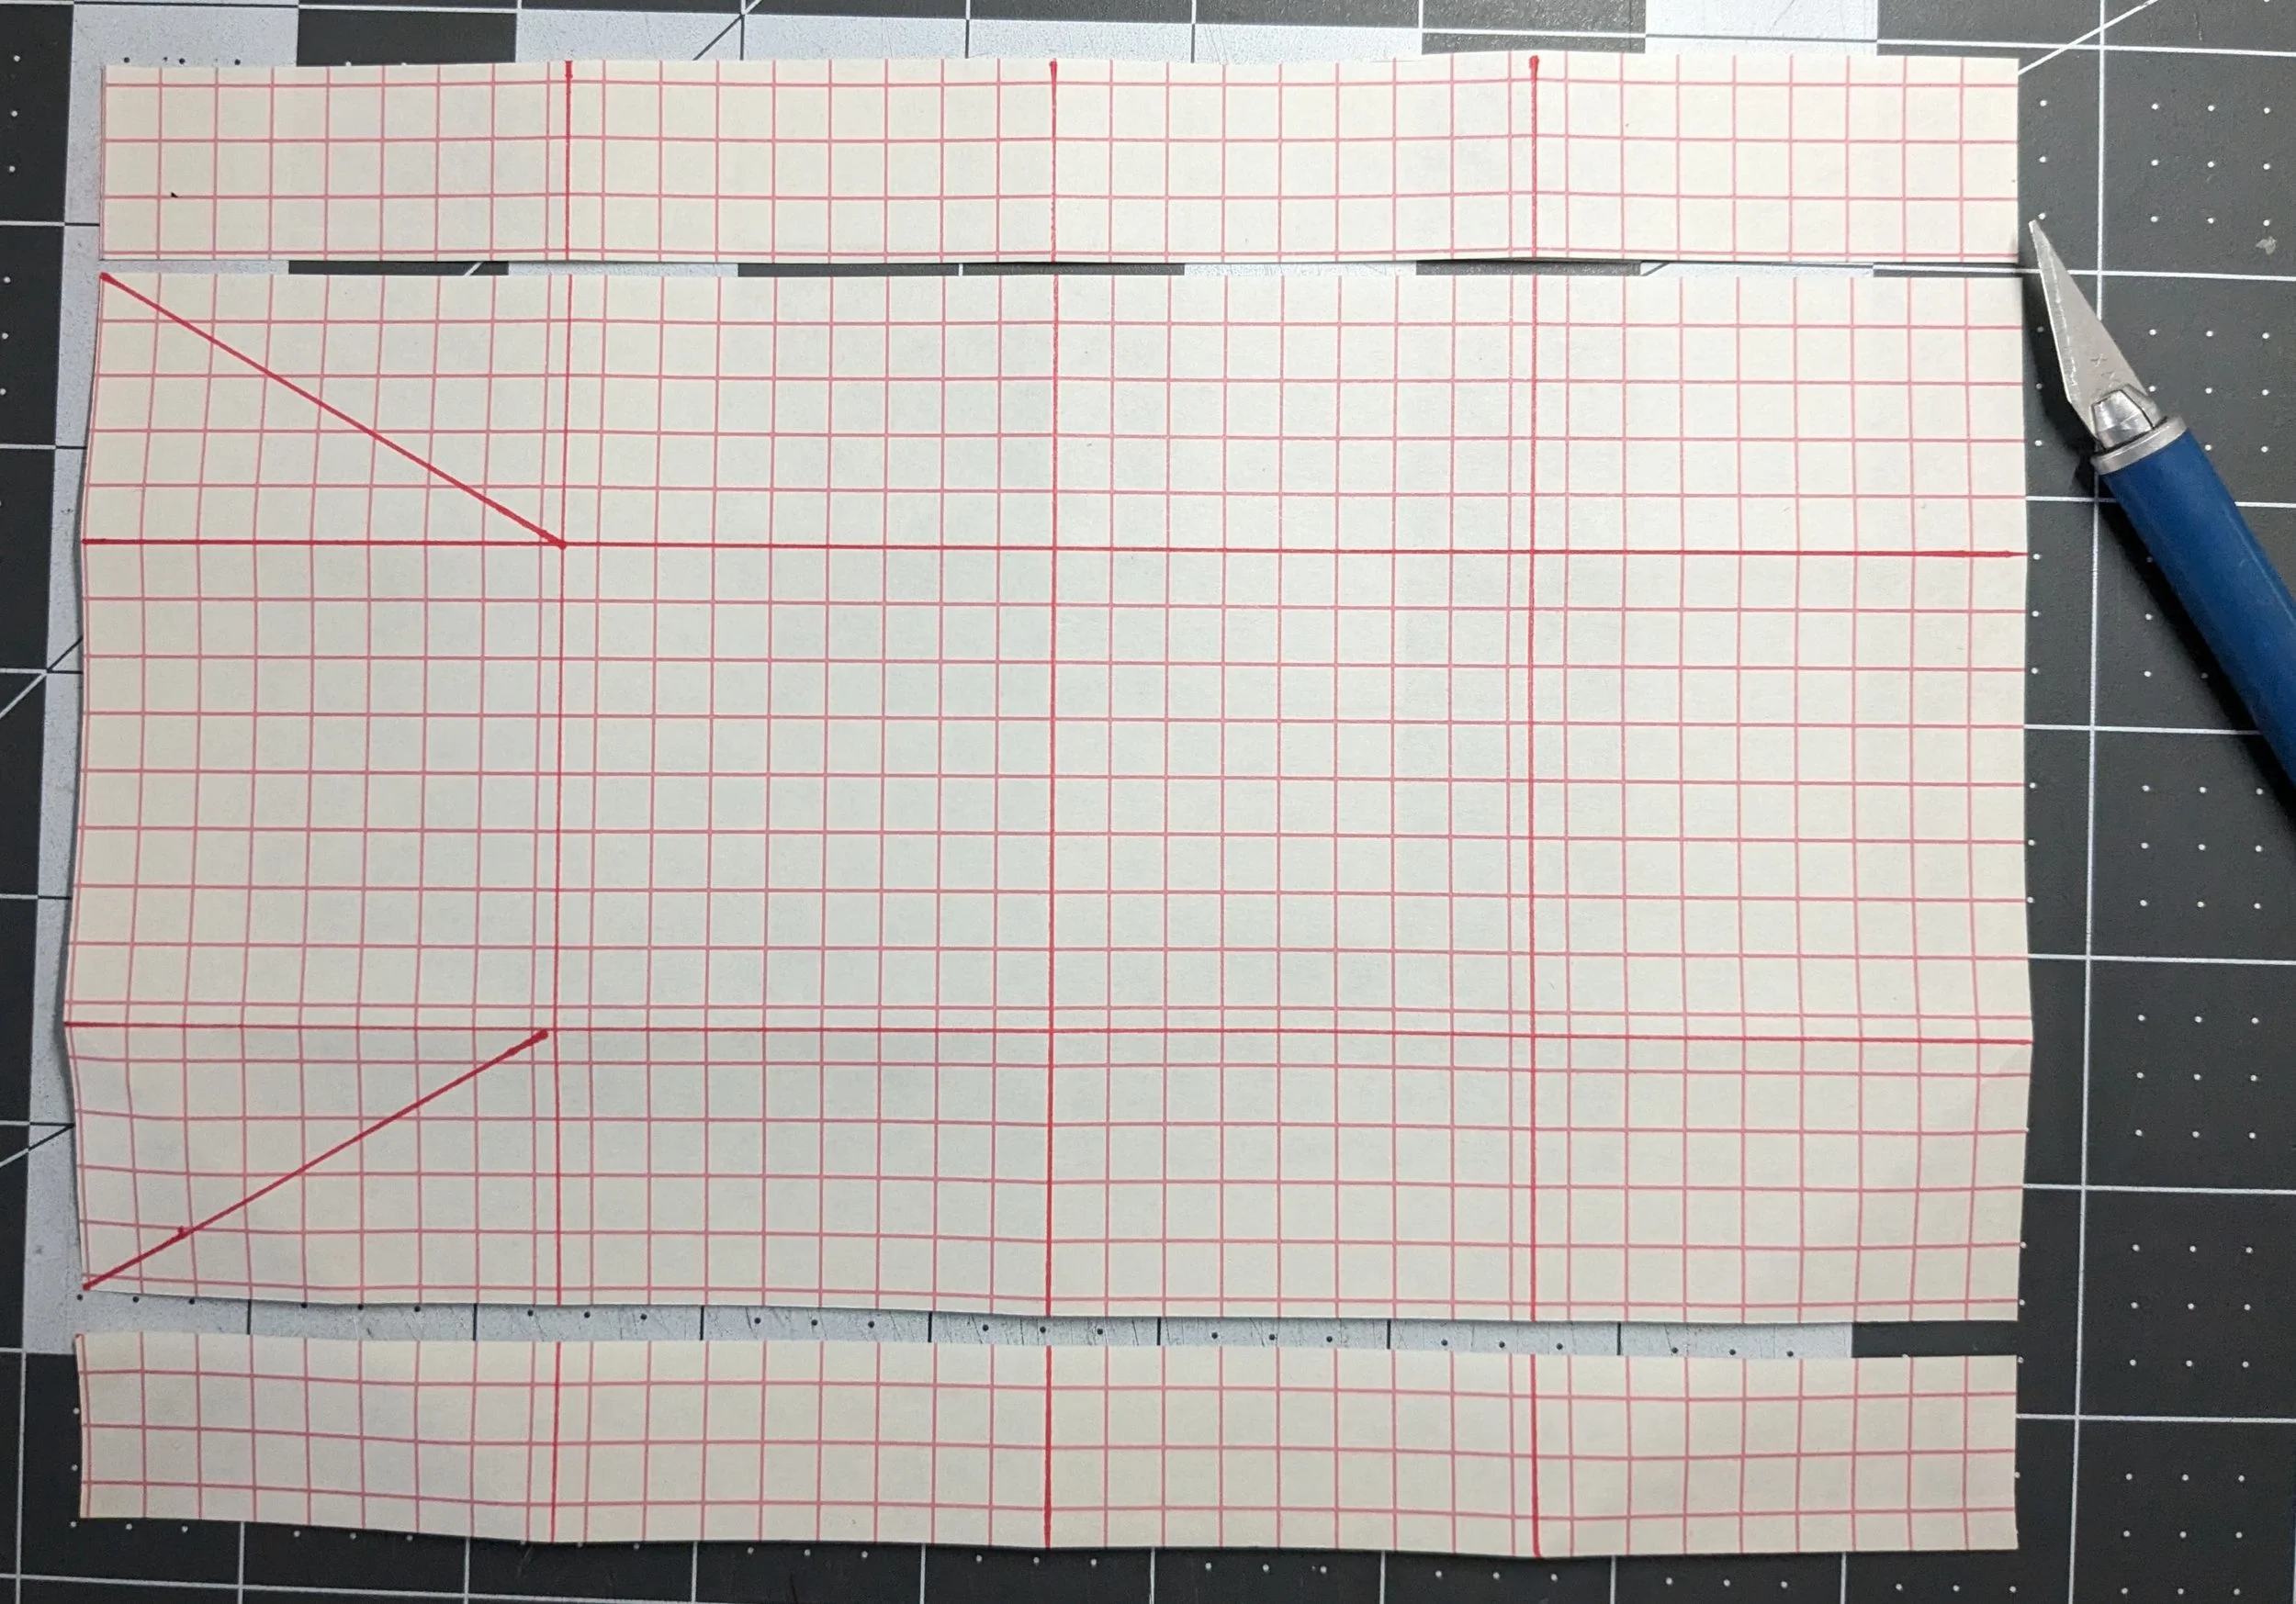
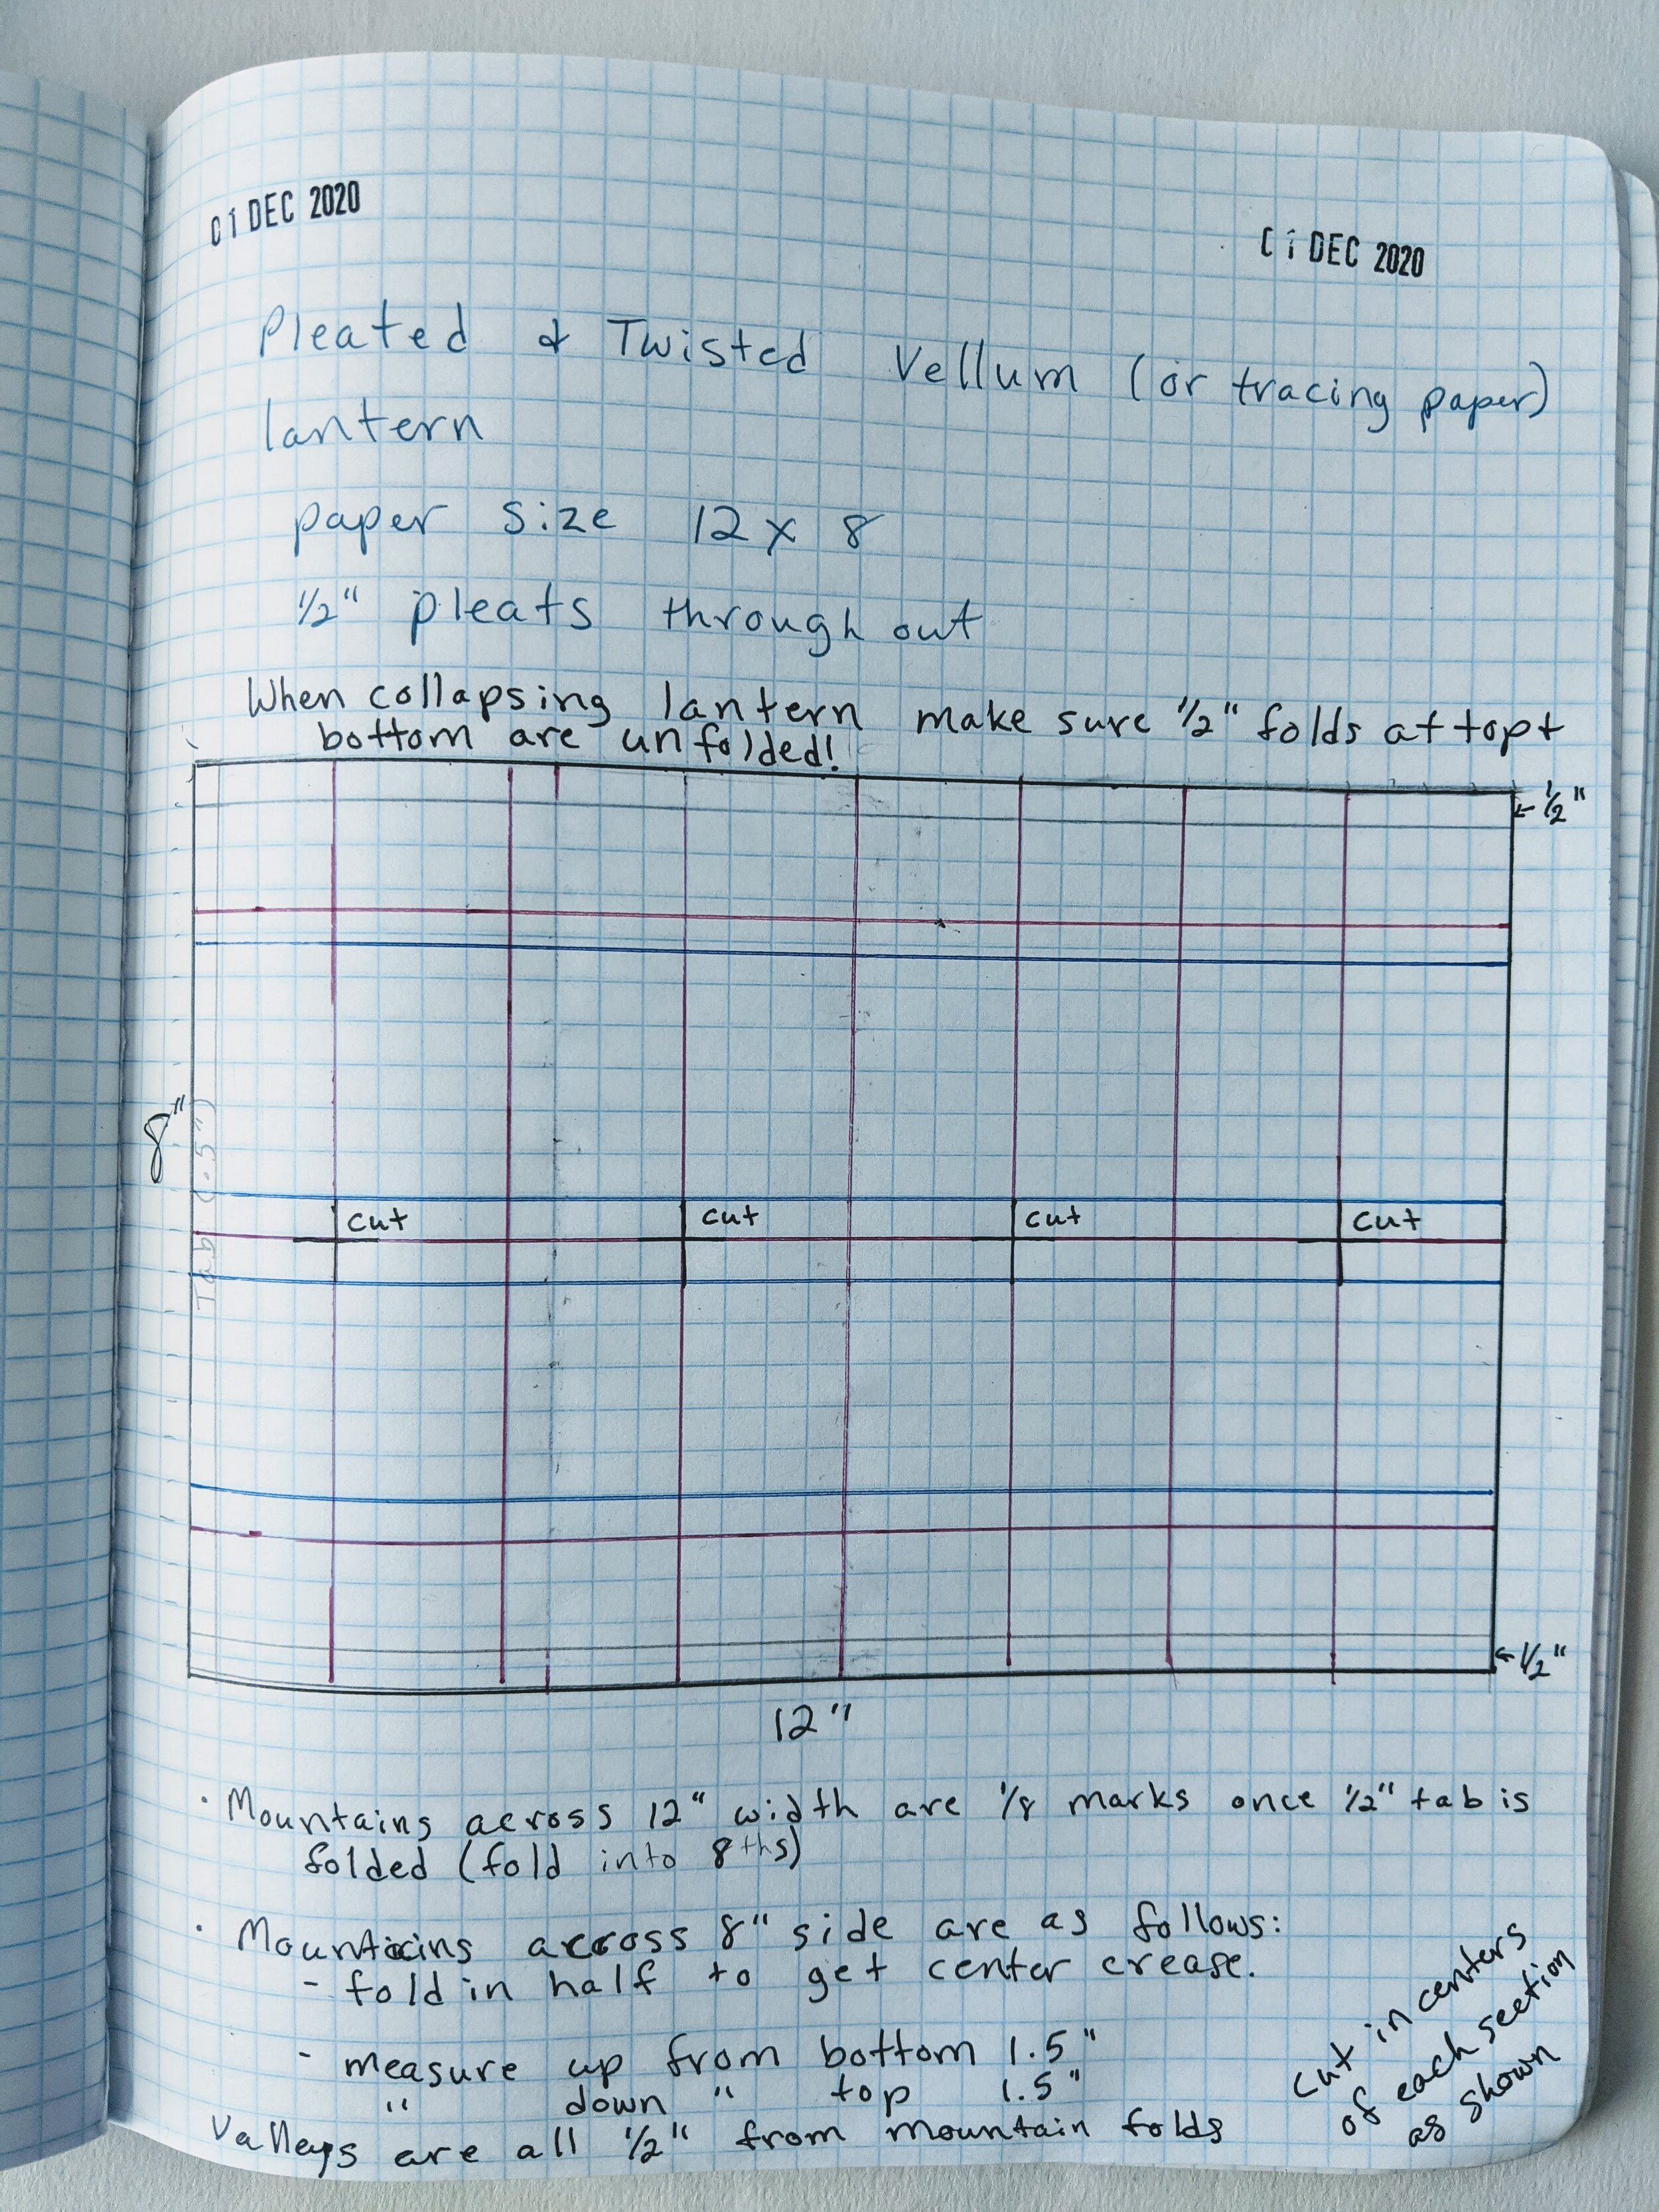
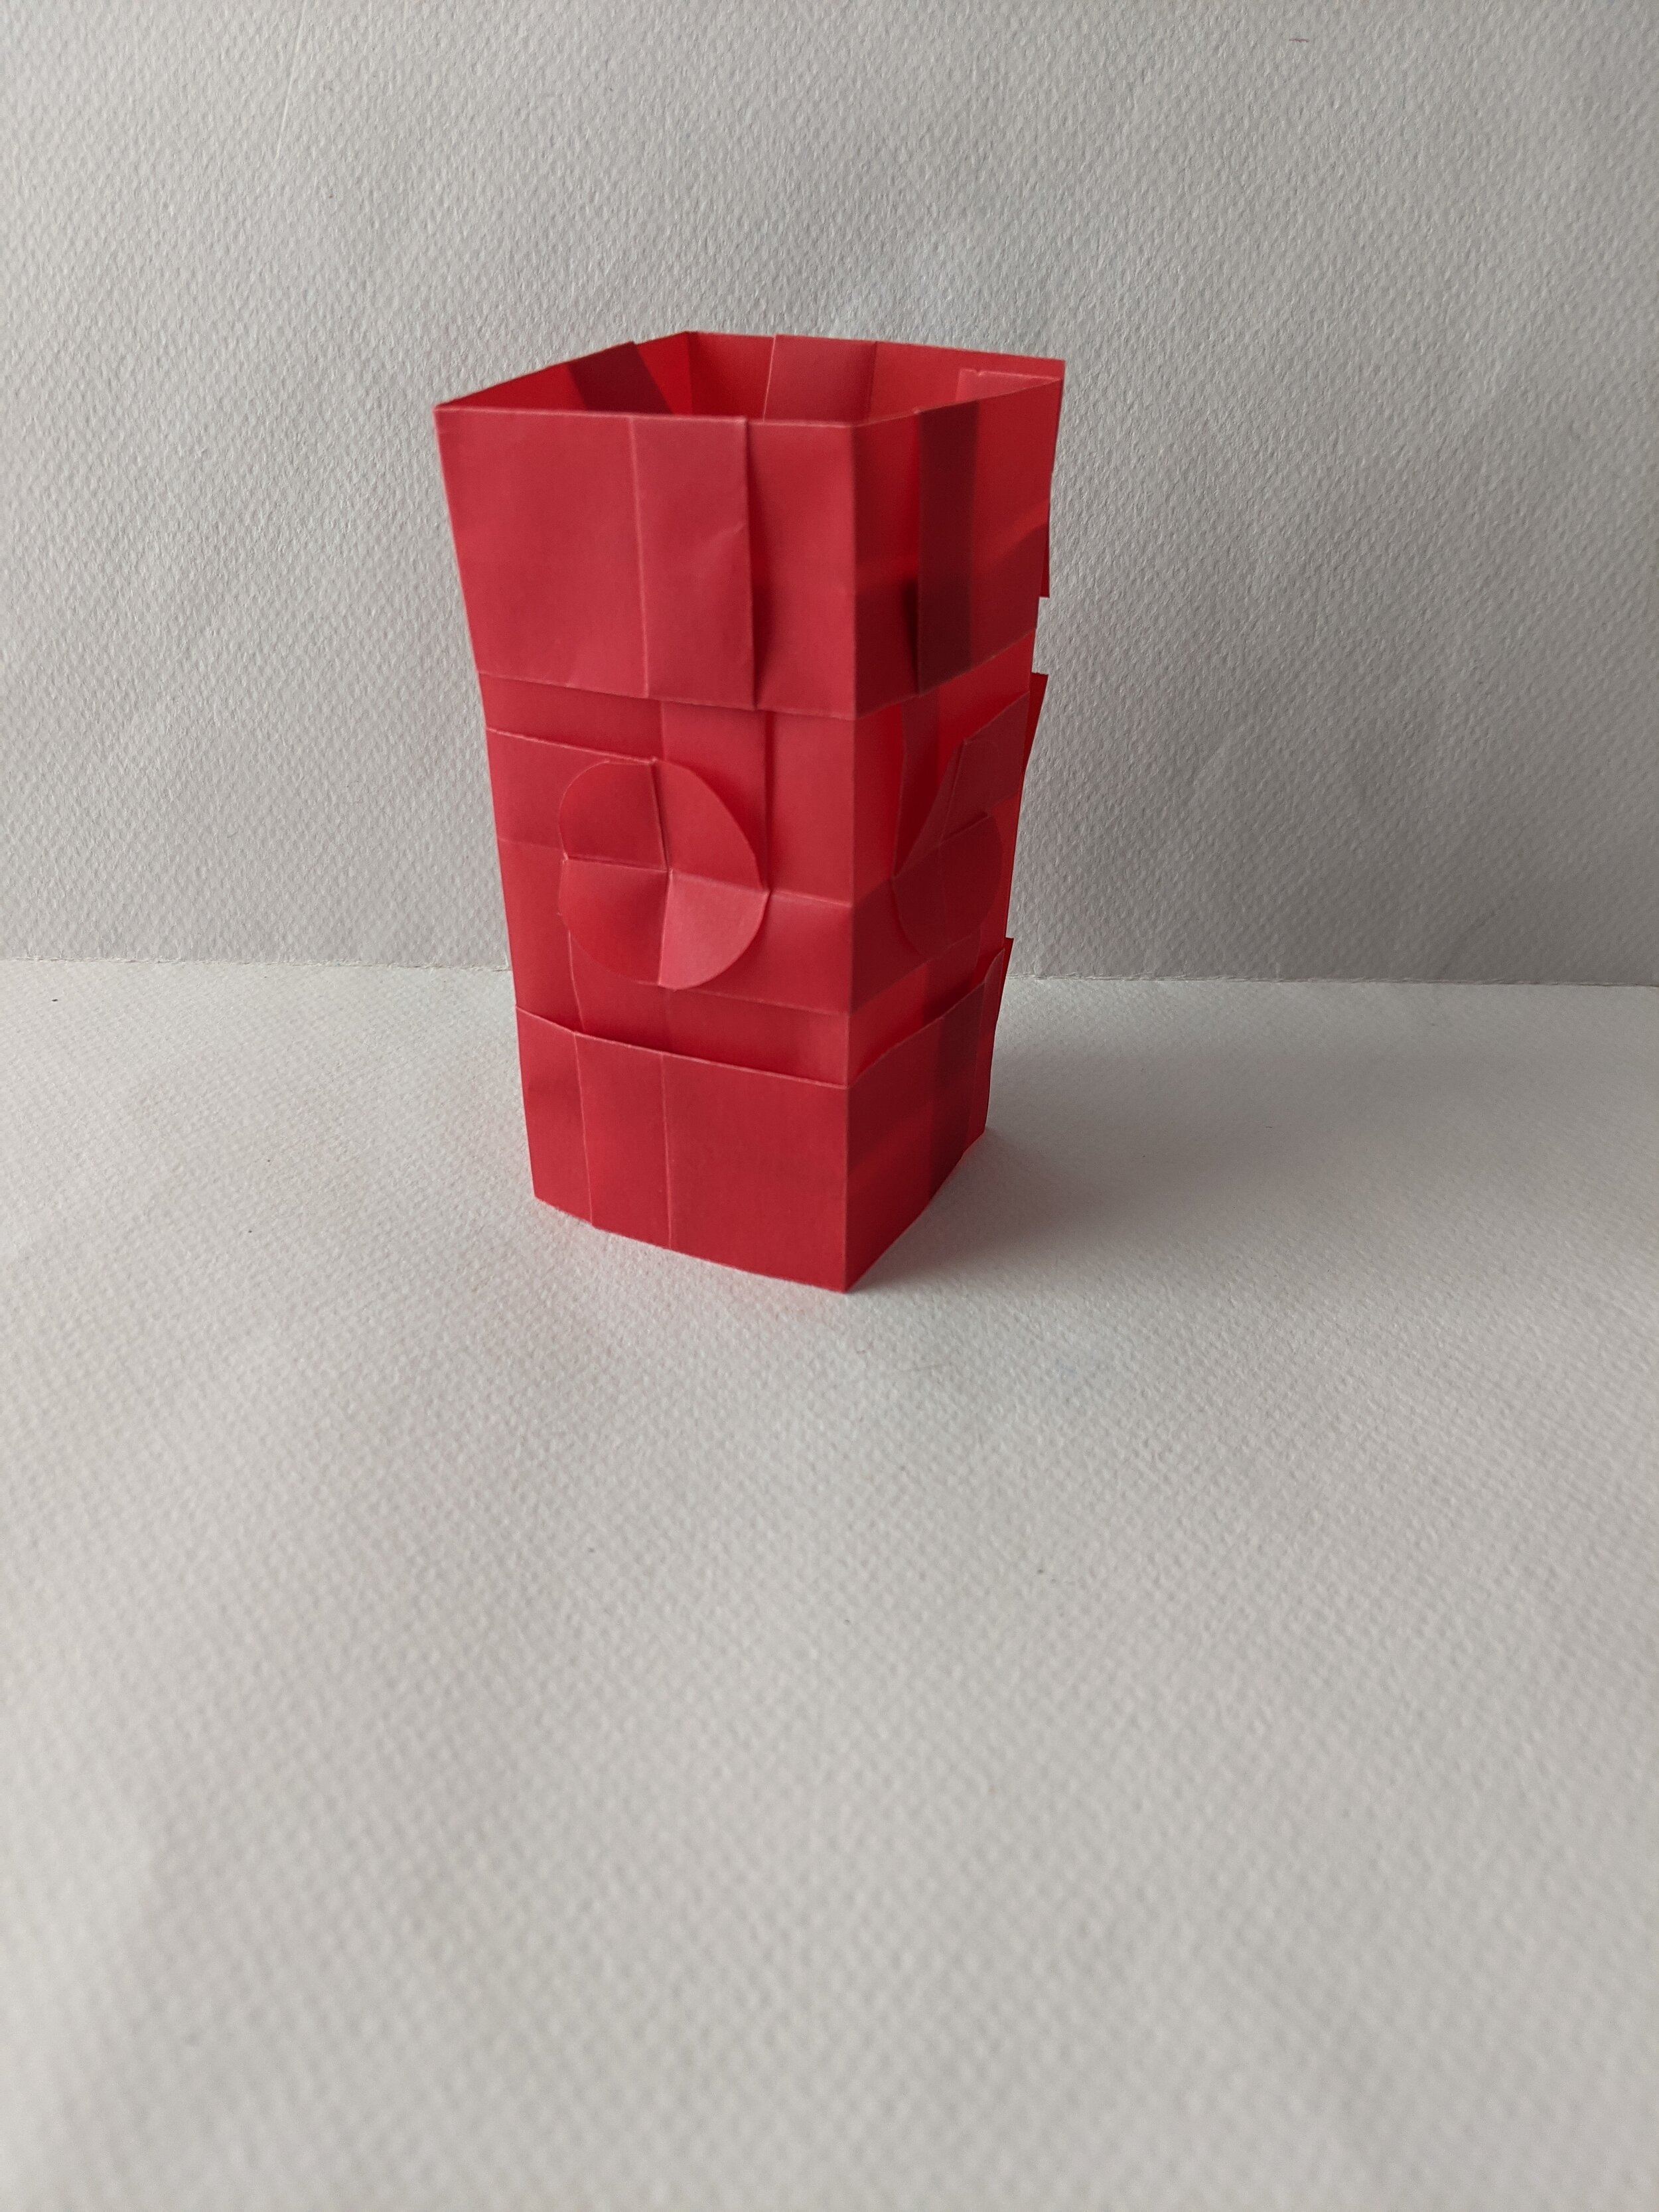
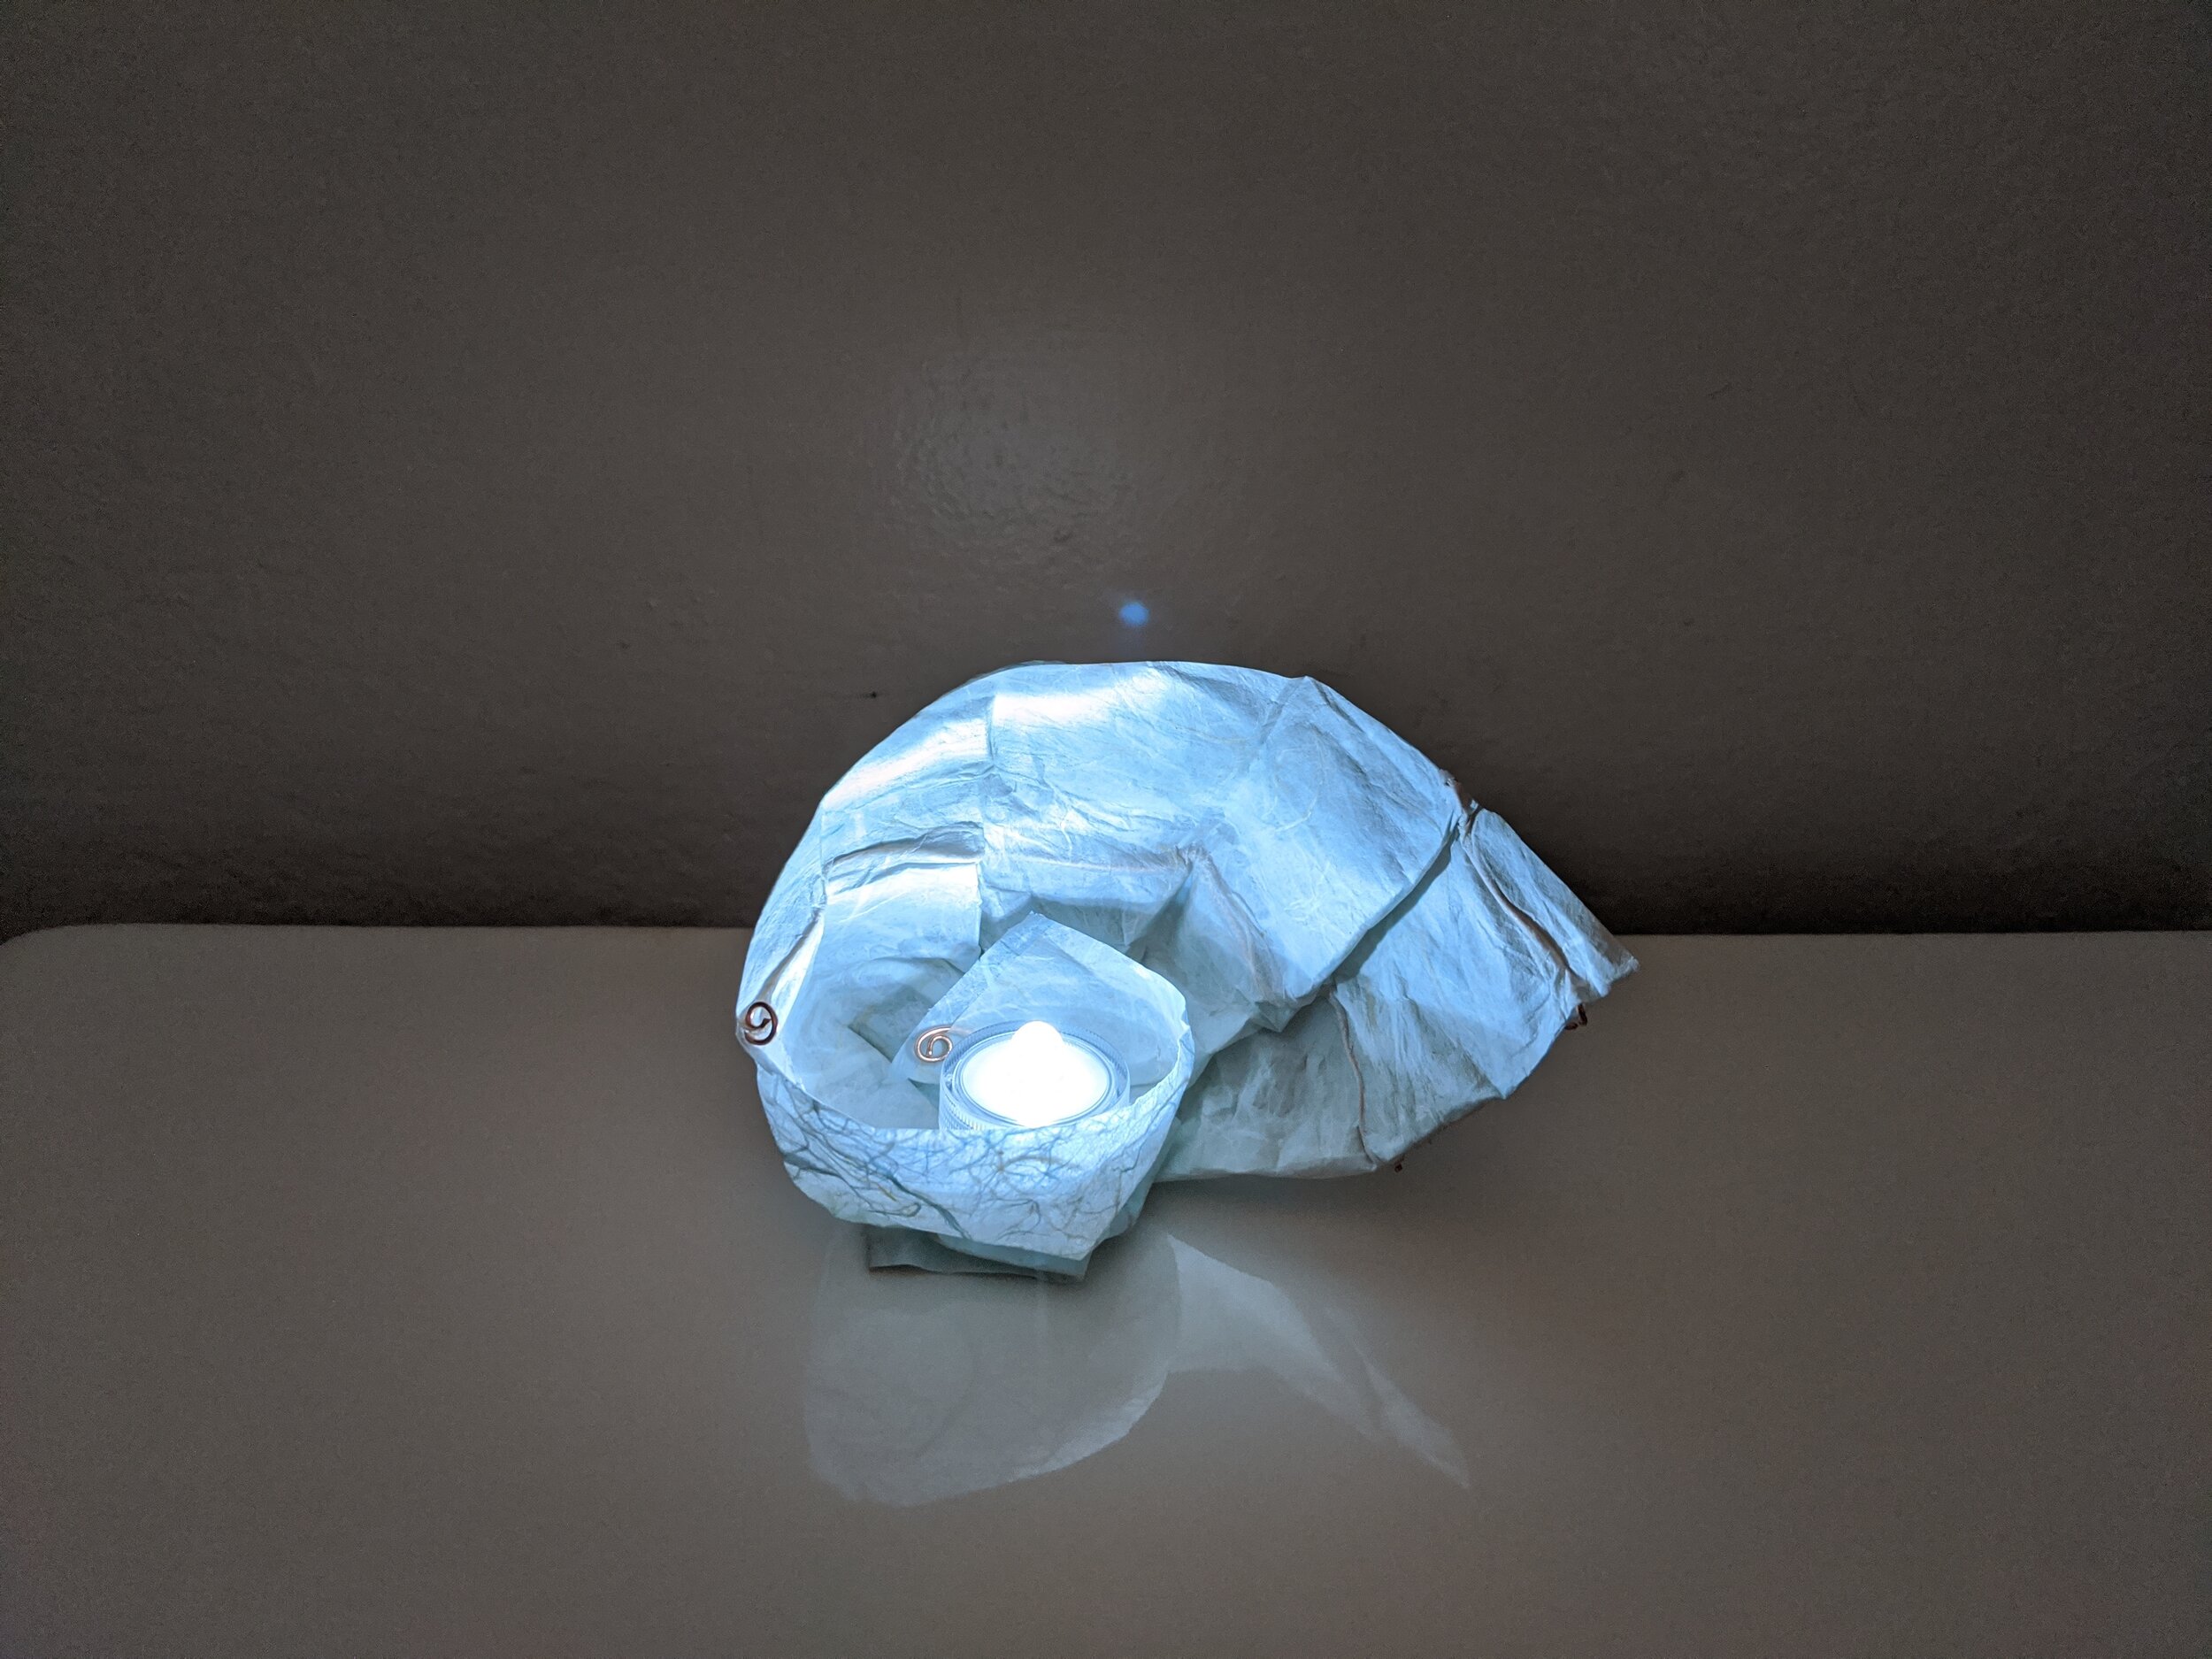
I am currently obsessed with box making. I wanted to make a spiral box I found on Pinterest, but it was hard to fold and the diagram I downloaded was very small. I decided to try making my own based on Tomoko Fuse’s nautilus shell on pg. 67 of her fabulous book Spiral.

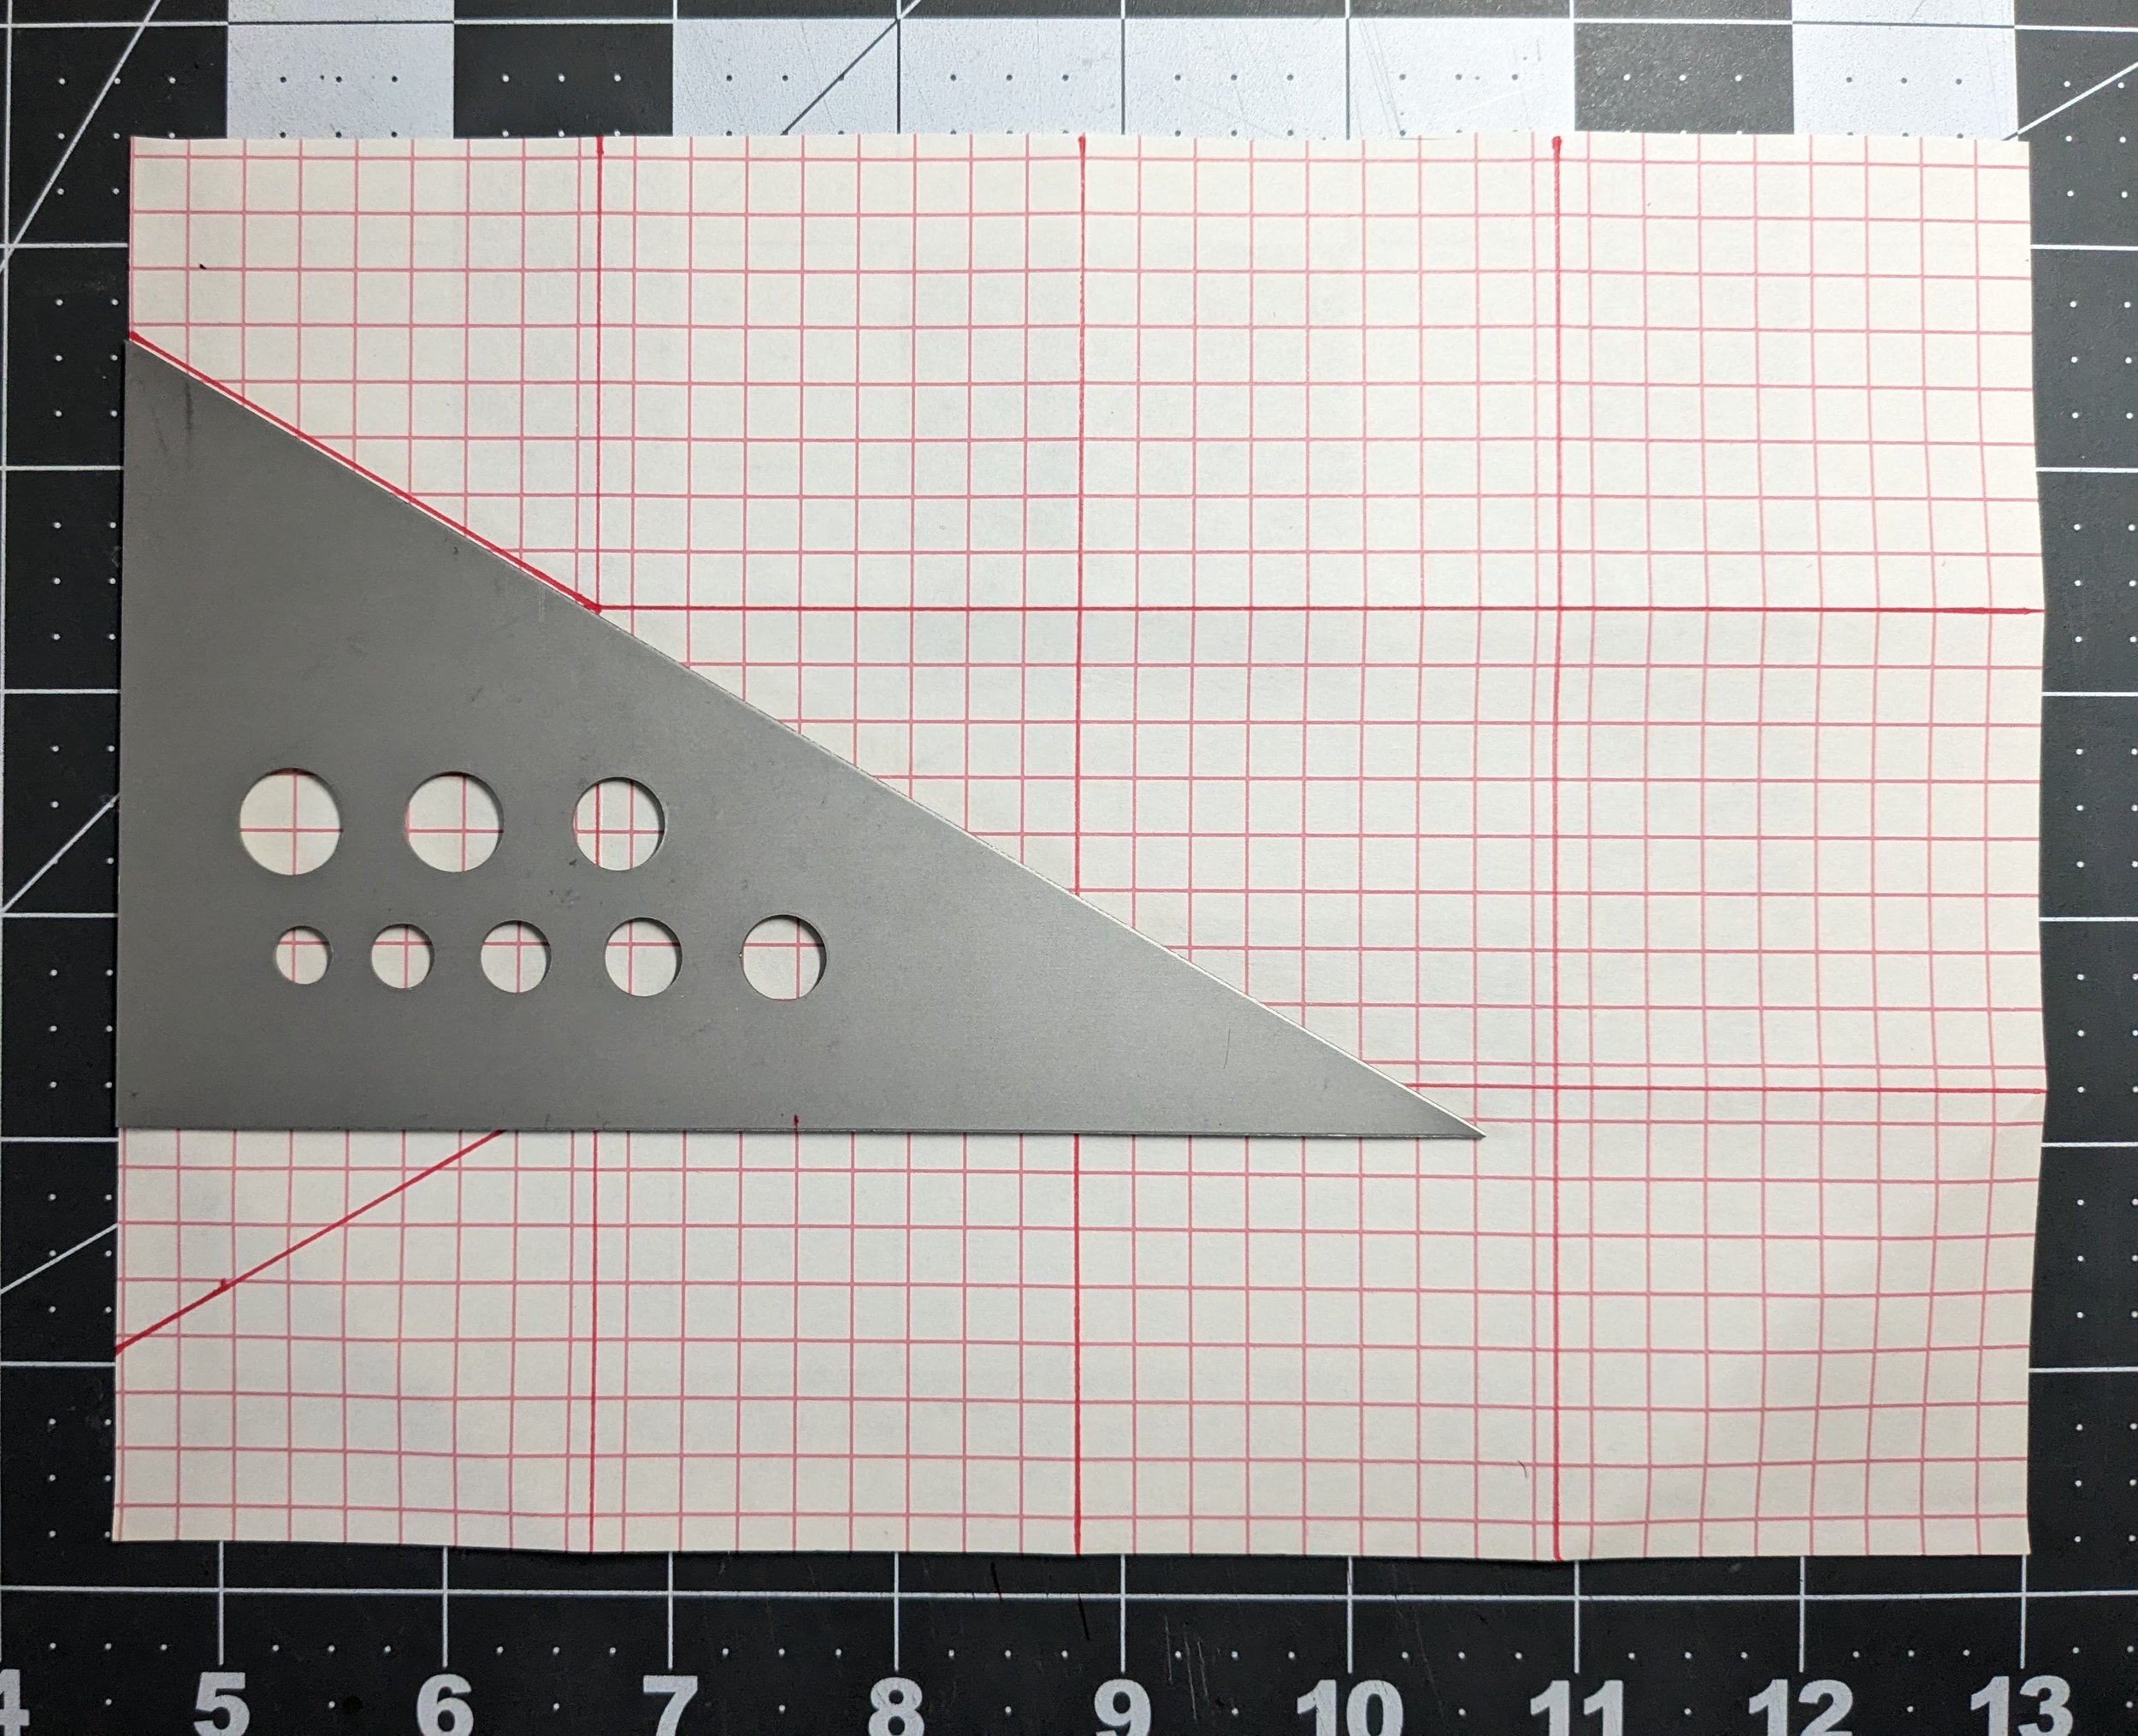
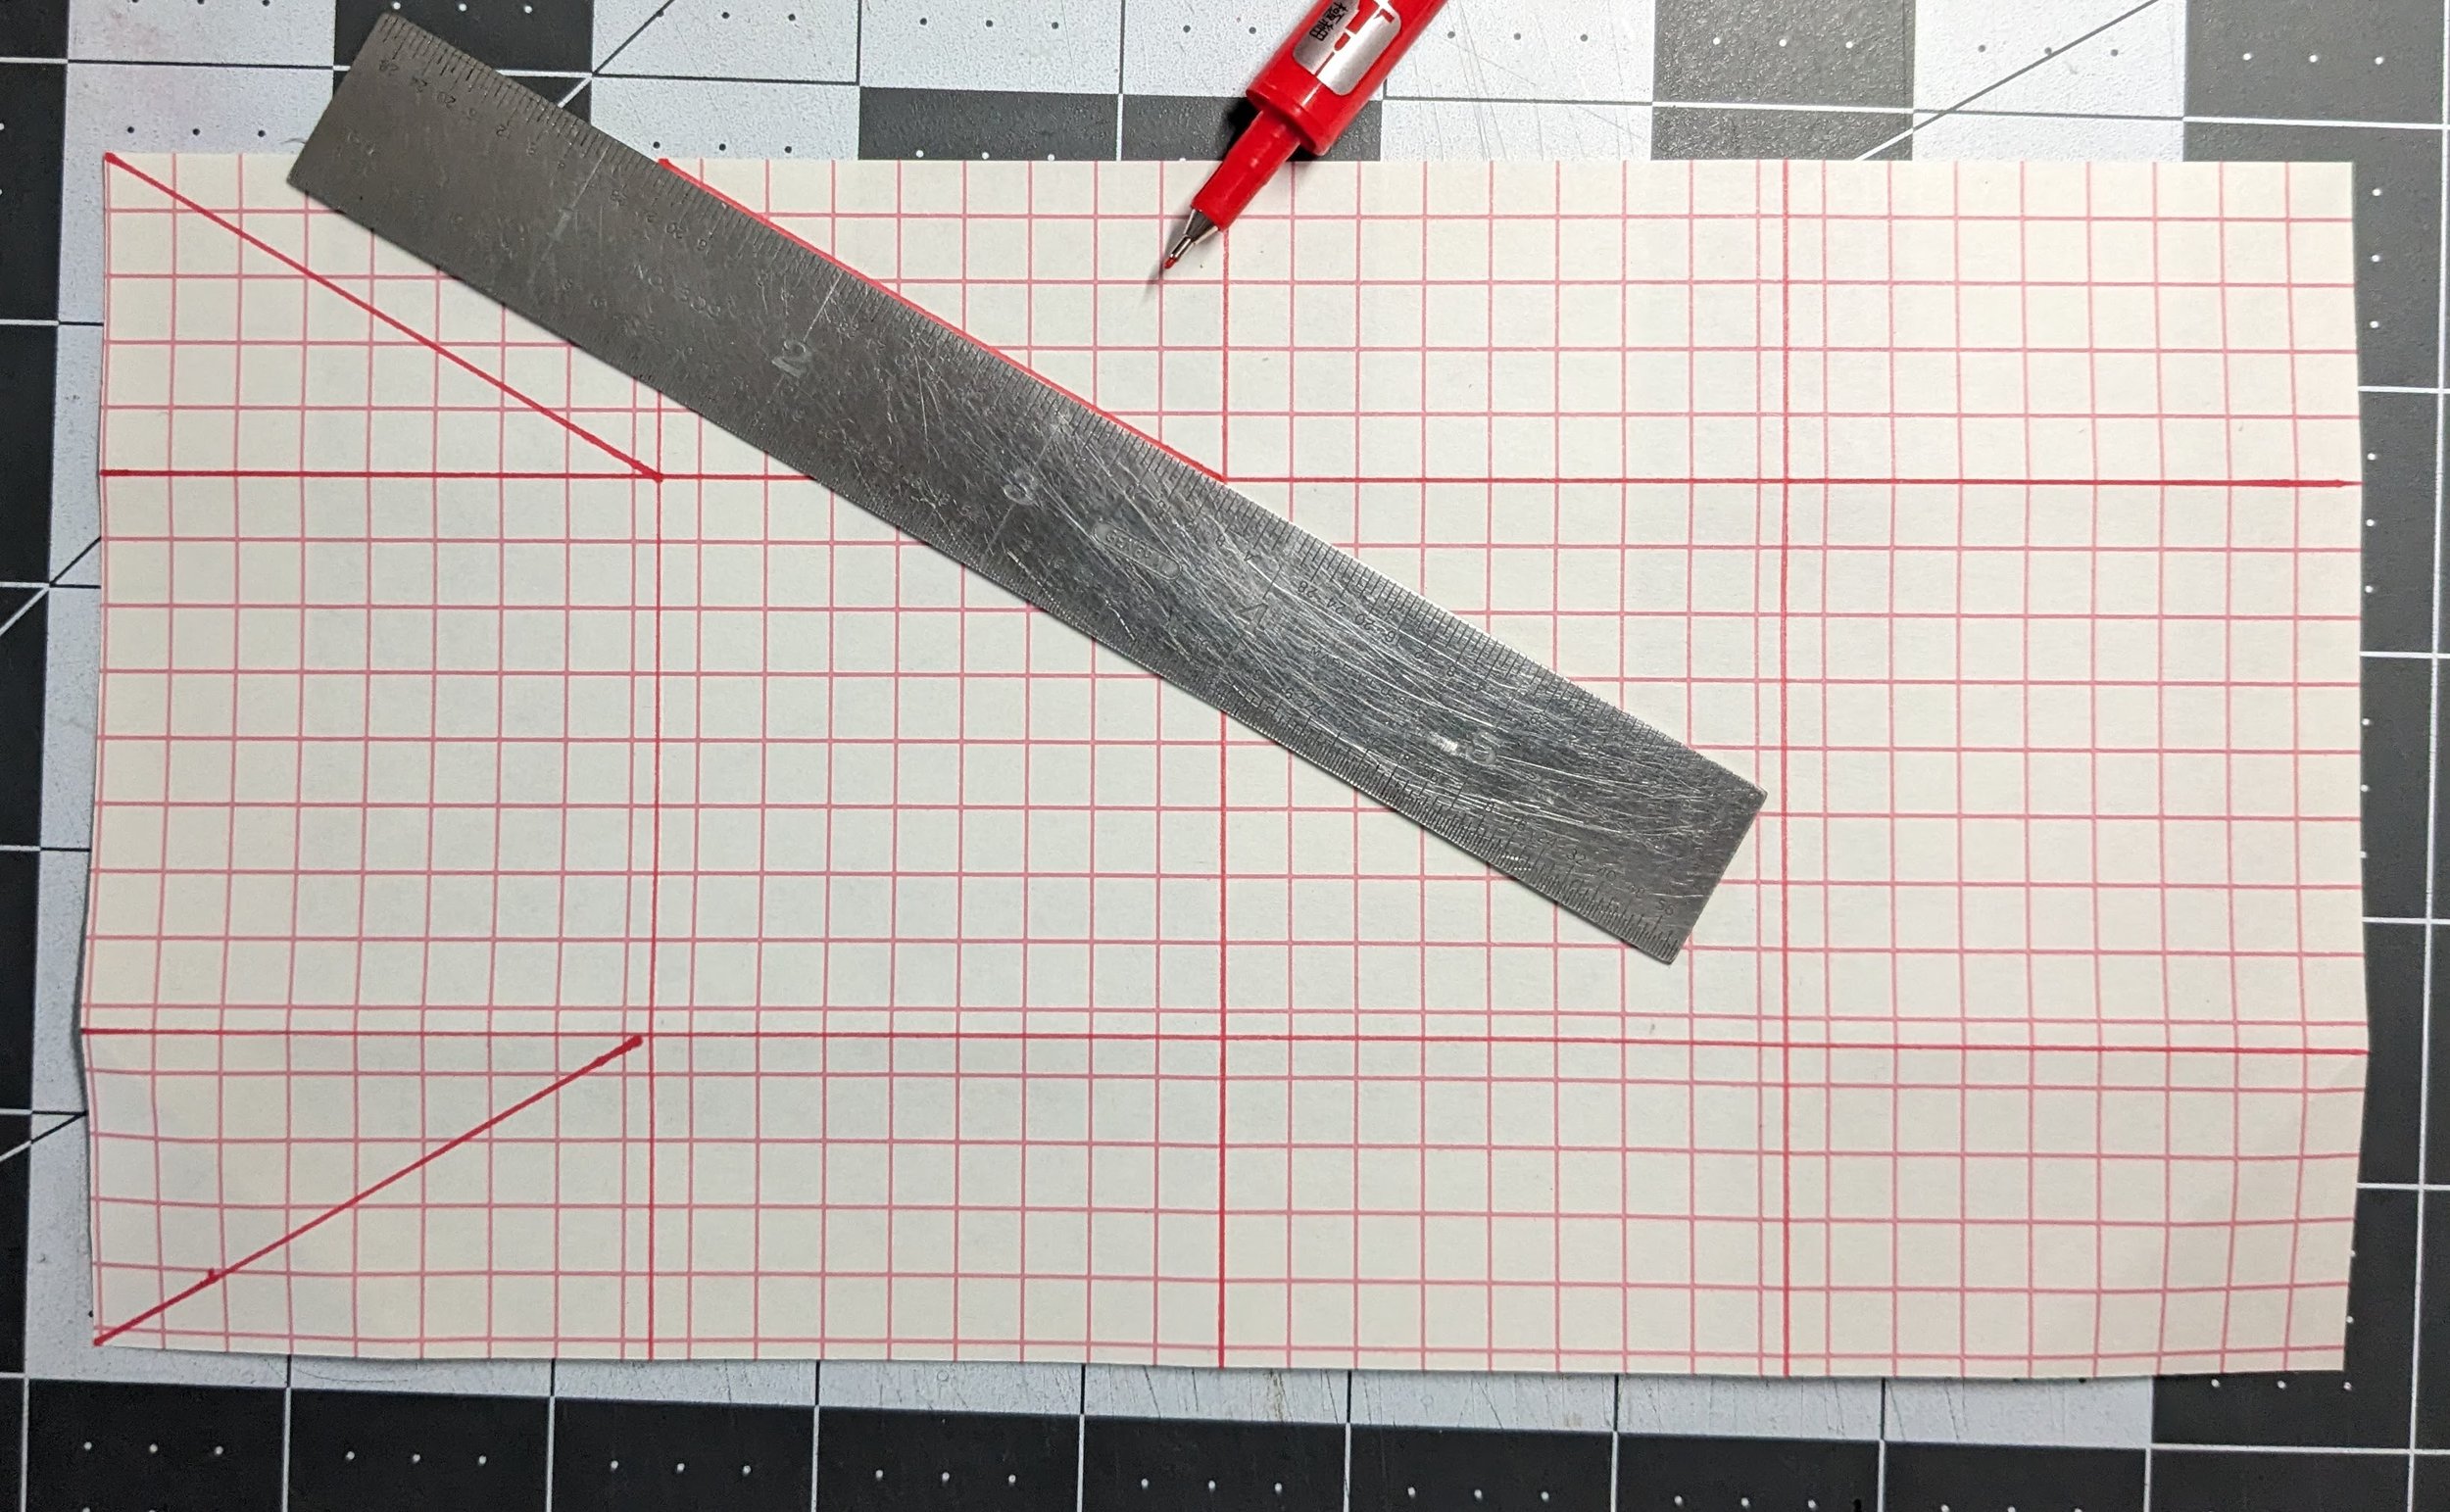
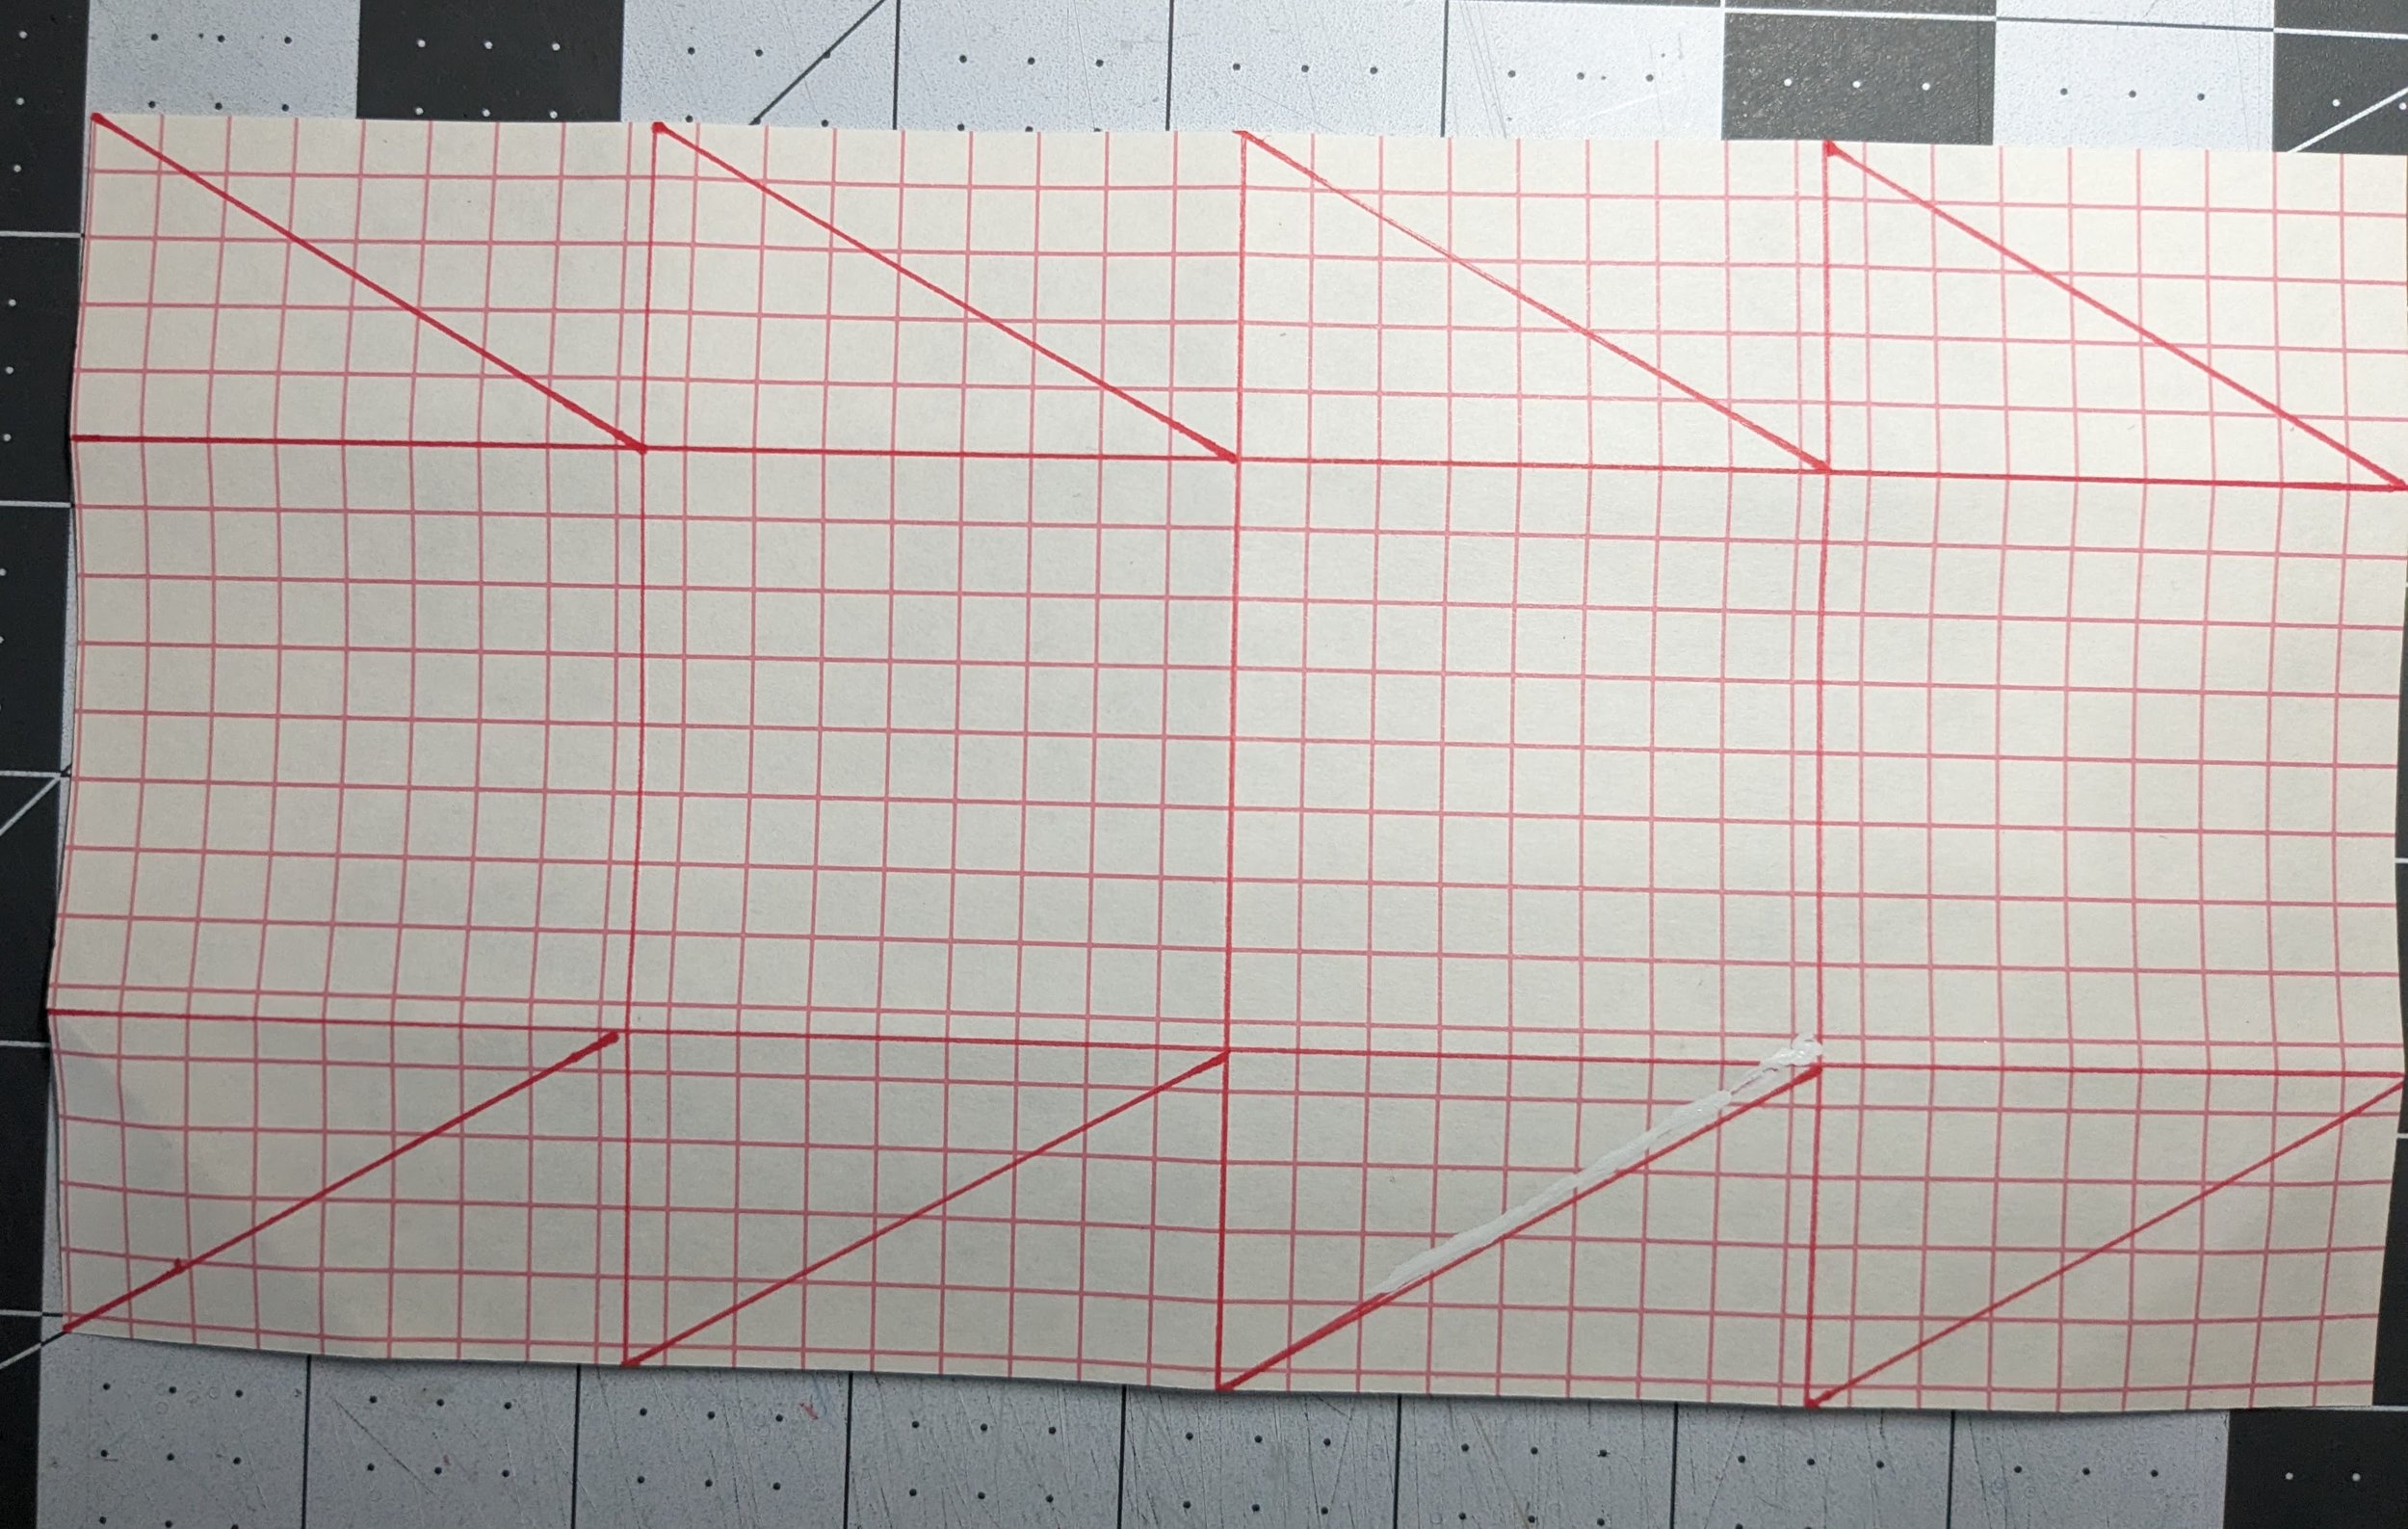
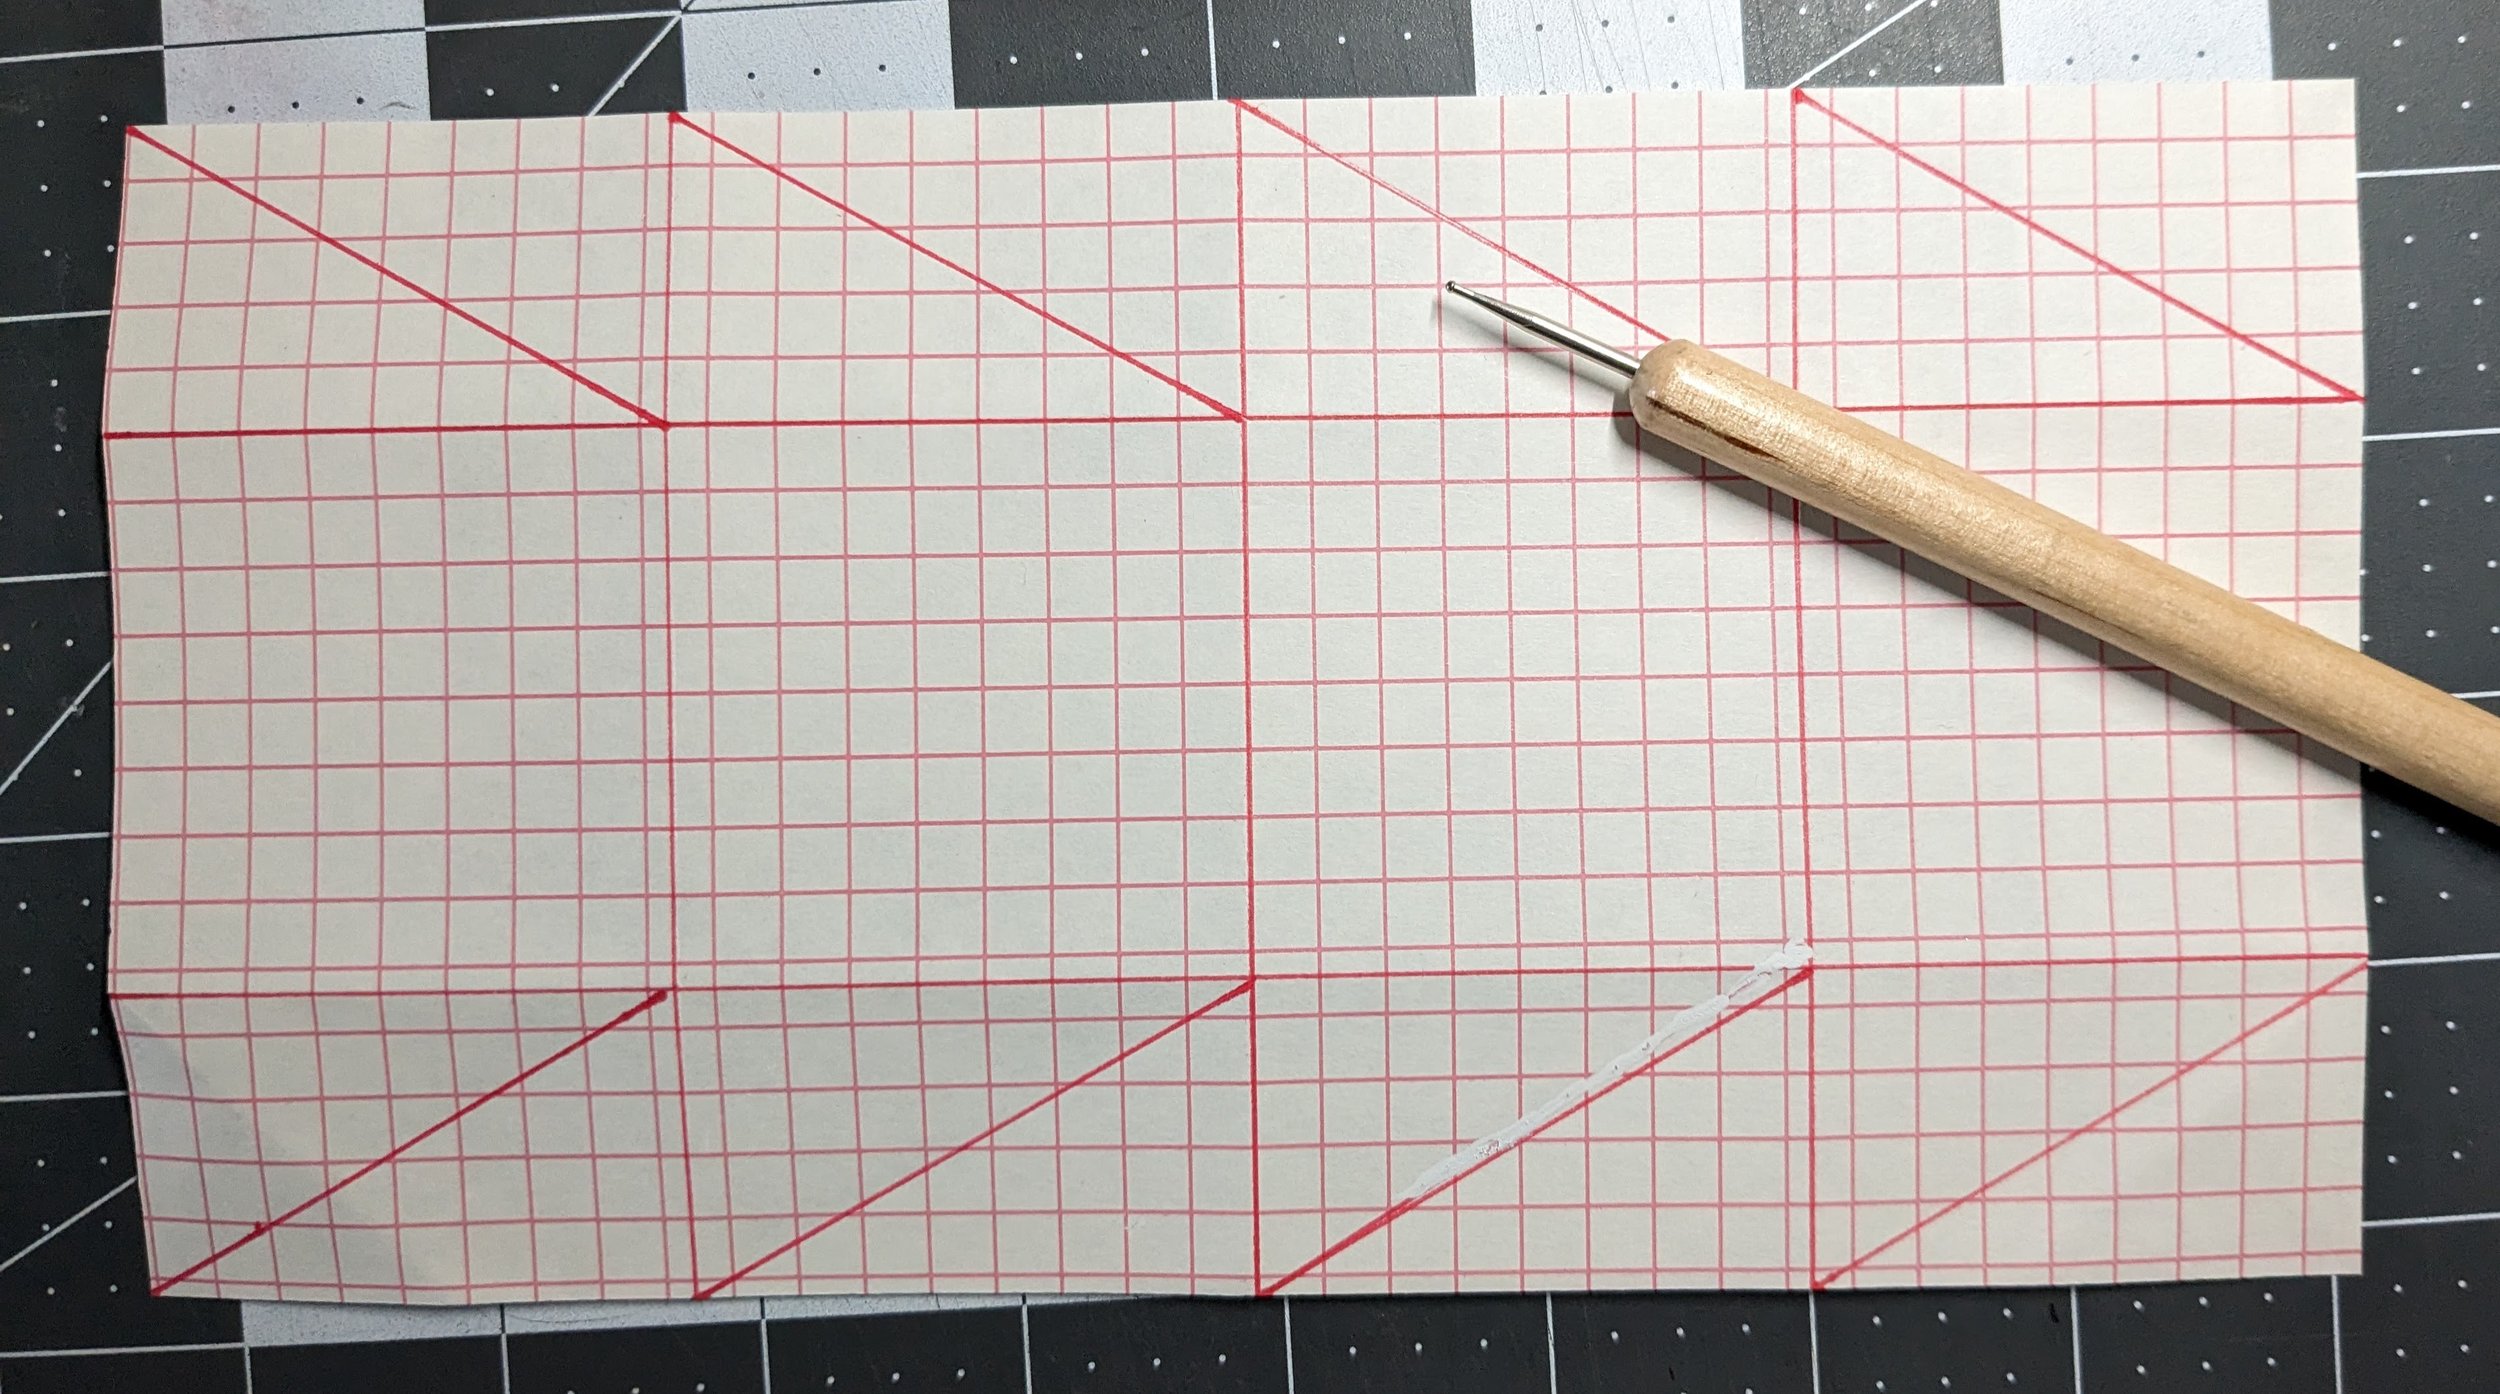
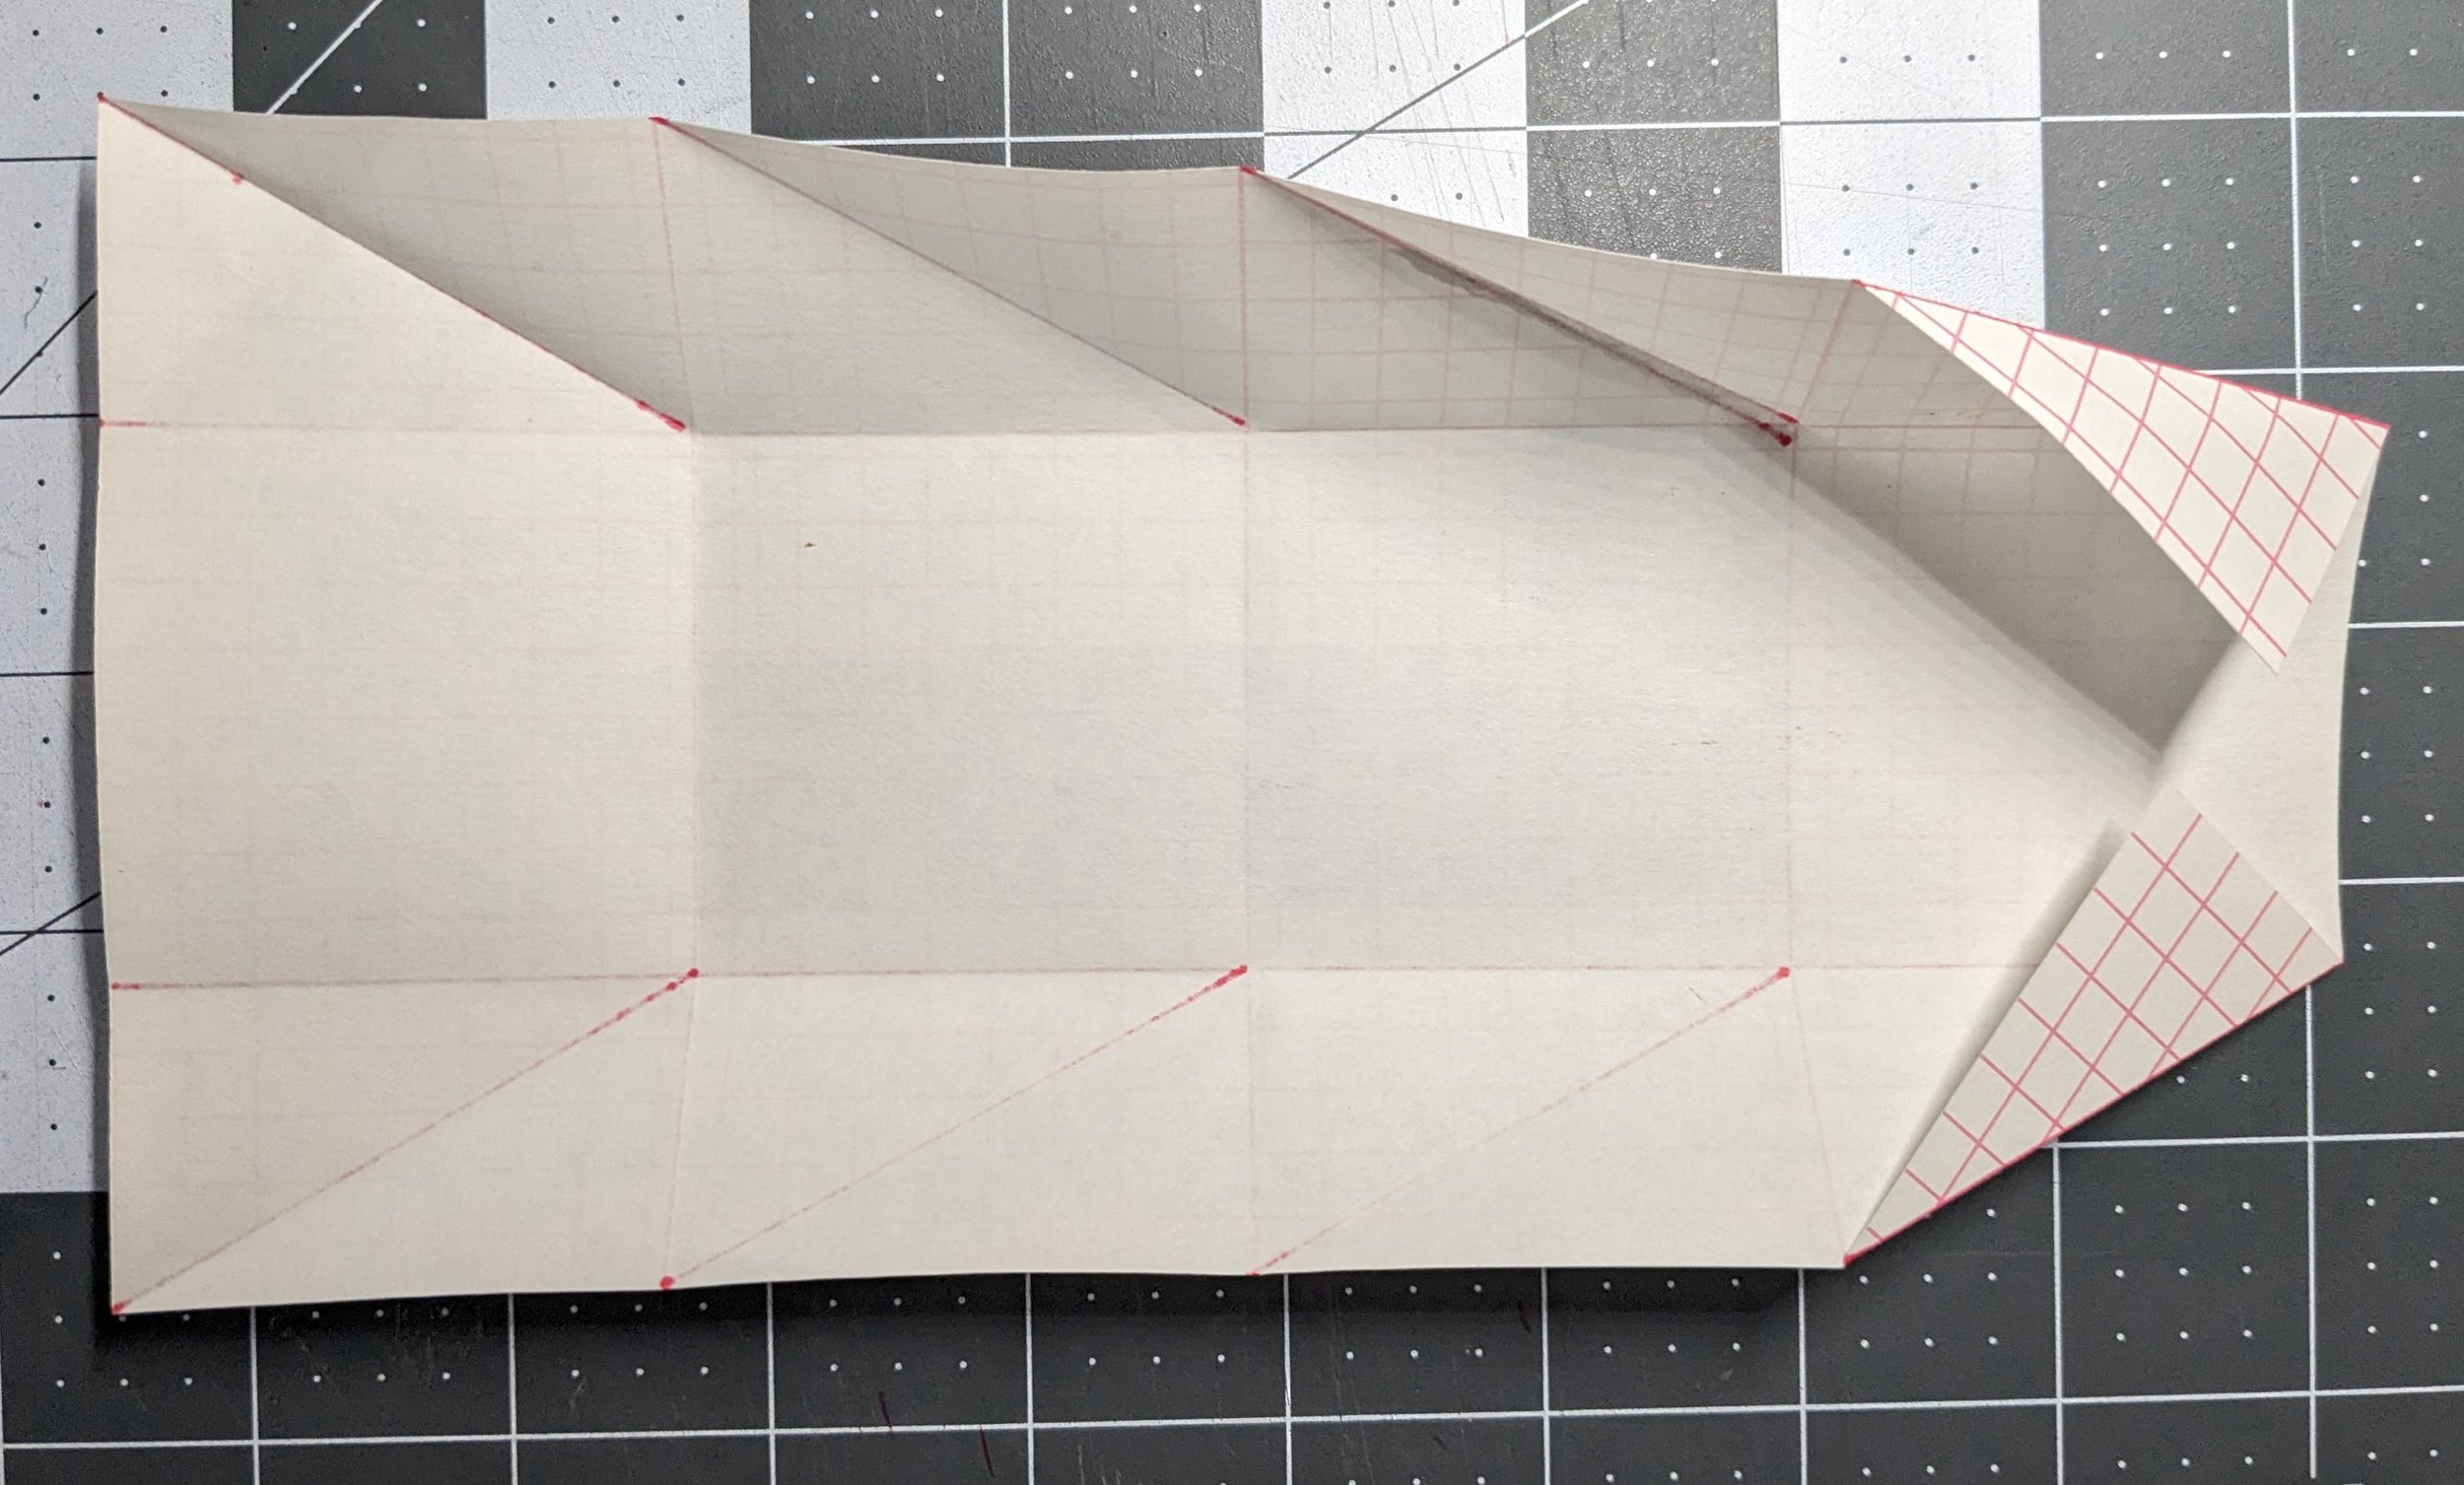
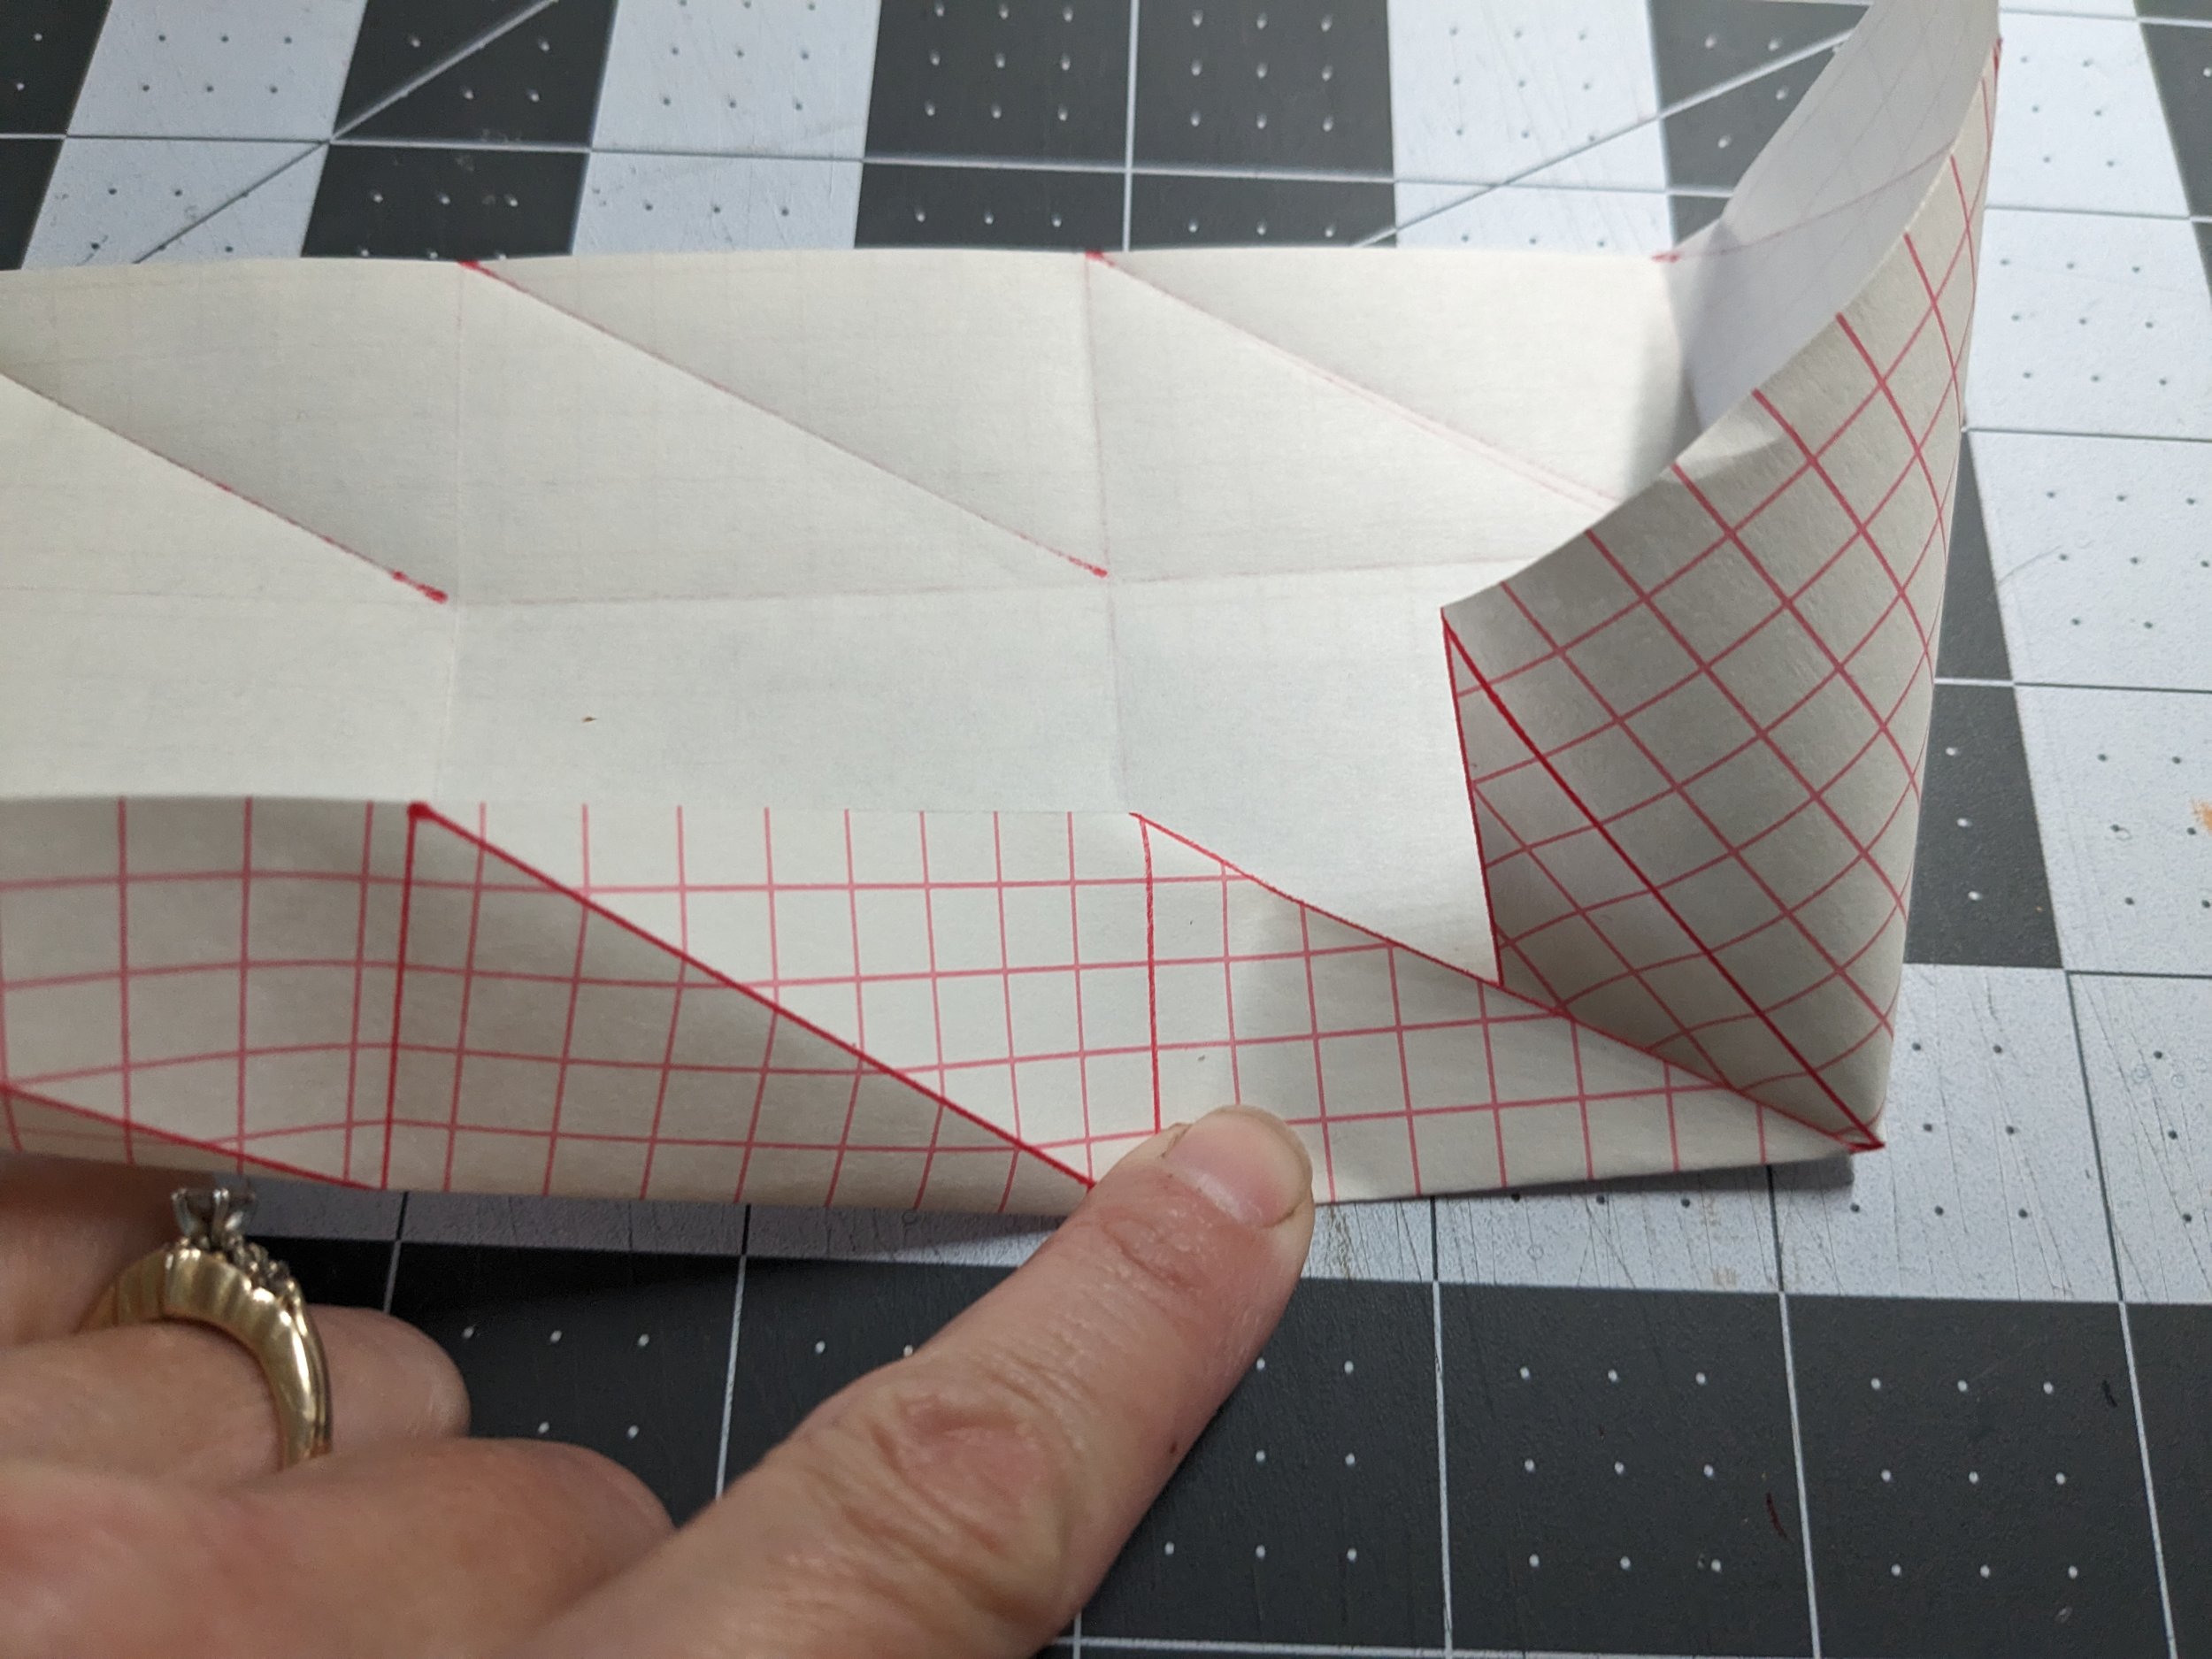
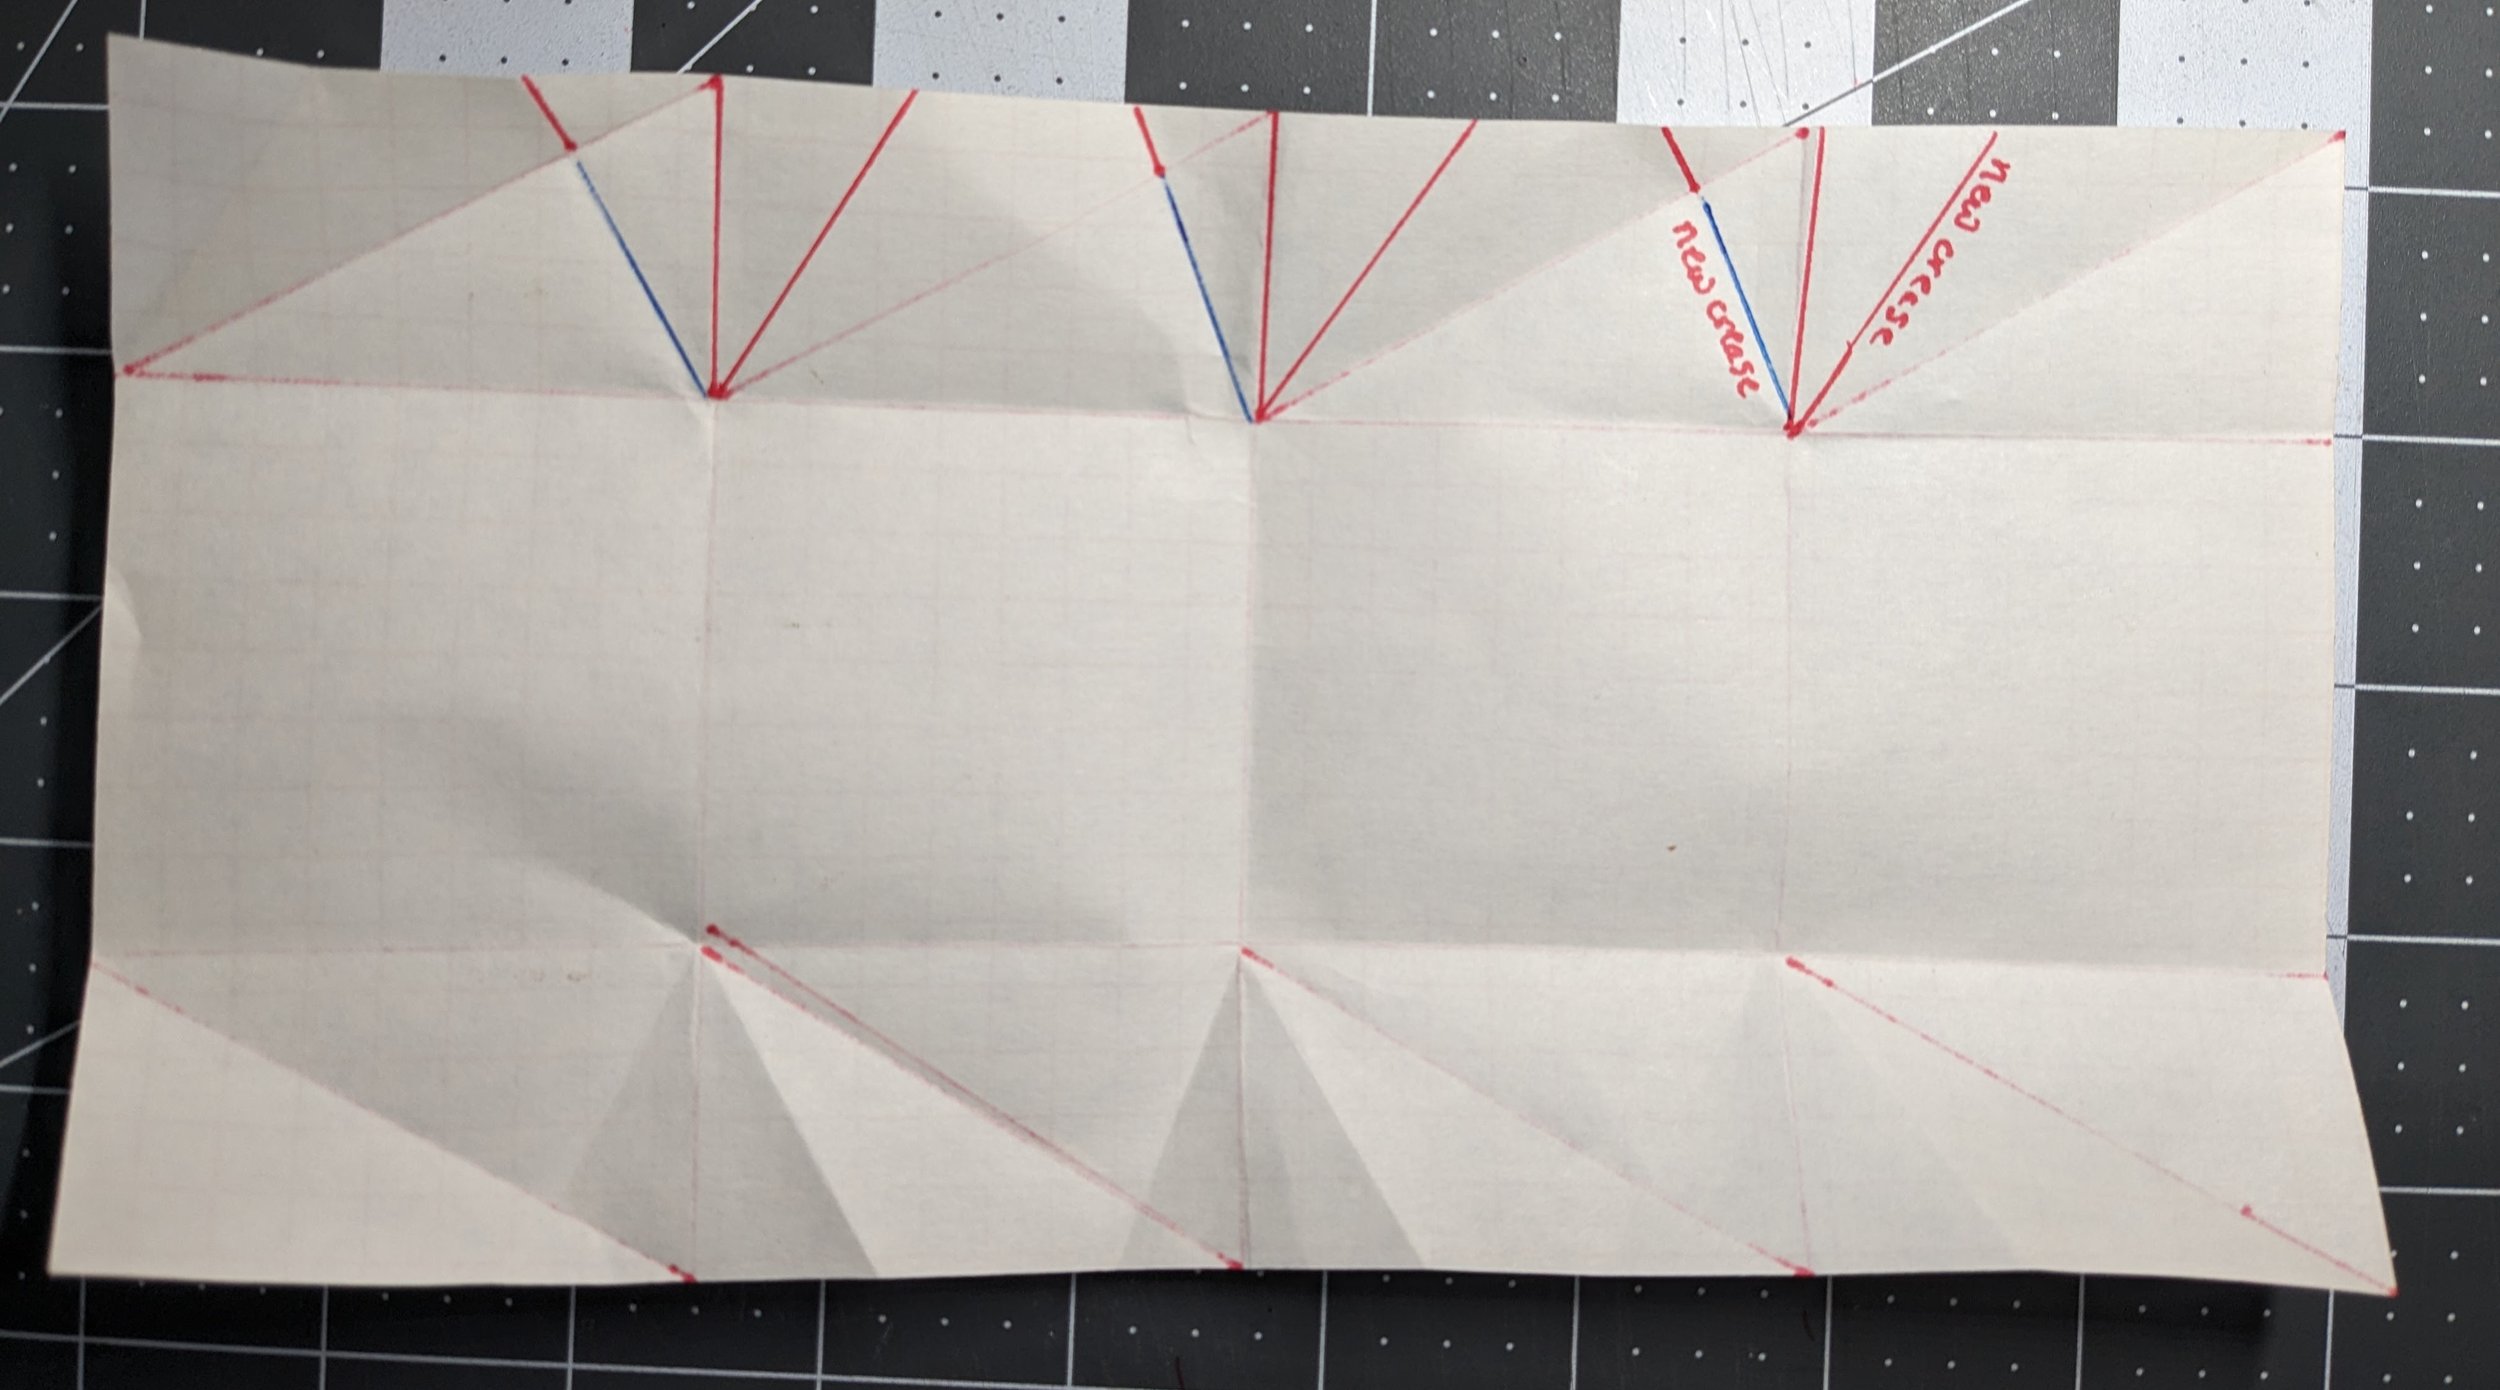
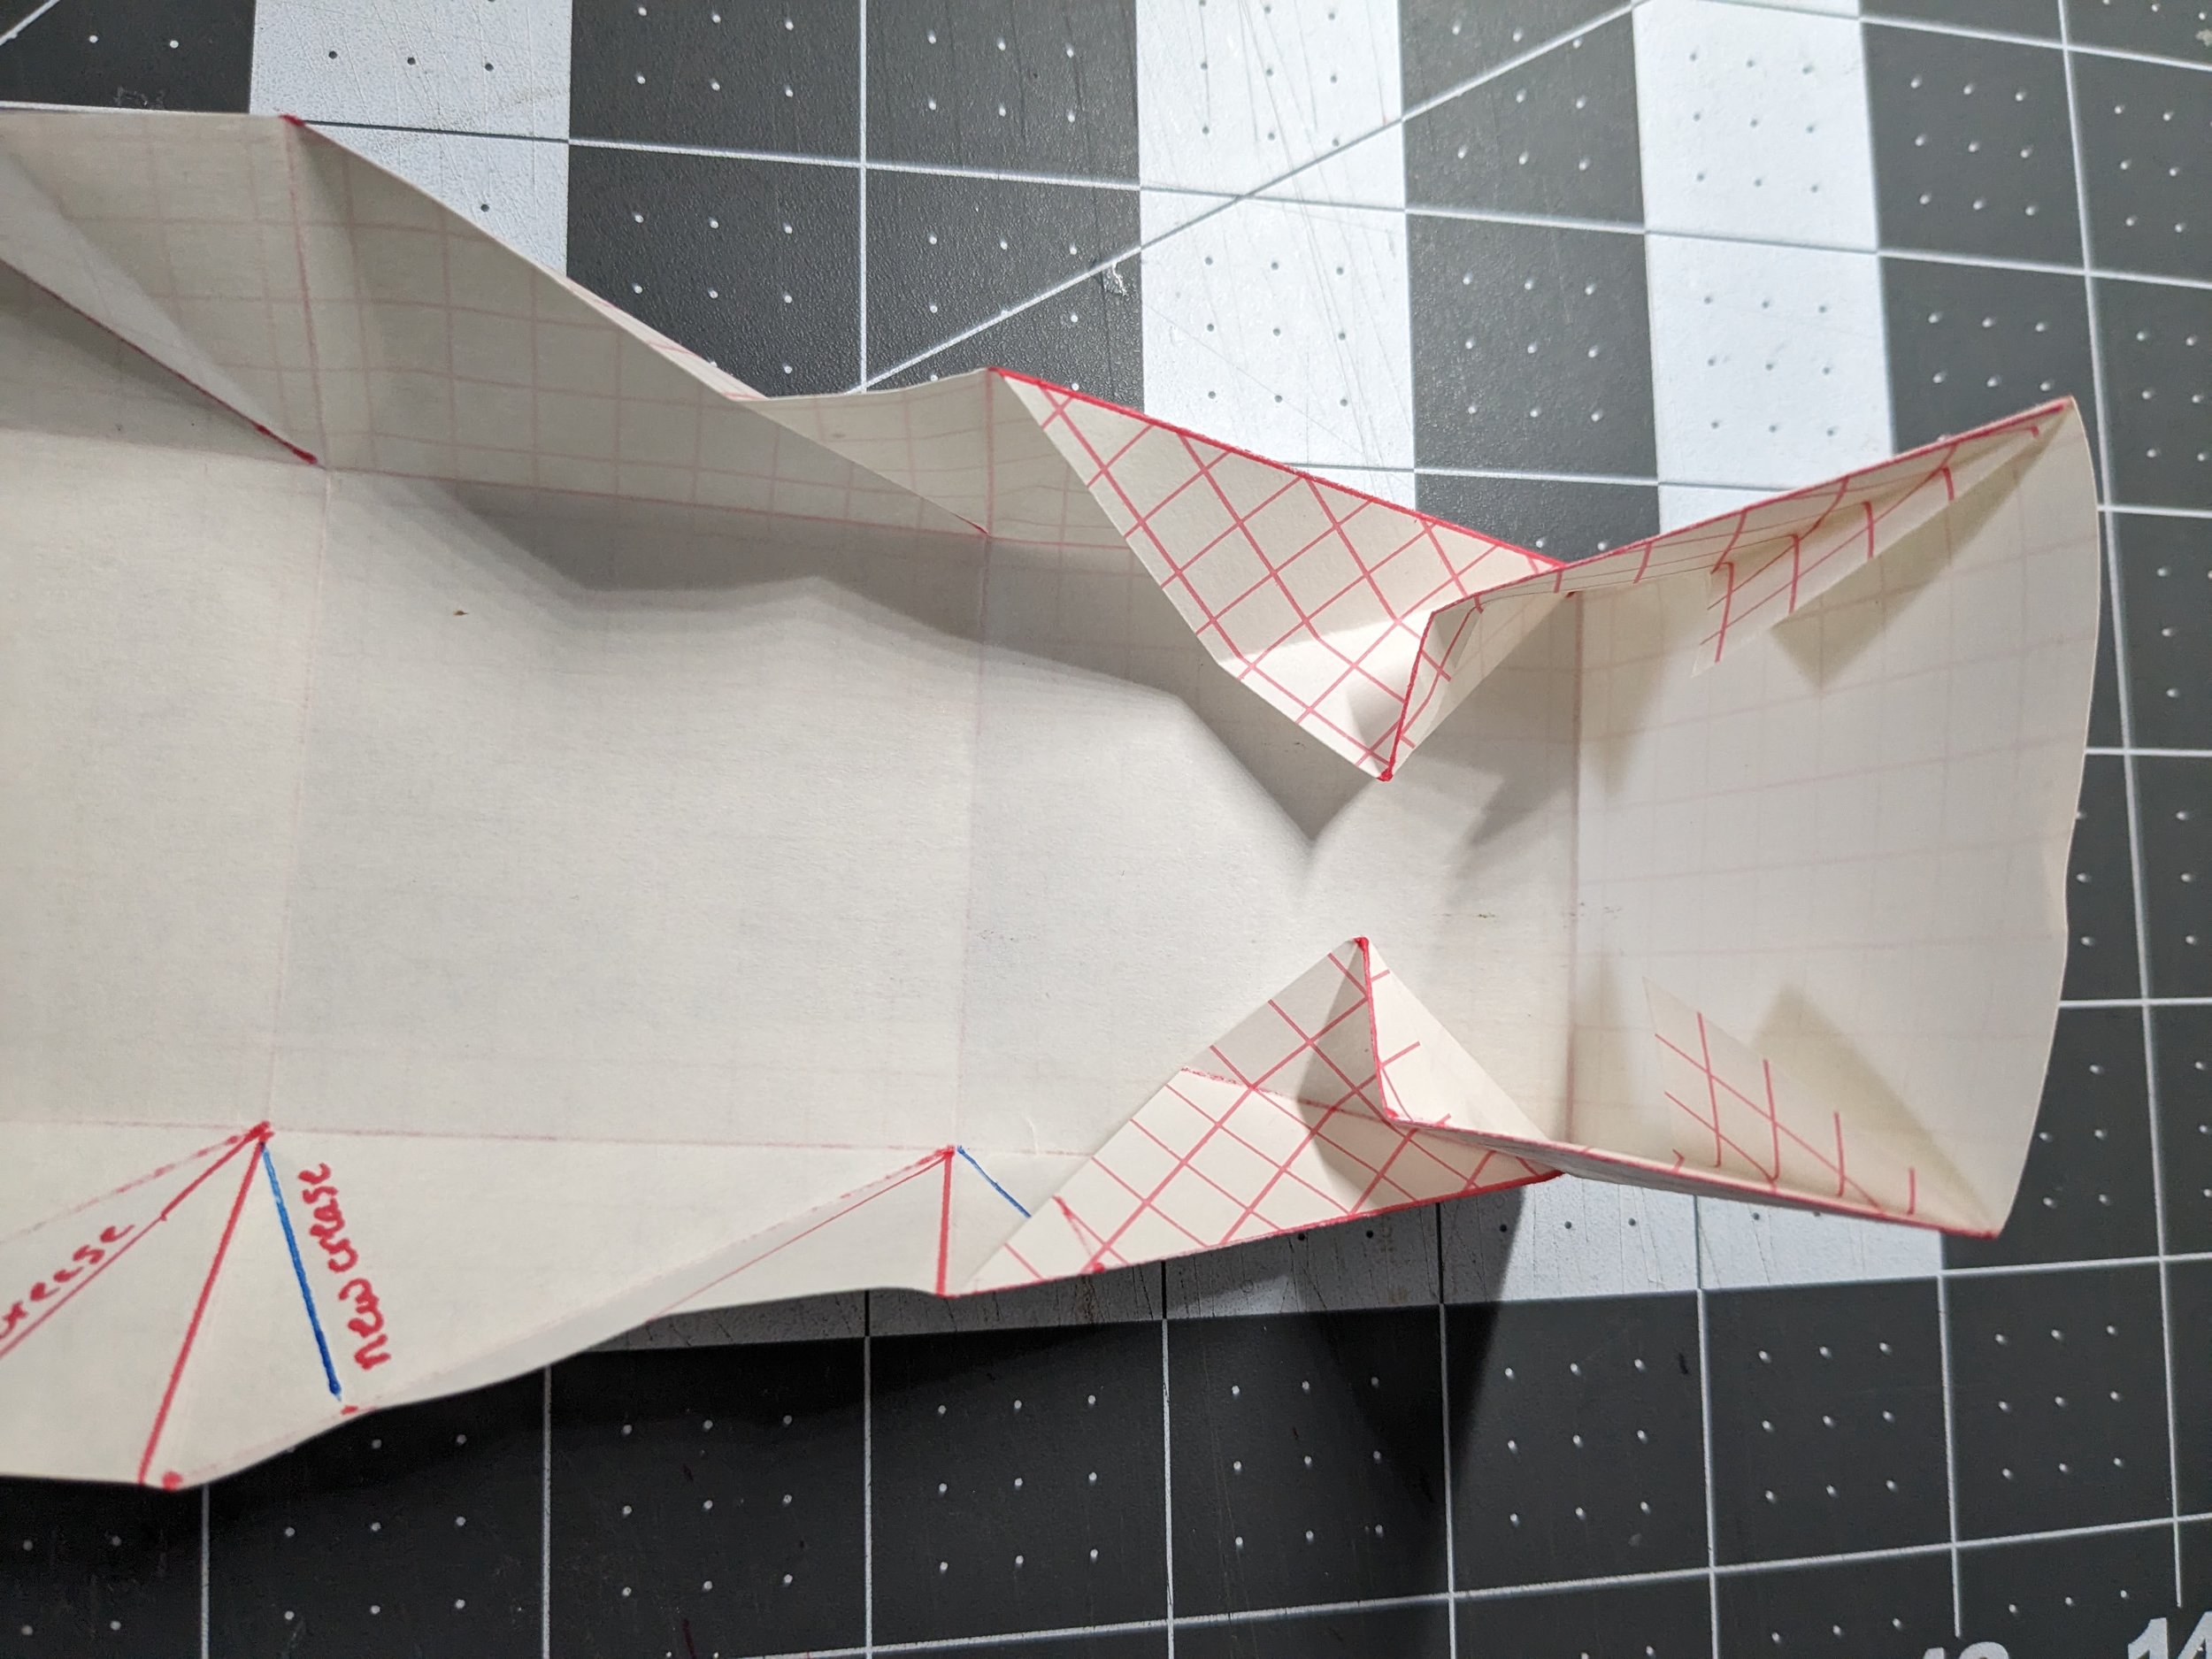
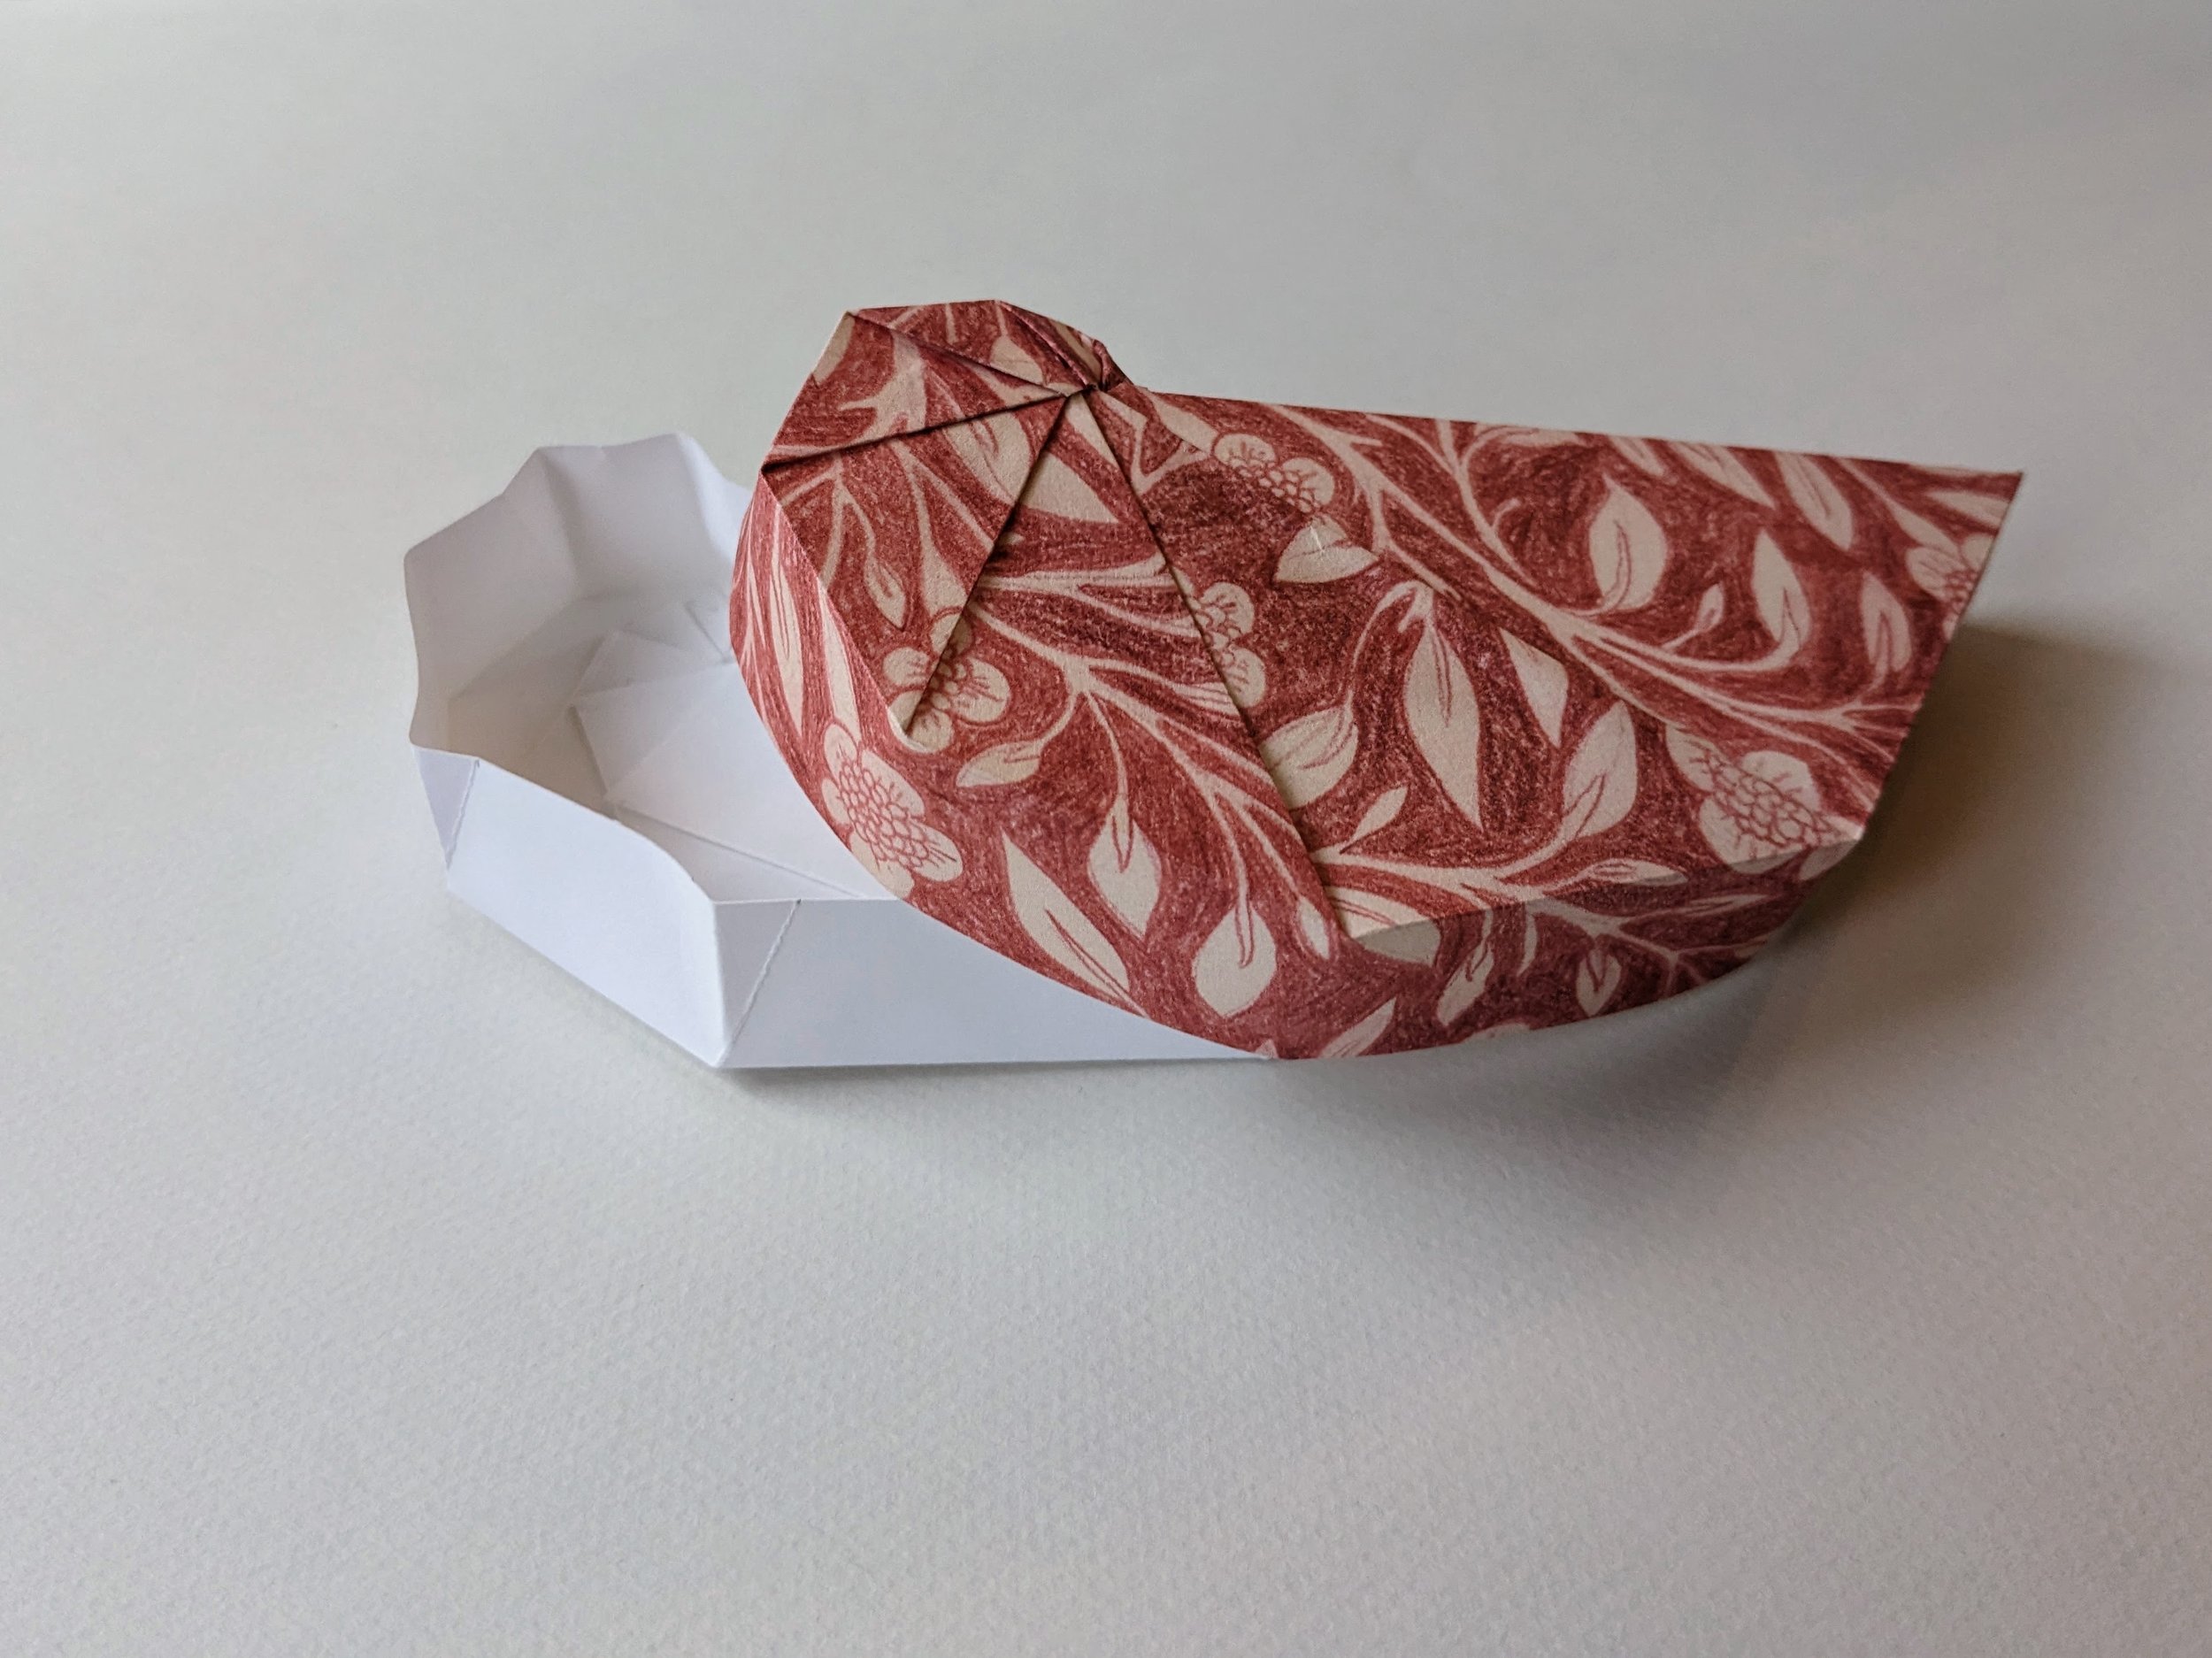
To create a box, I added a 1 inch border to the long side of the triangle to give the box a side and turned the first fold into a 1 inch side with a glue tab. This required modifying it a bit. My first few attempts at folding the box had folds along the long side corresponding with the mountain folds on the triangle, but when I reversed folds to make the box top, the angles on the two box parts were out of sync. I realized that folds along the side weren’t necessary.

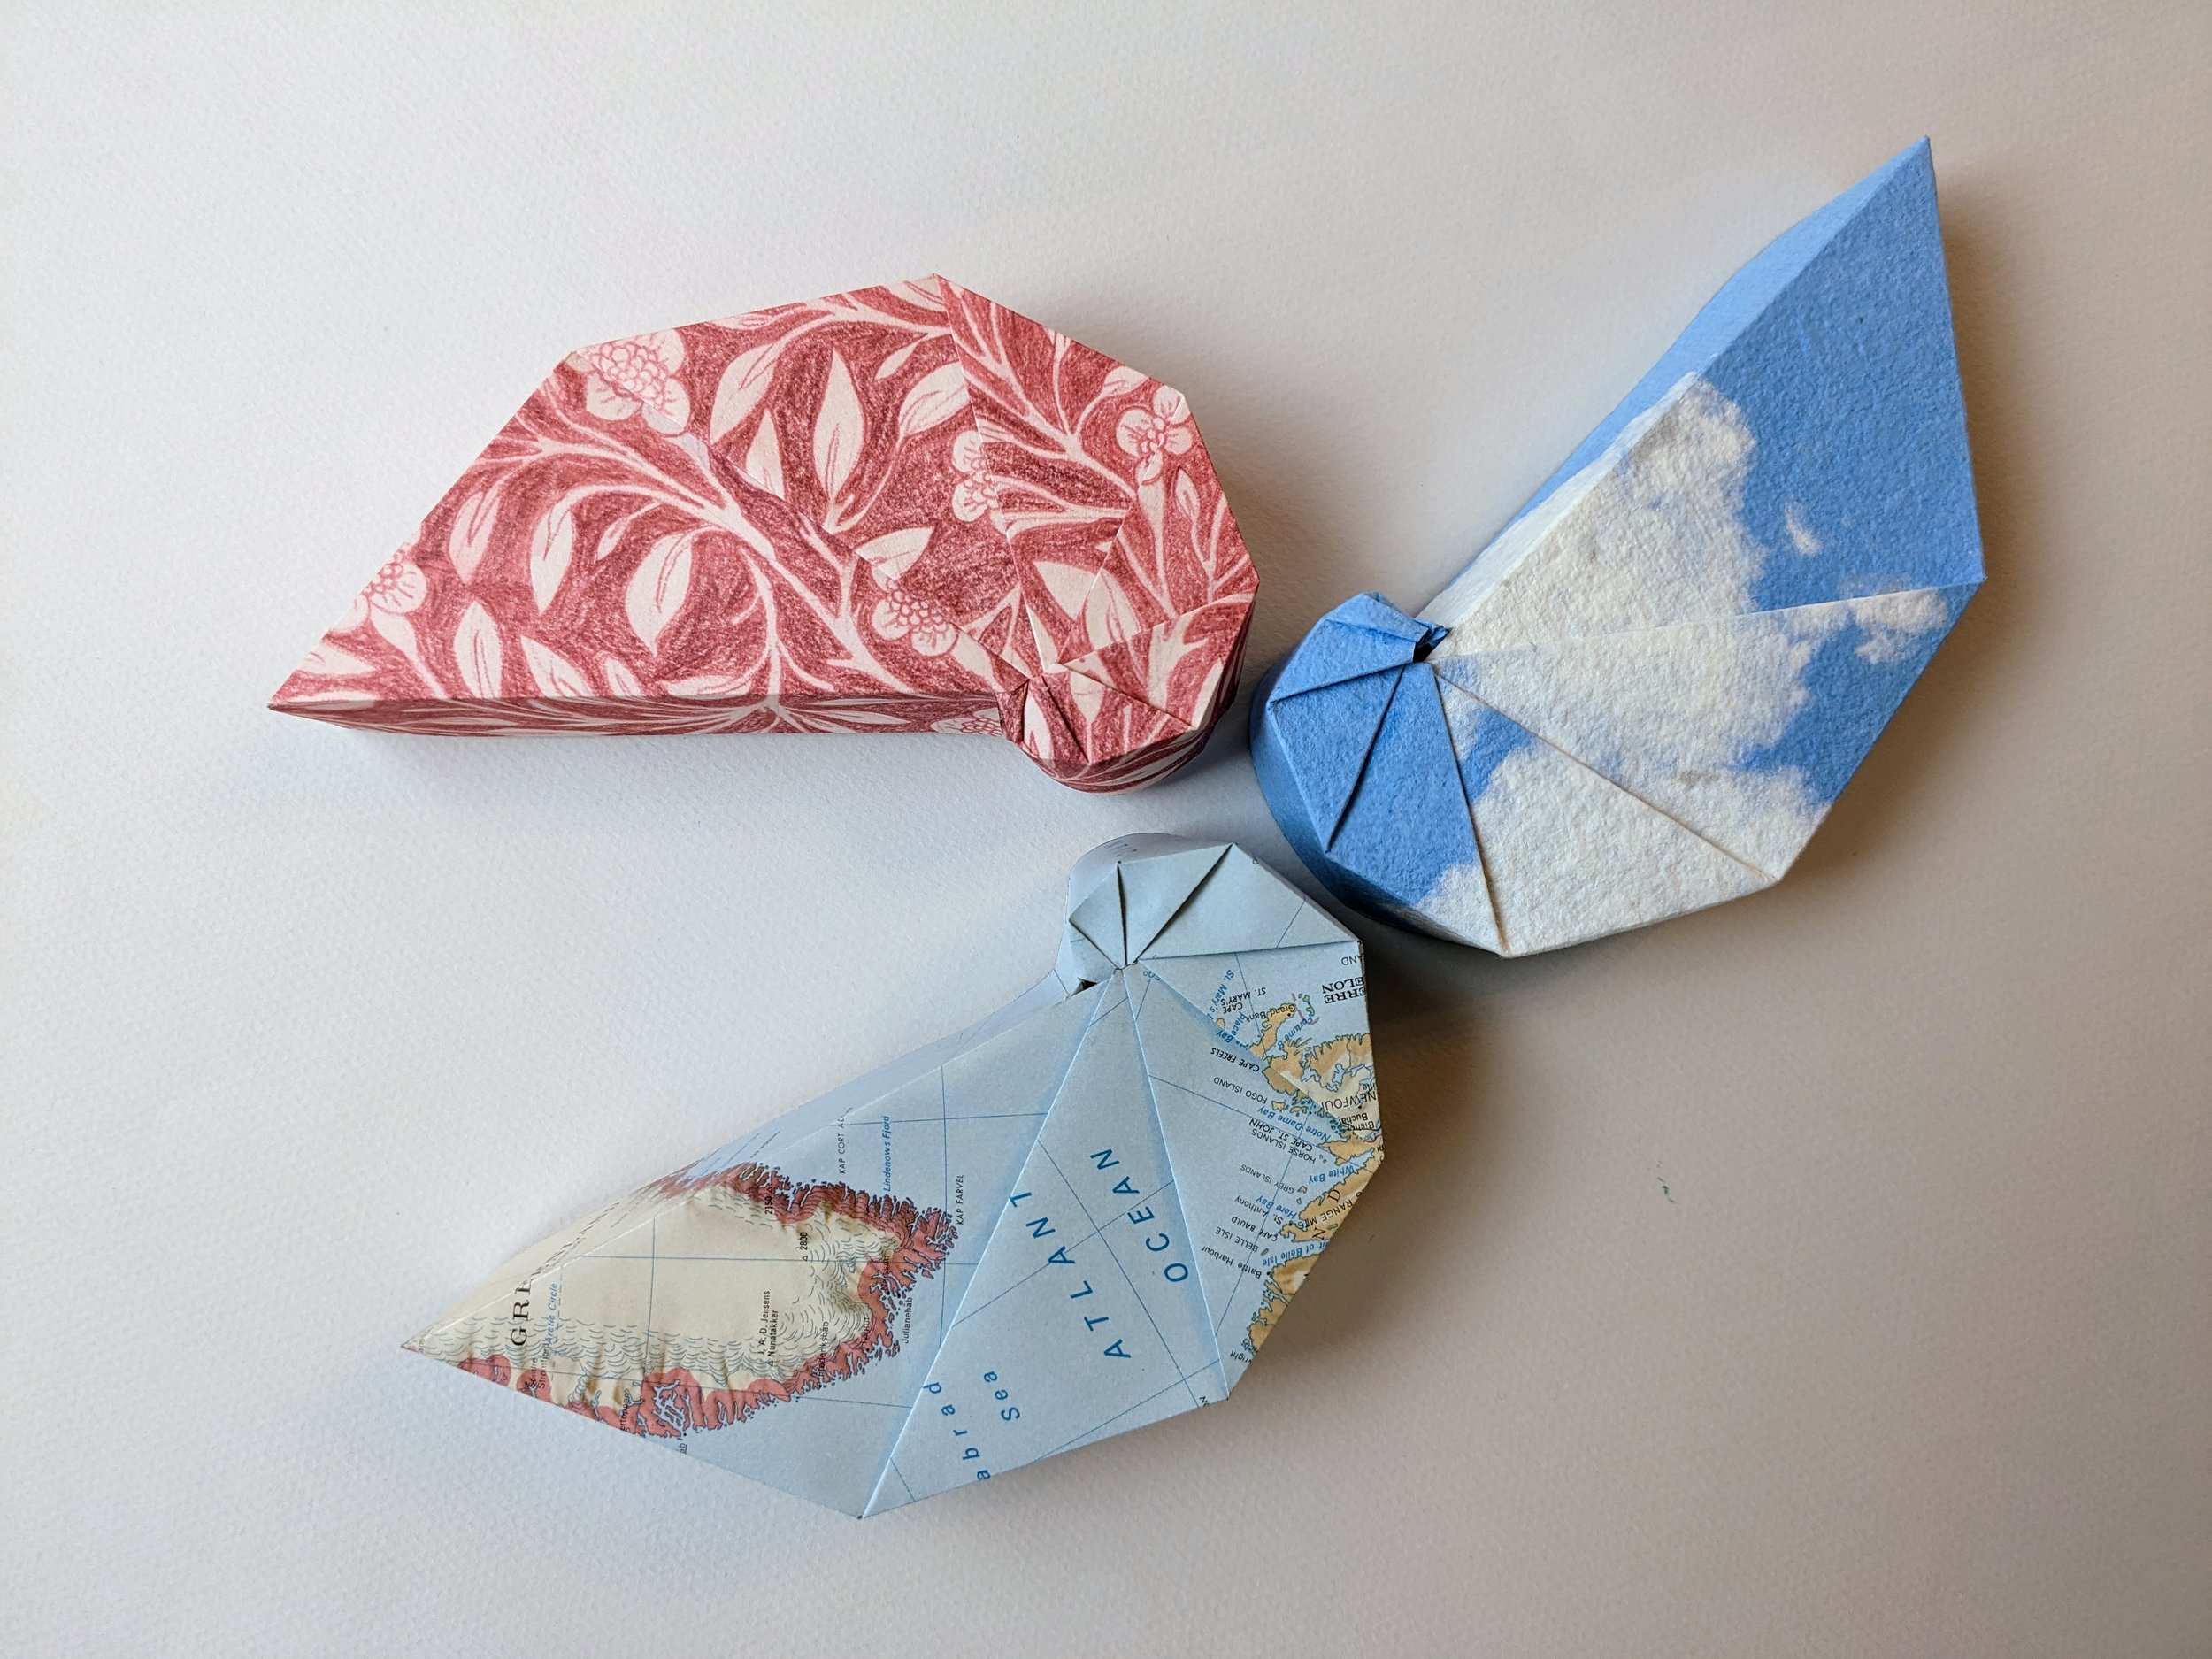
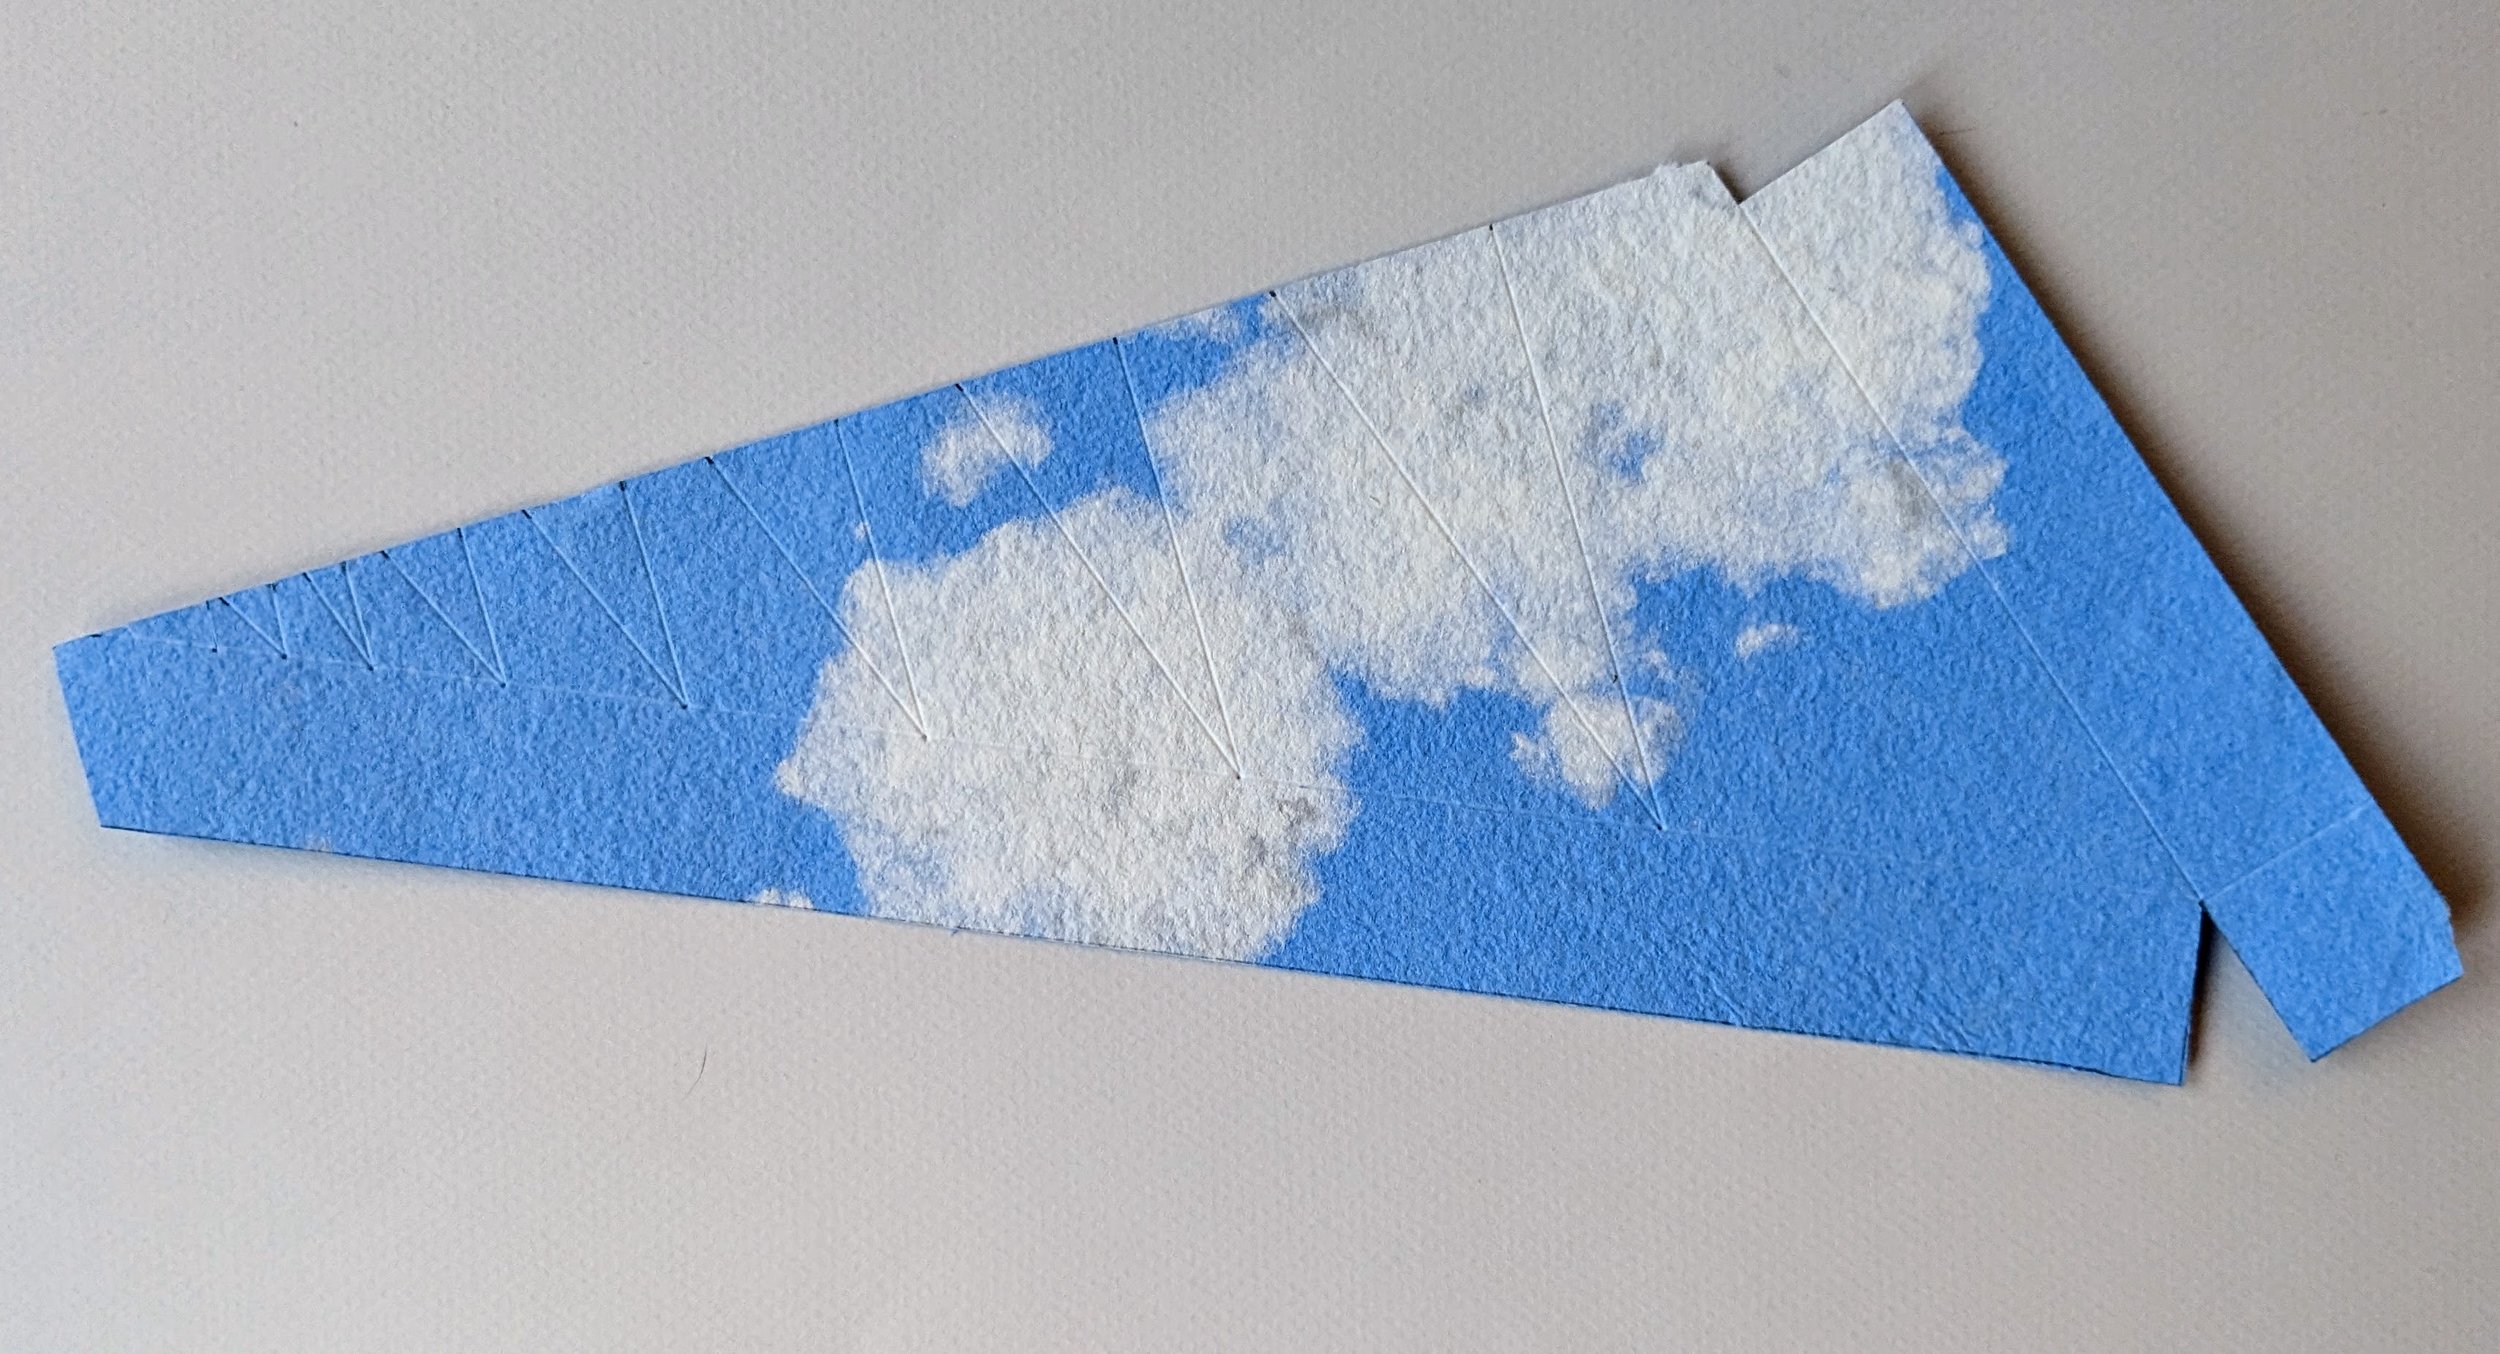
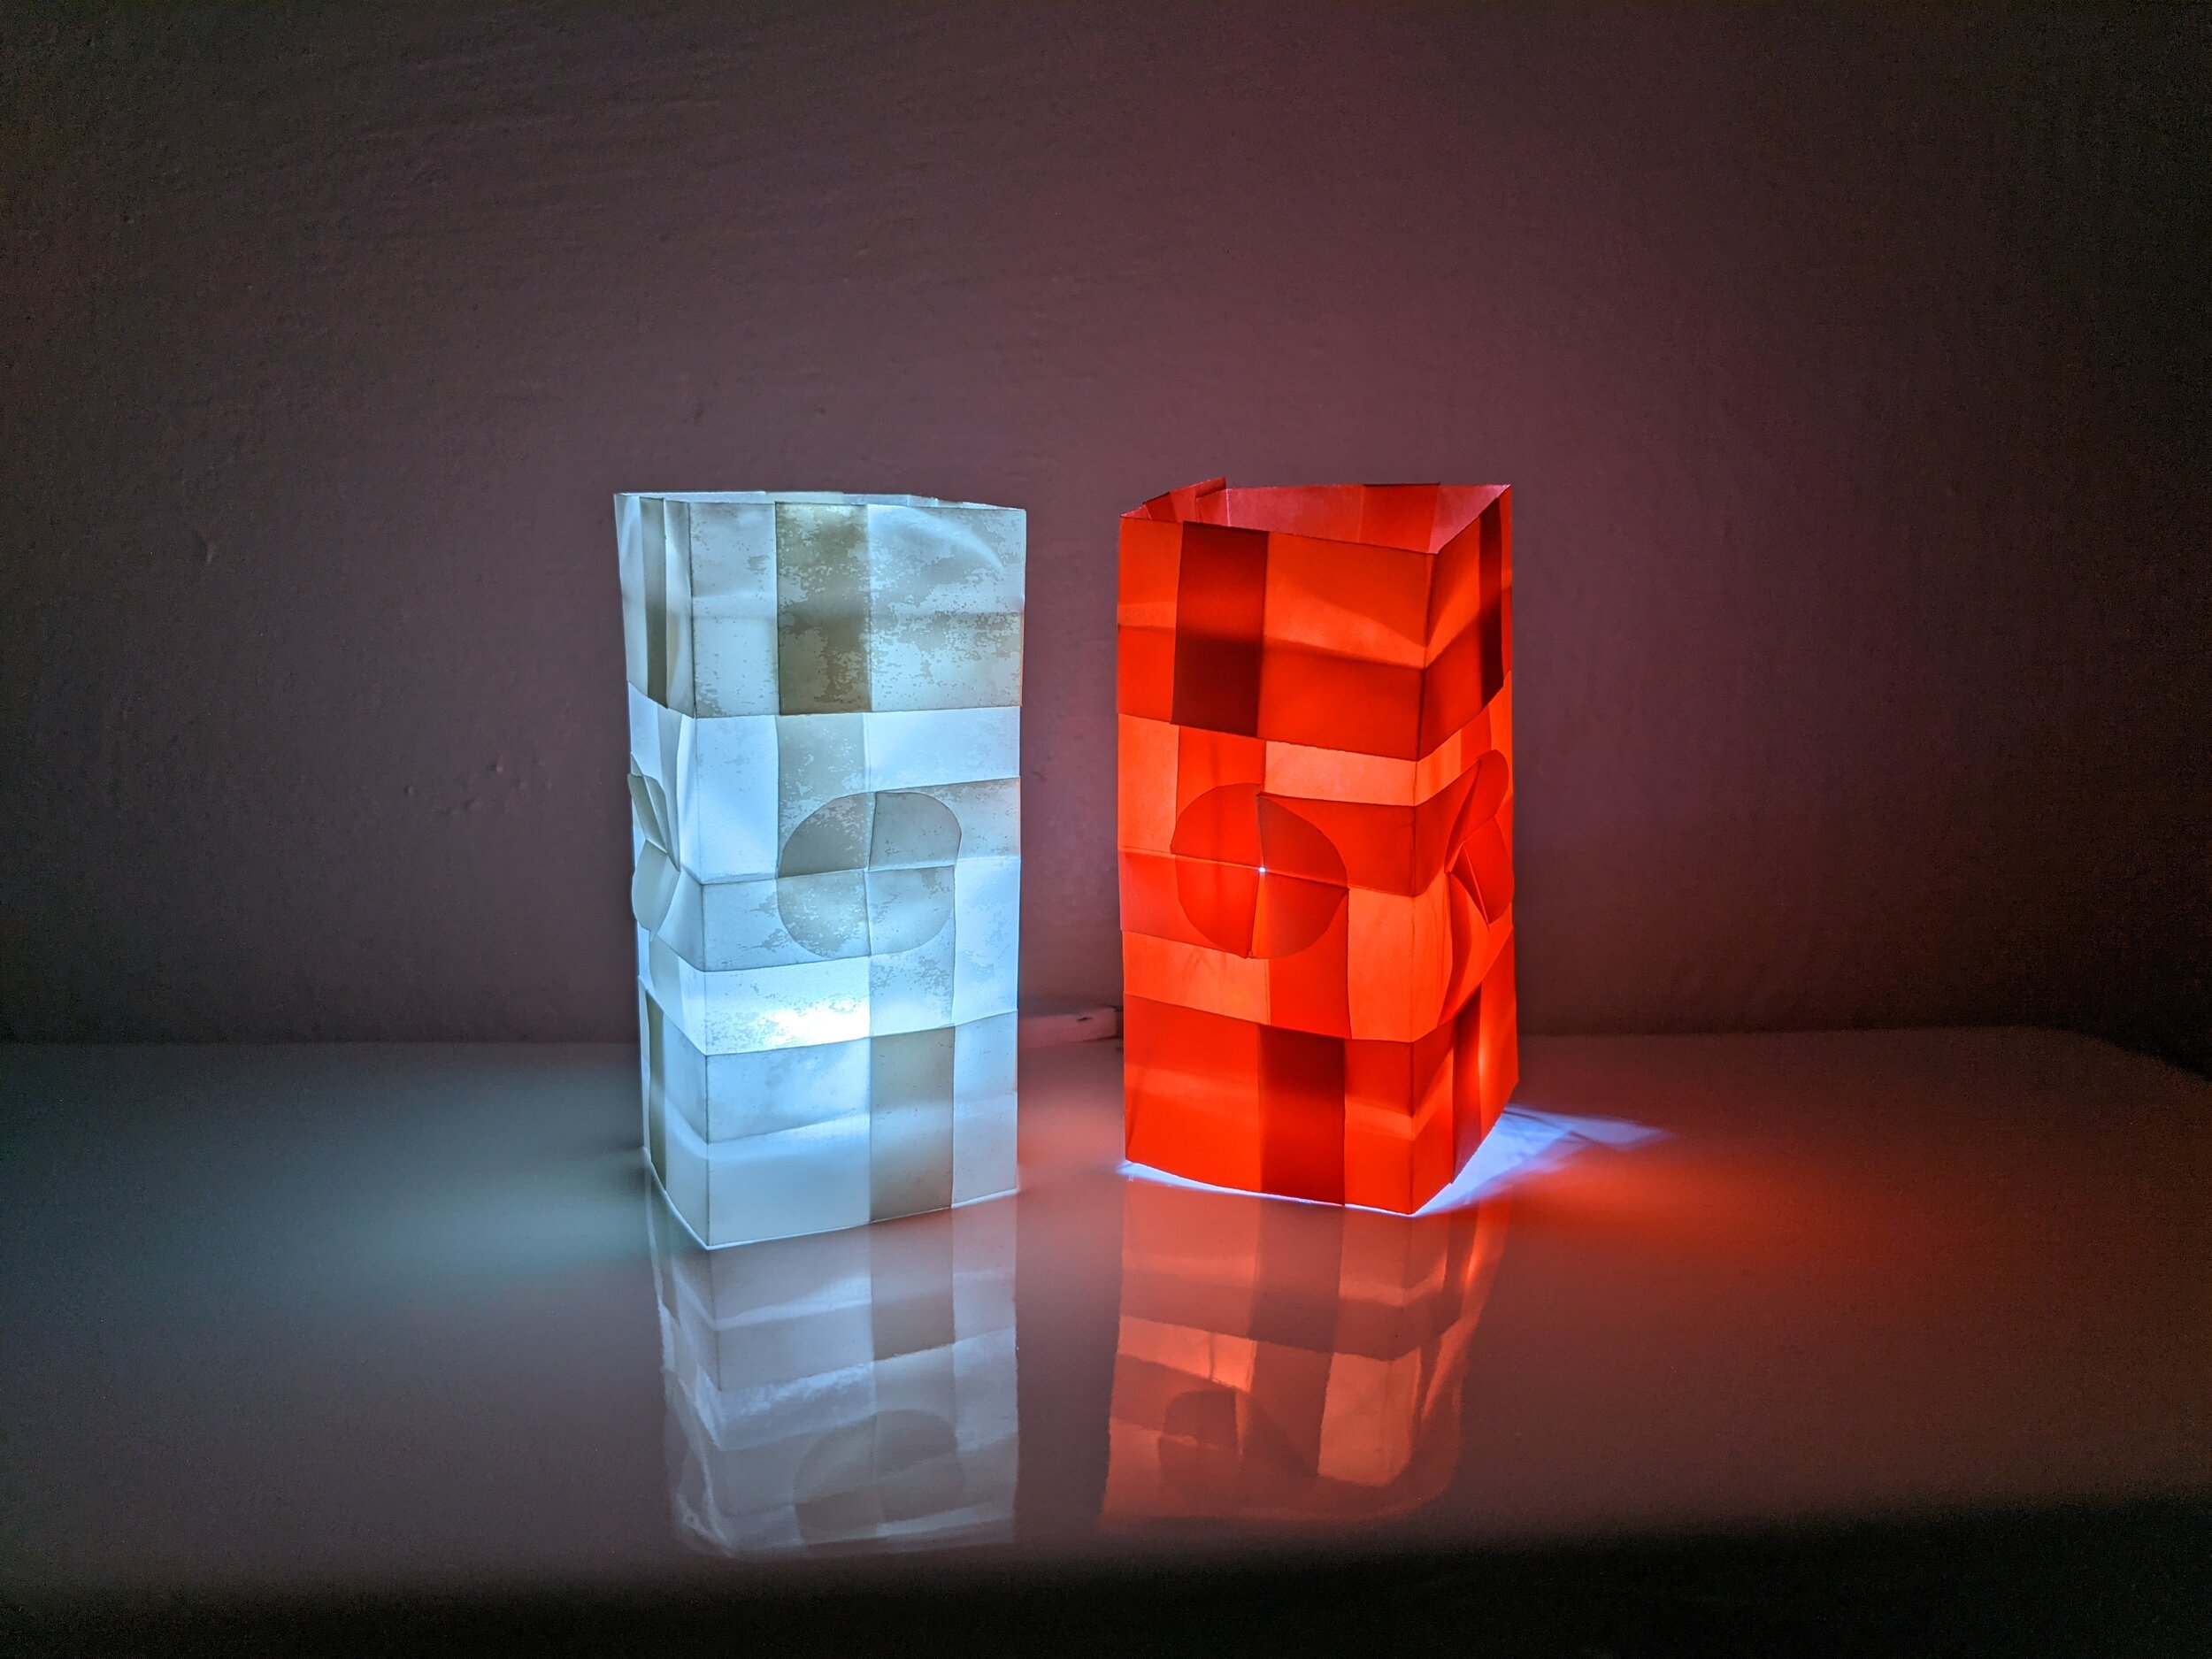
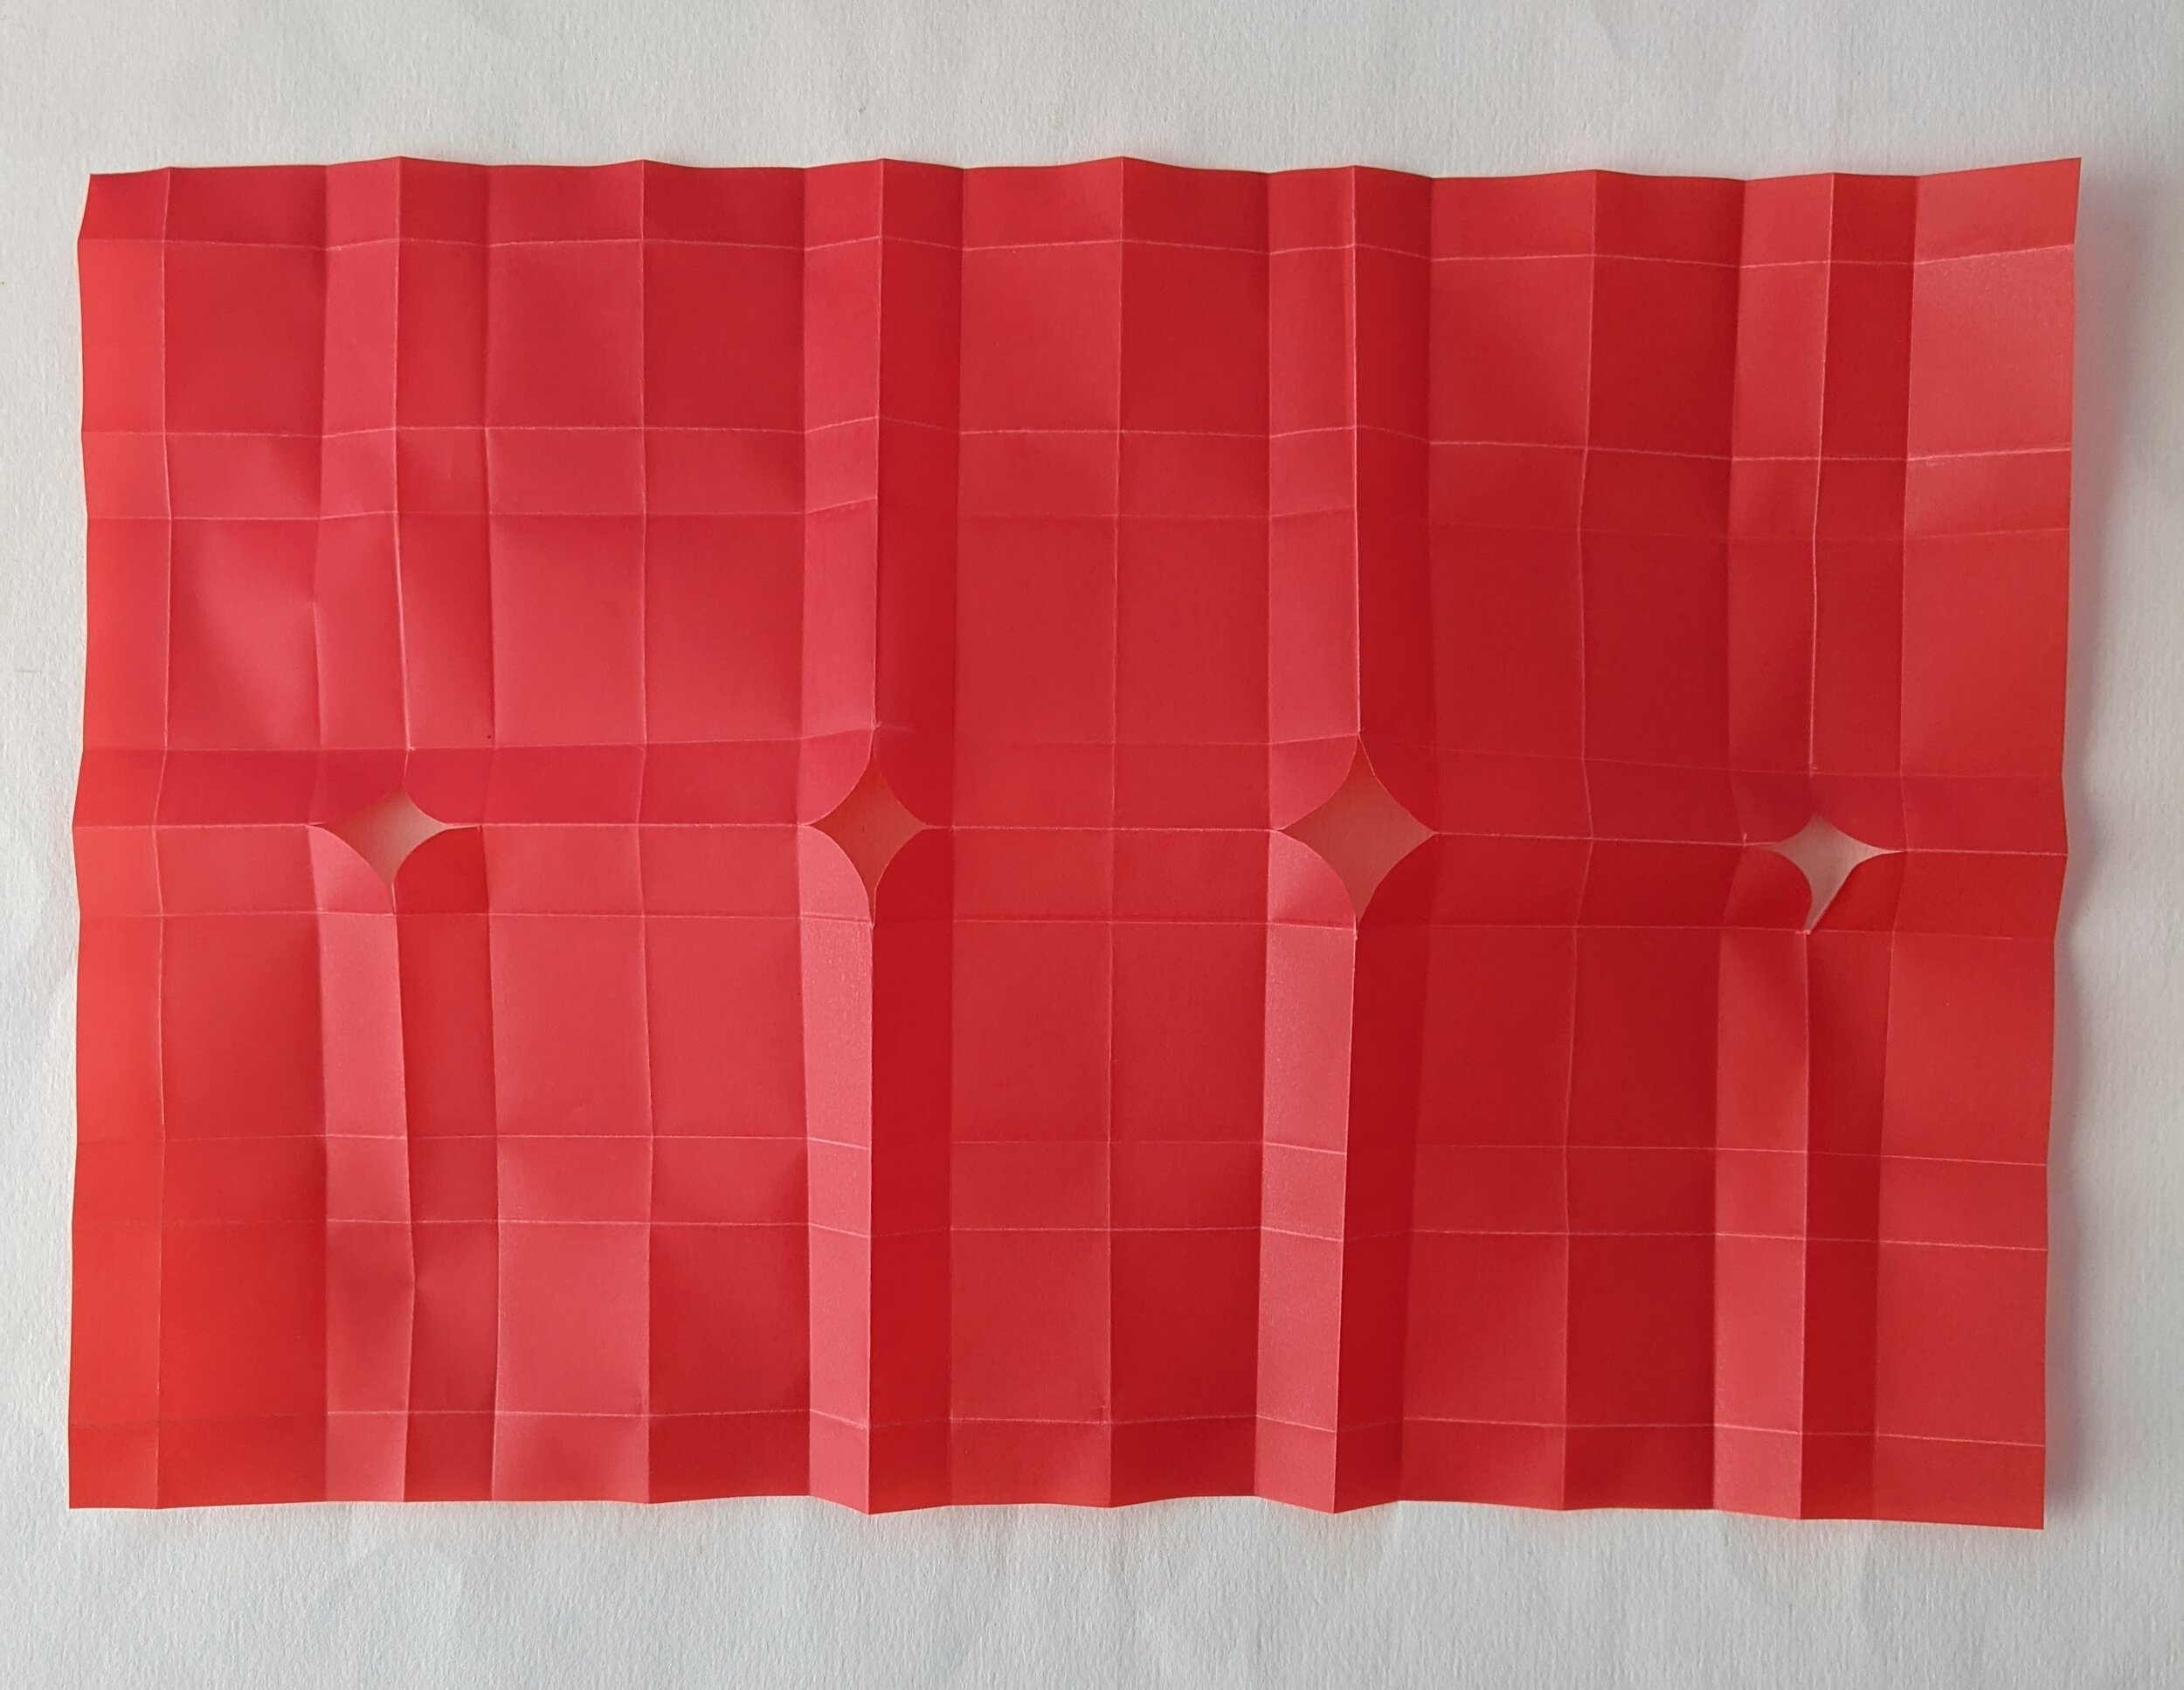
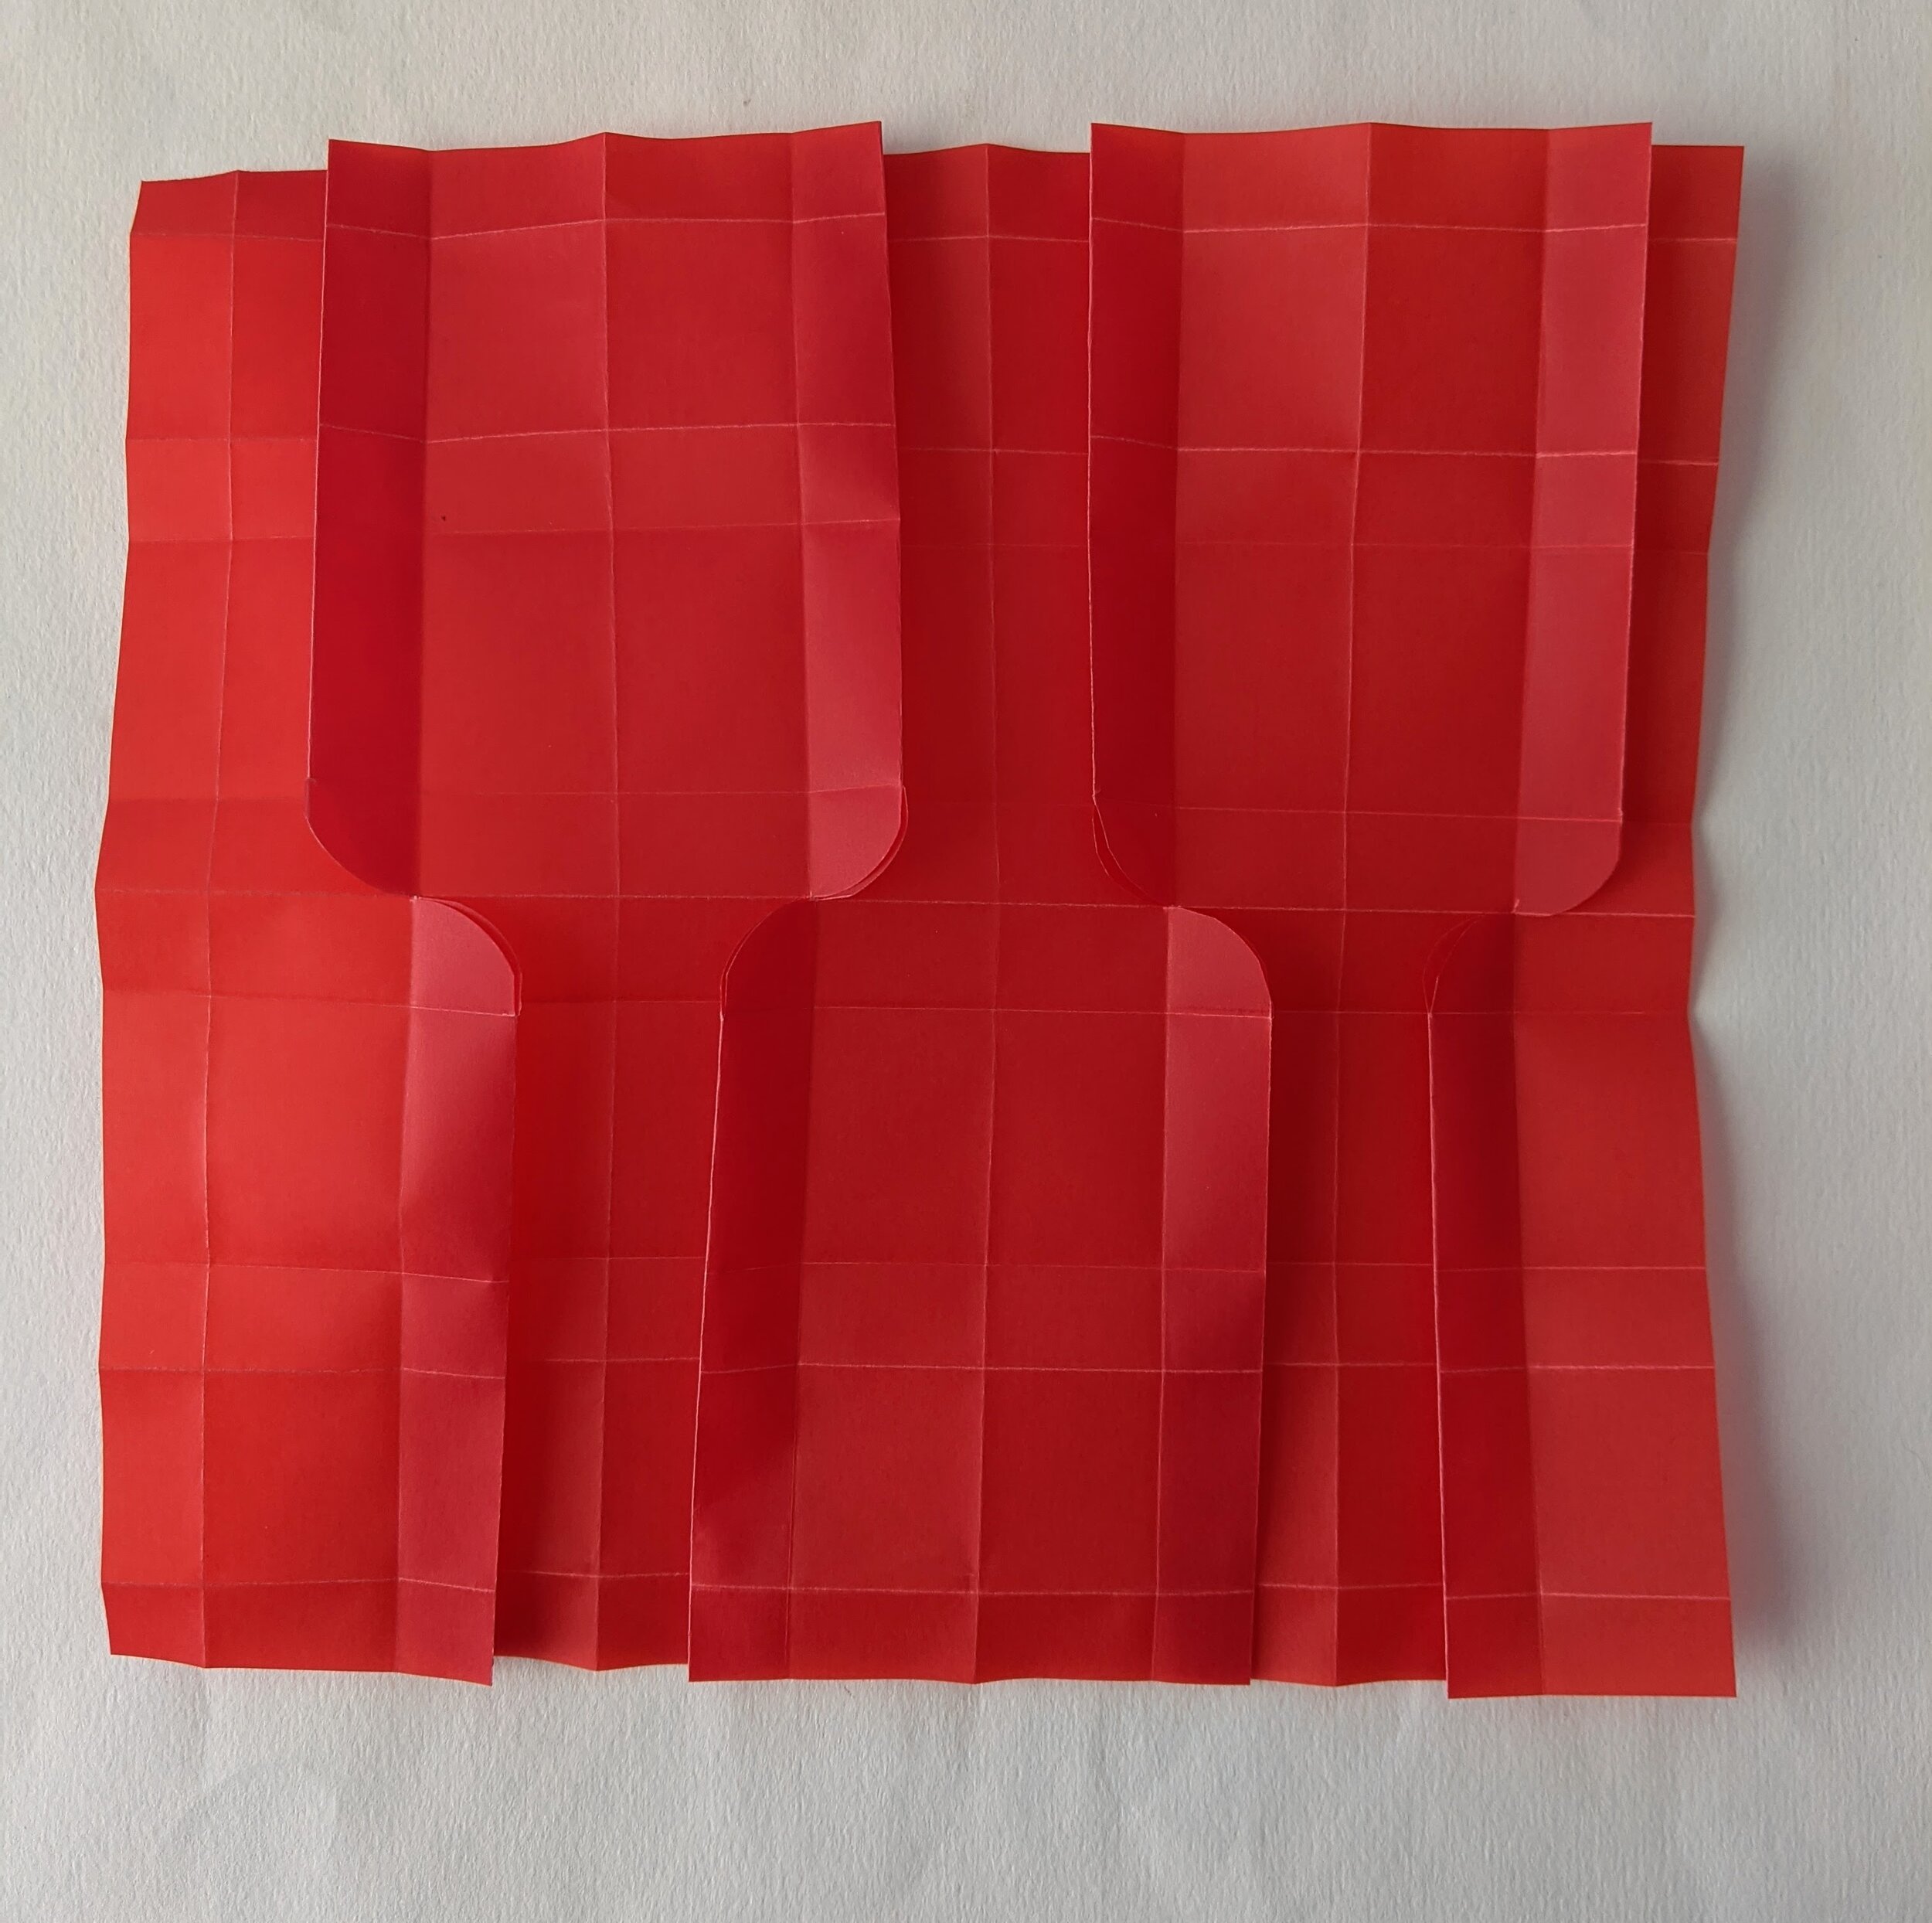
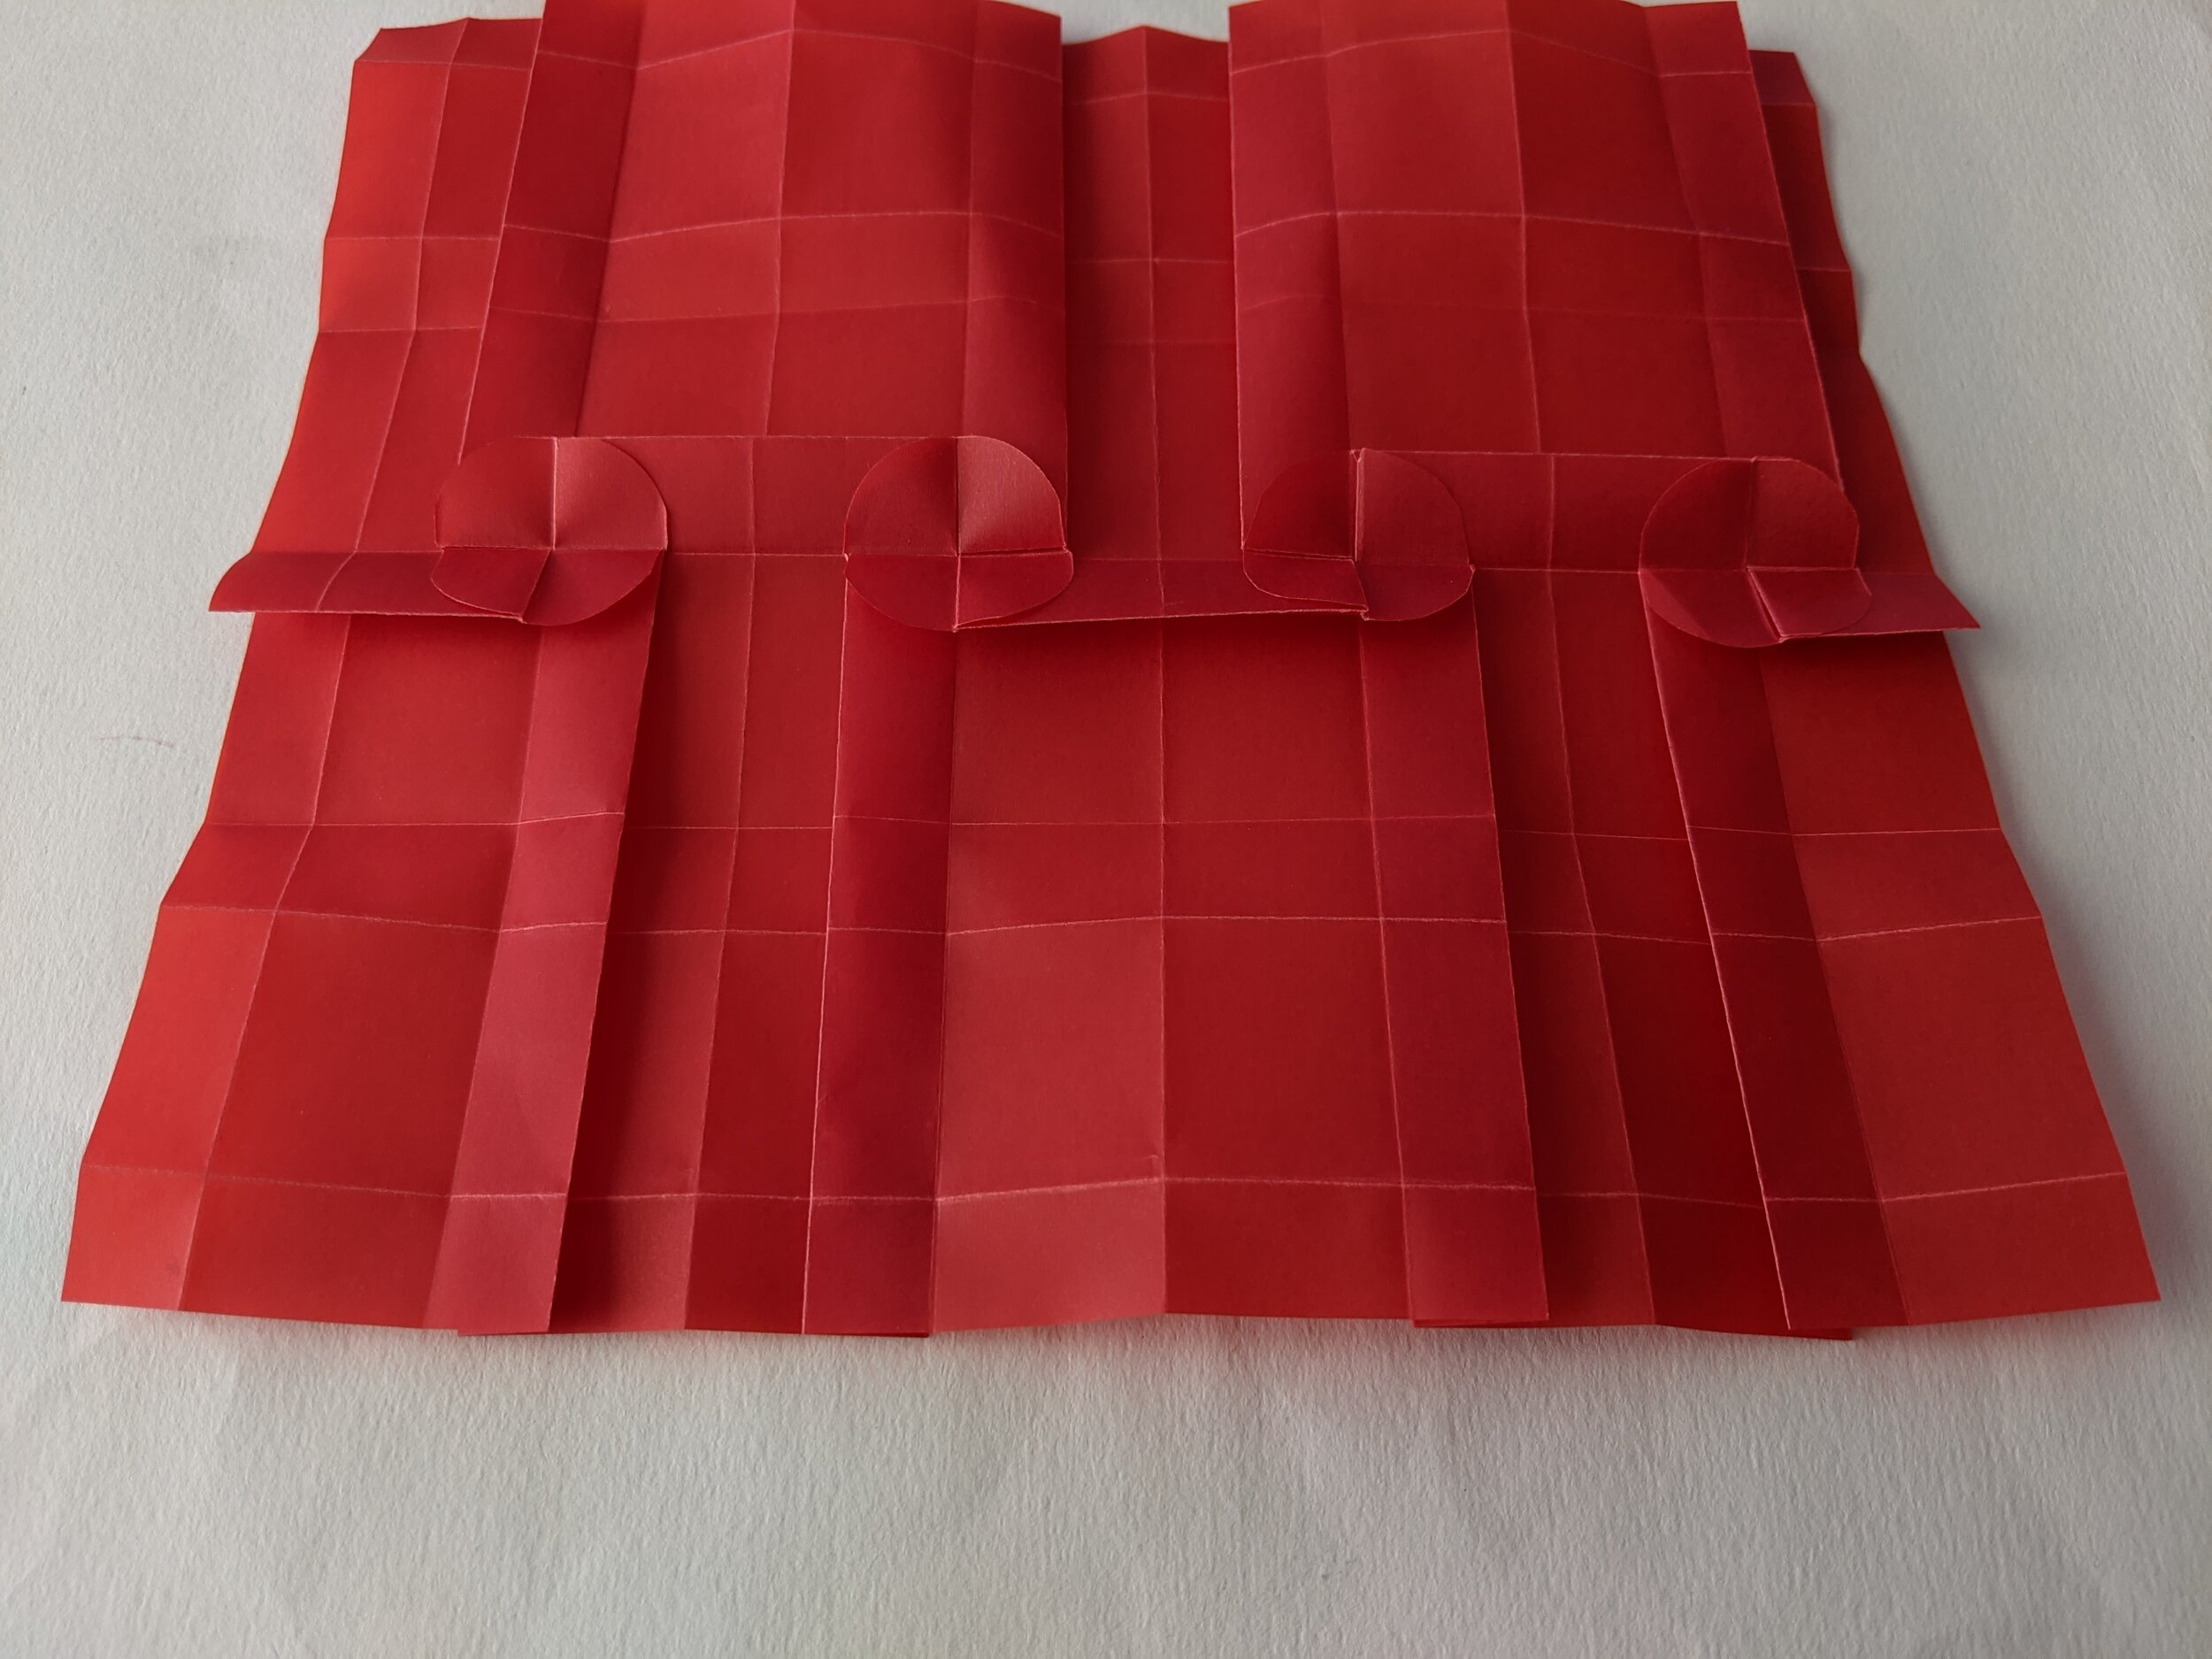
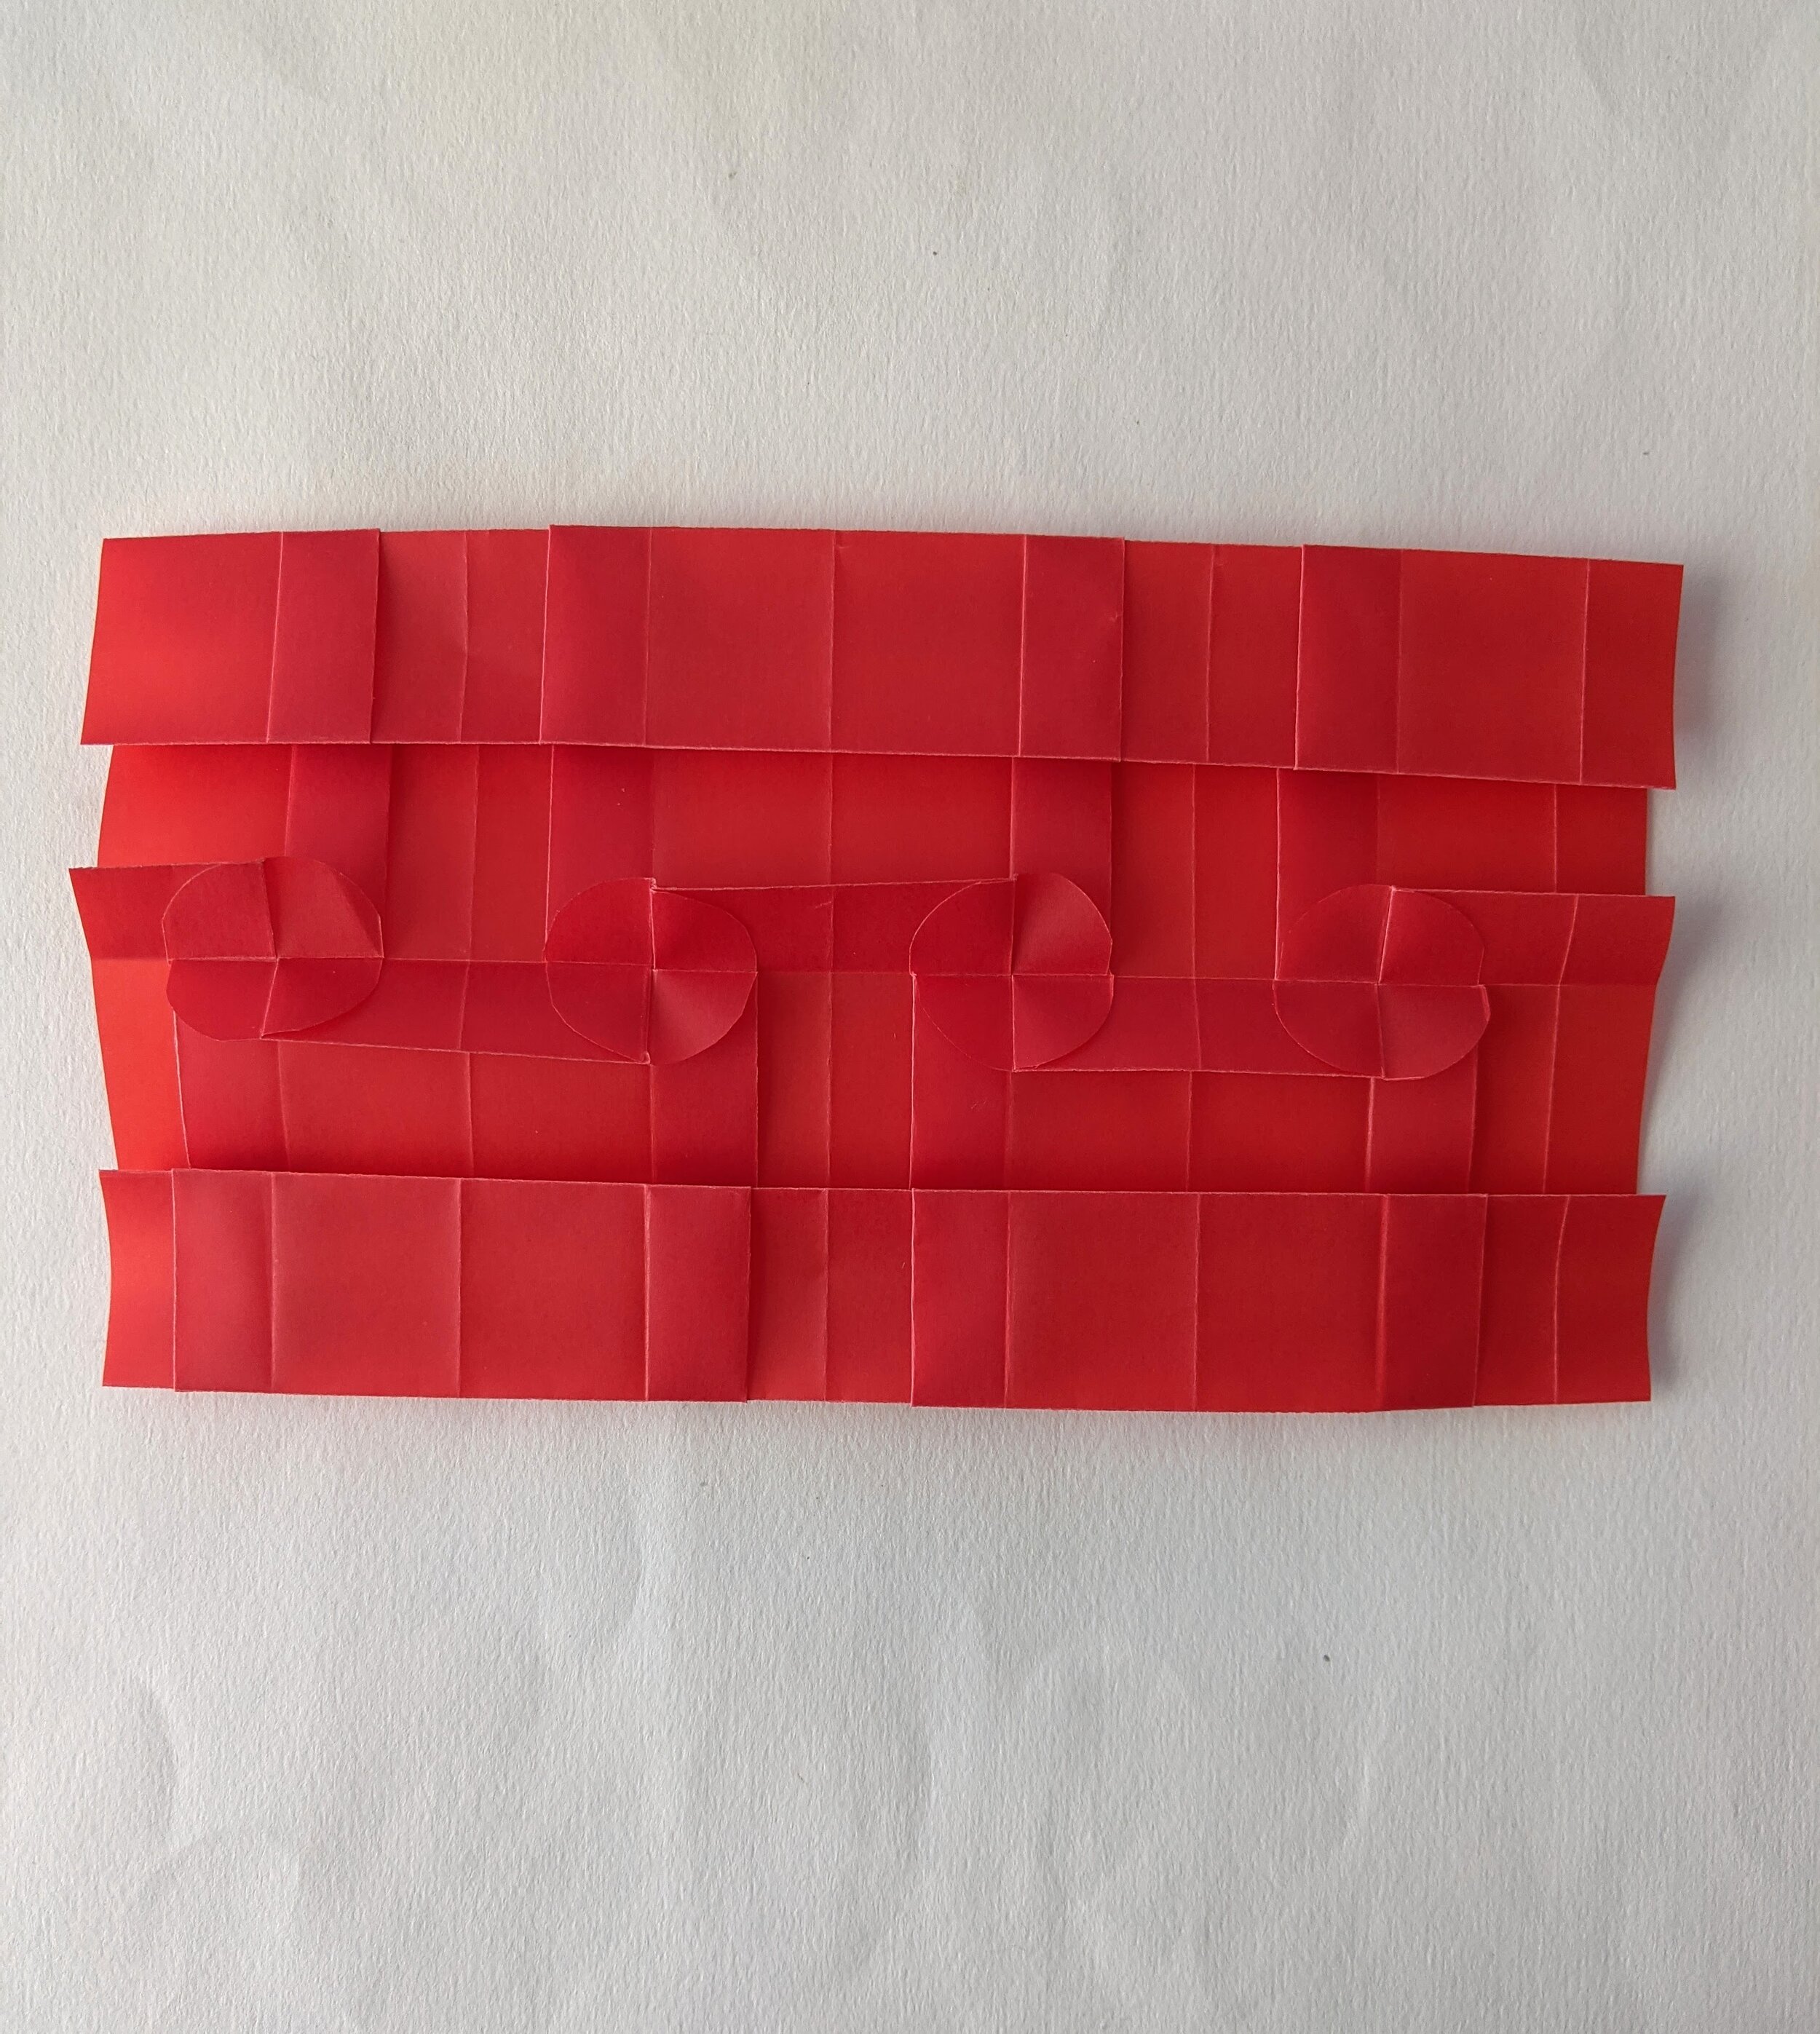
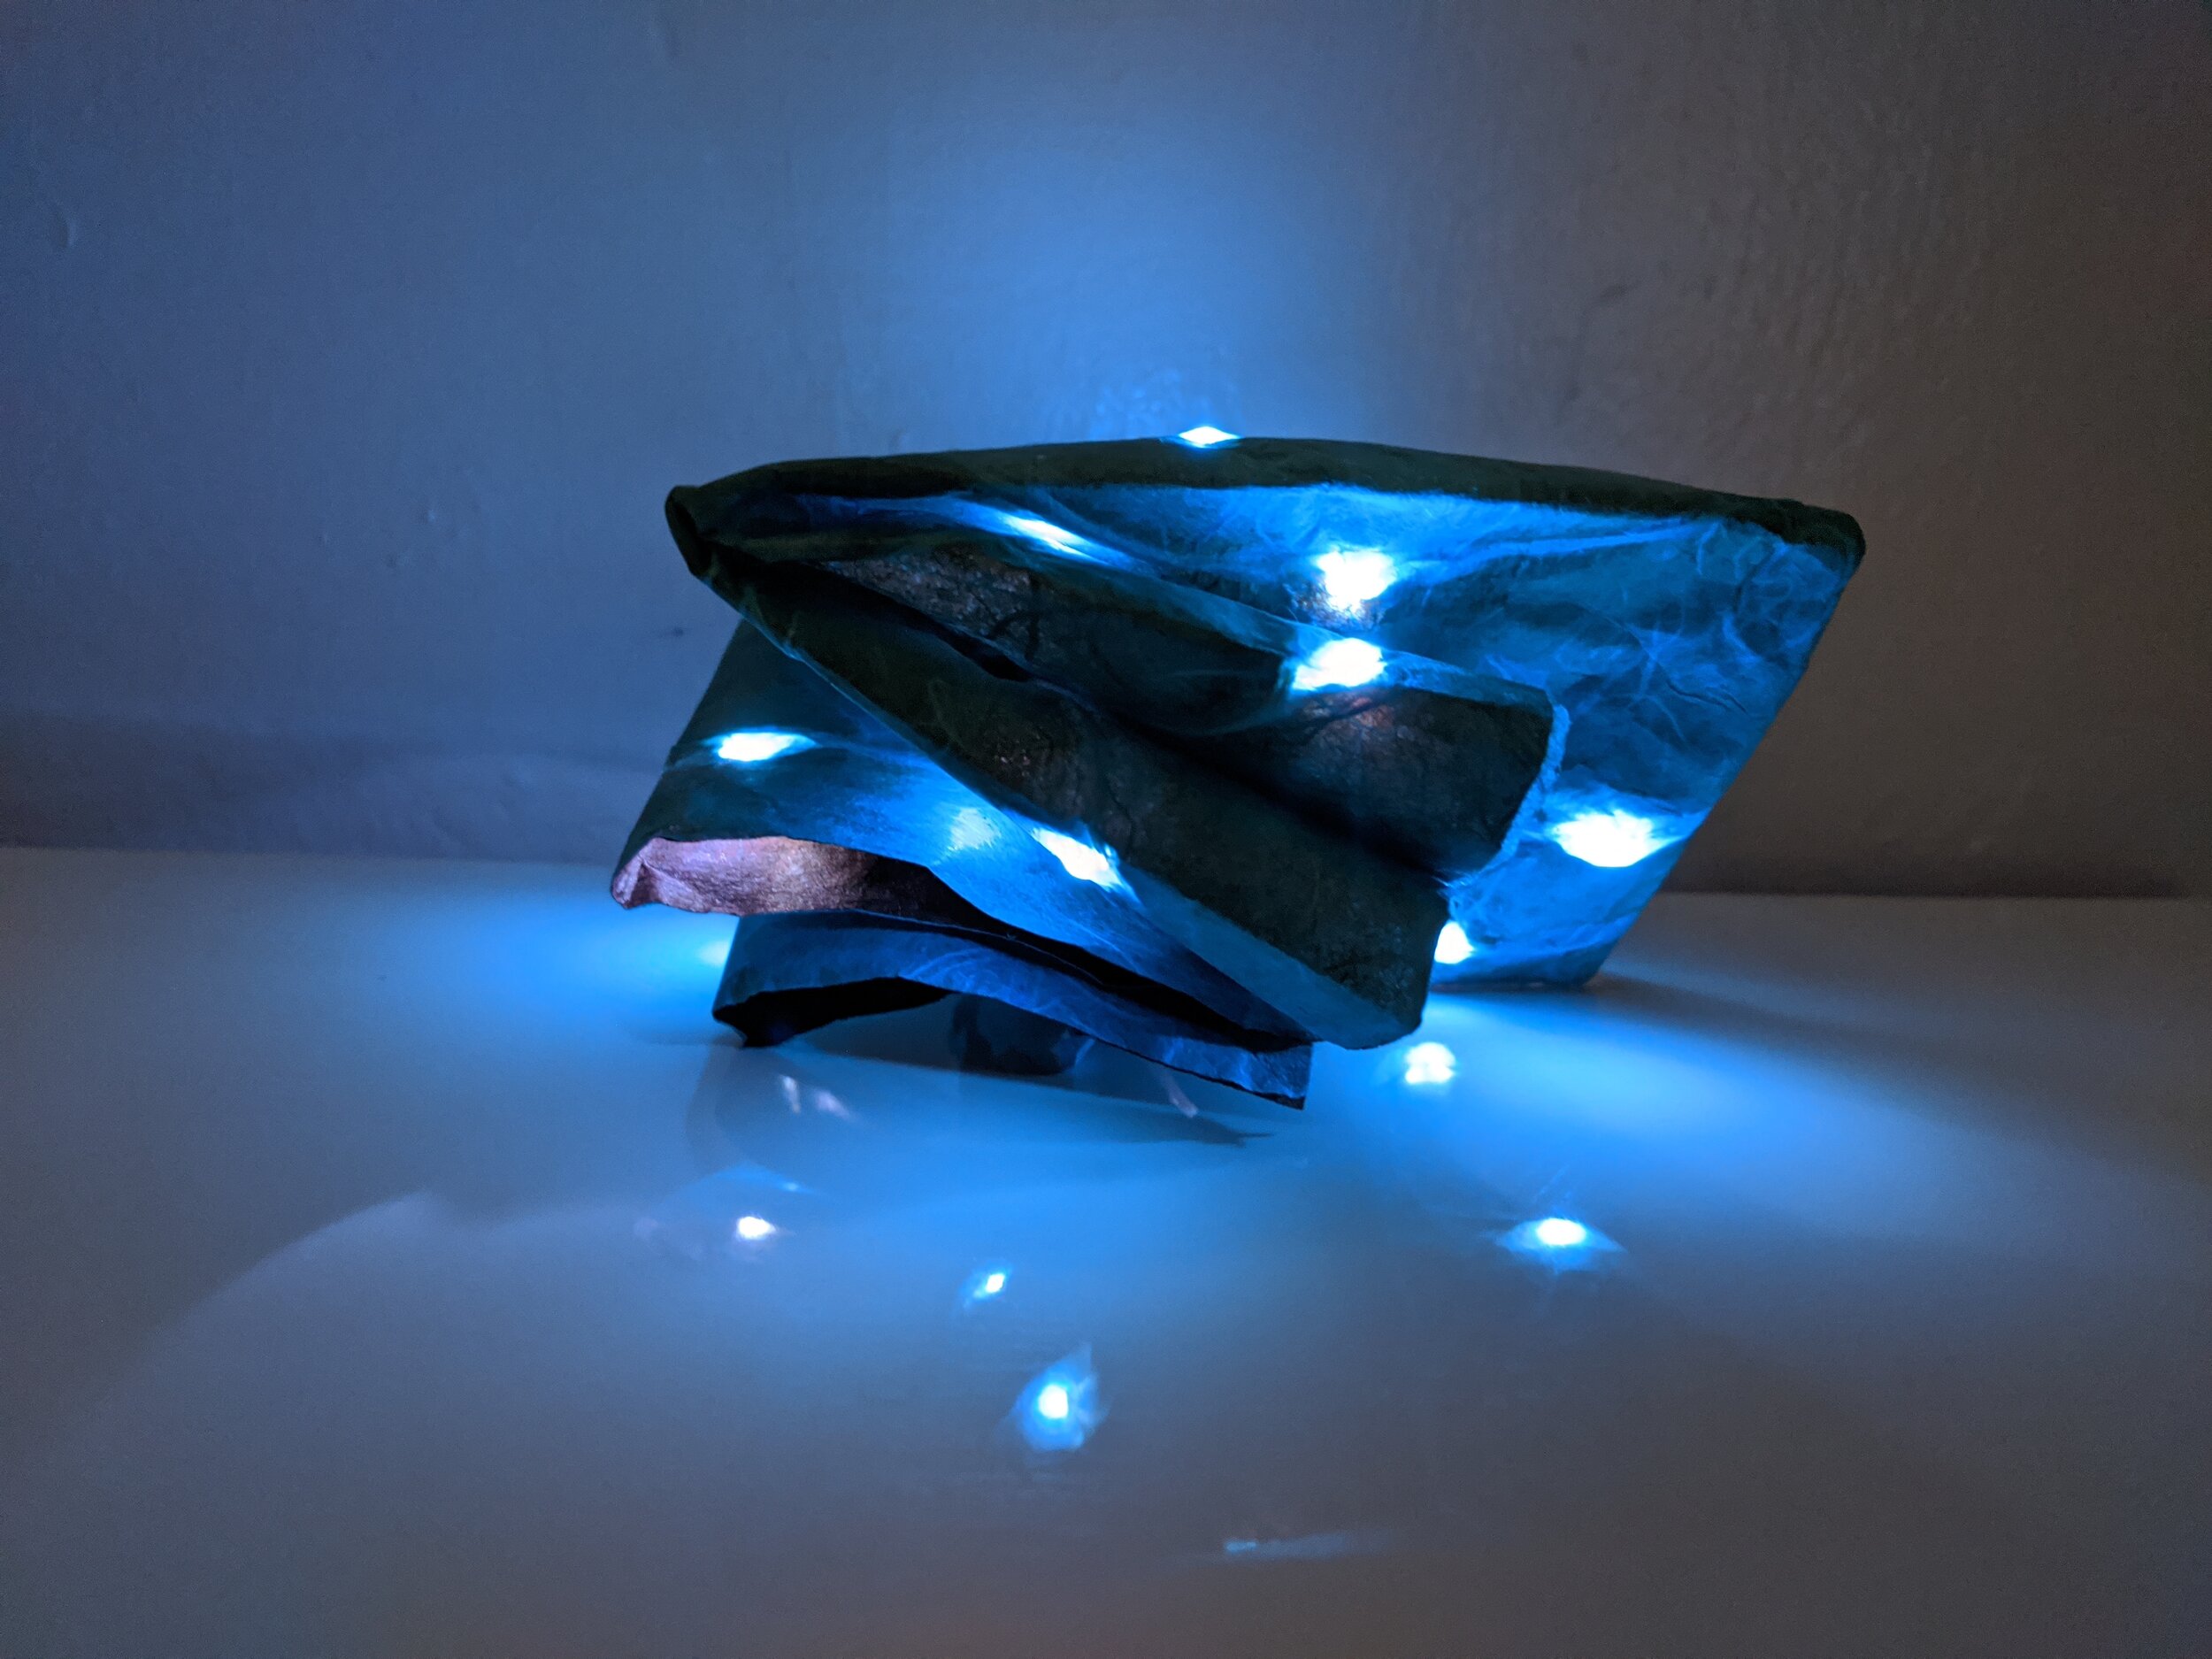
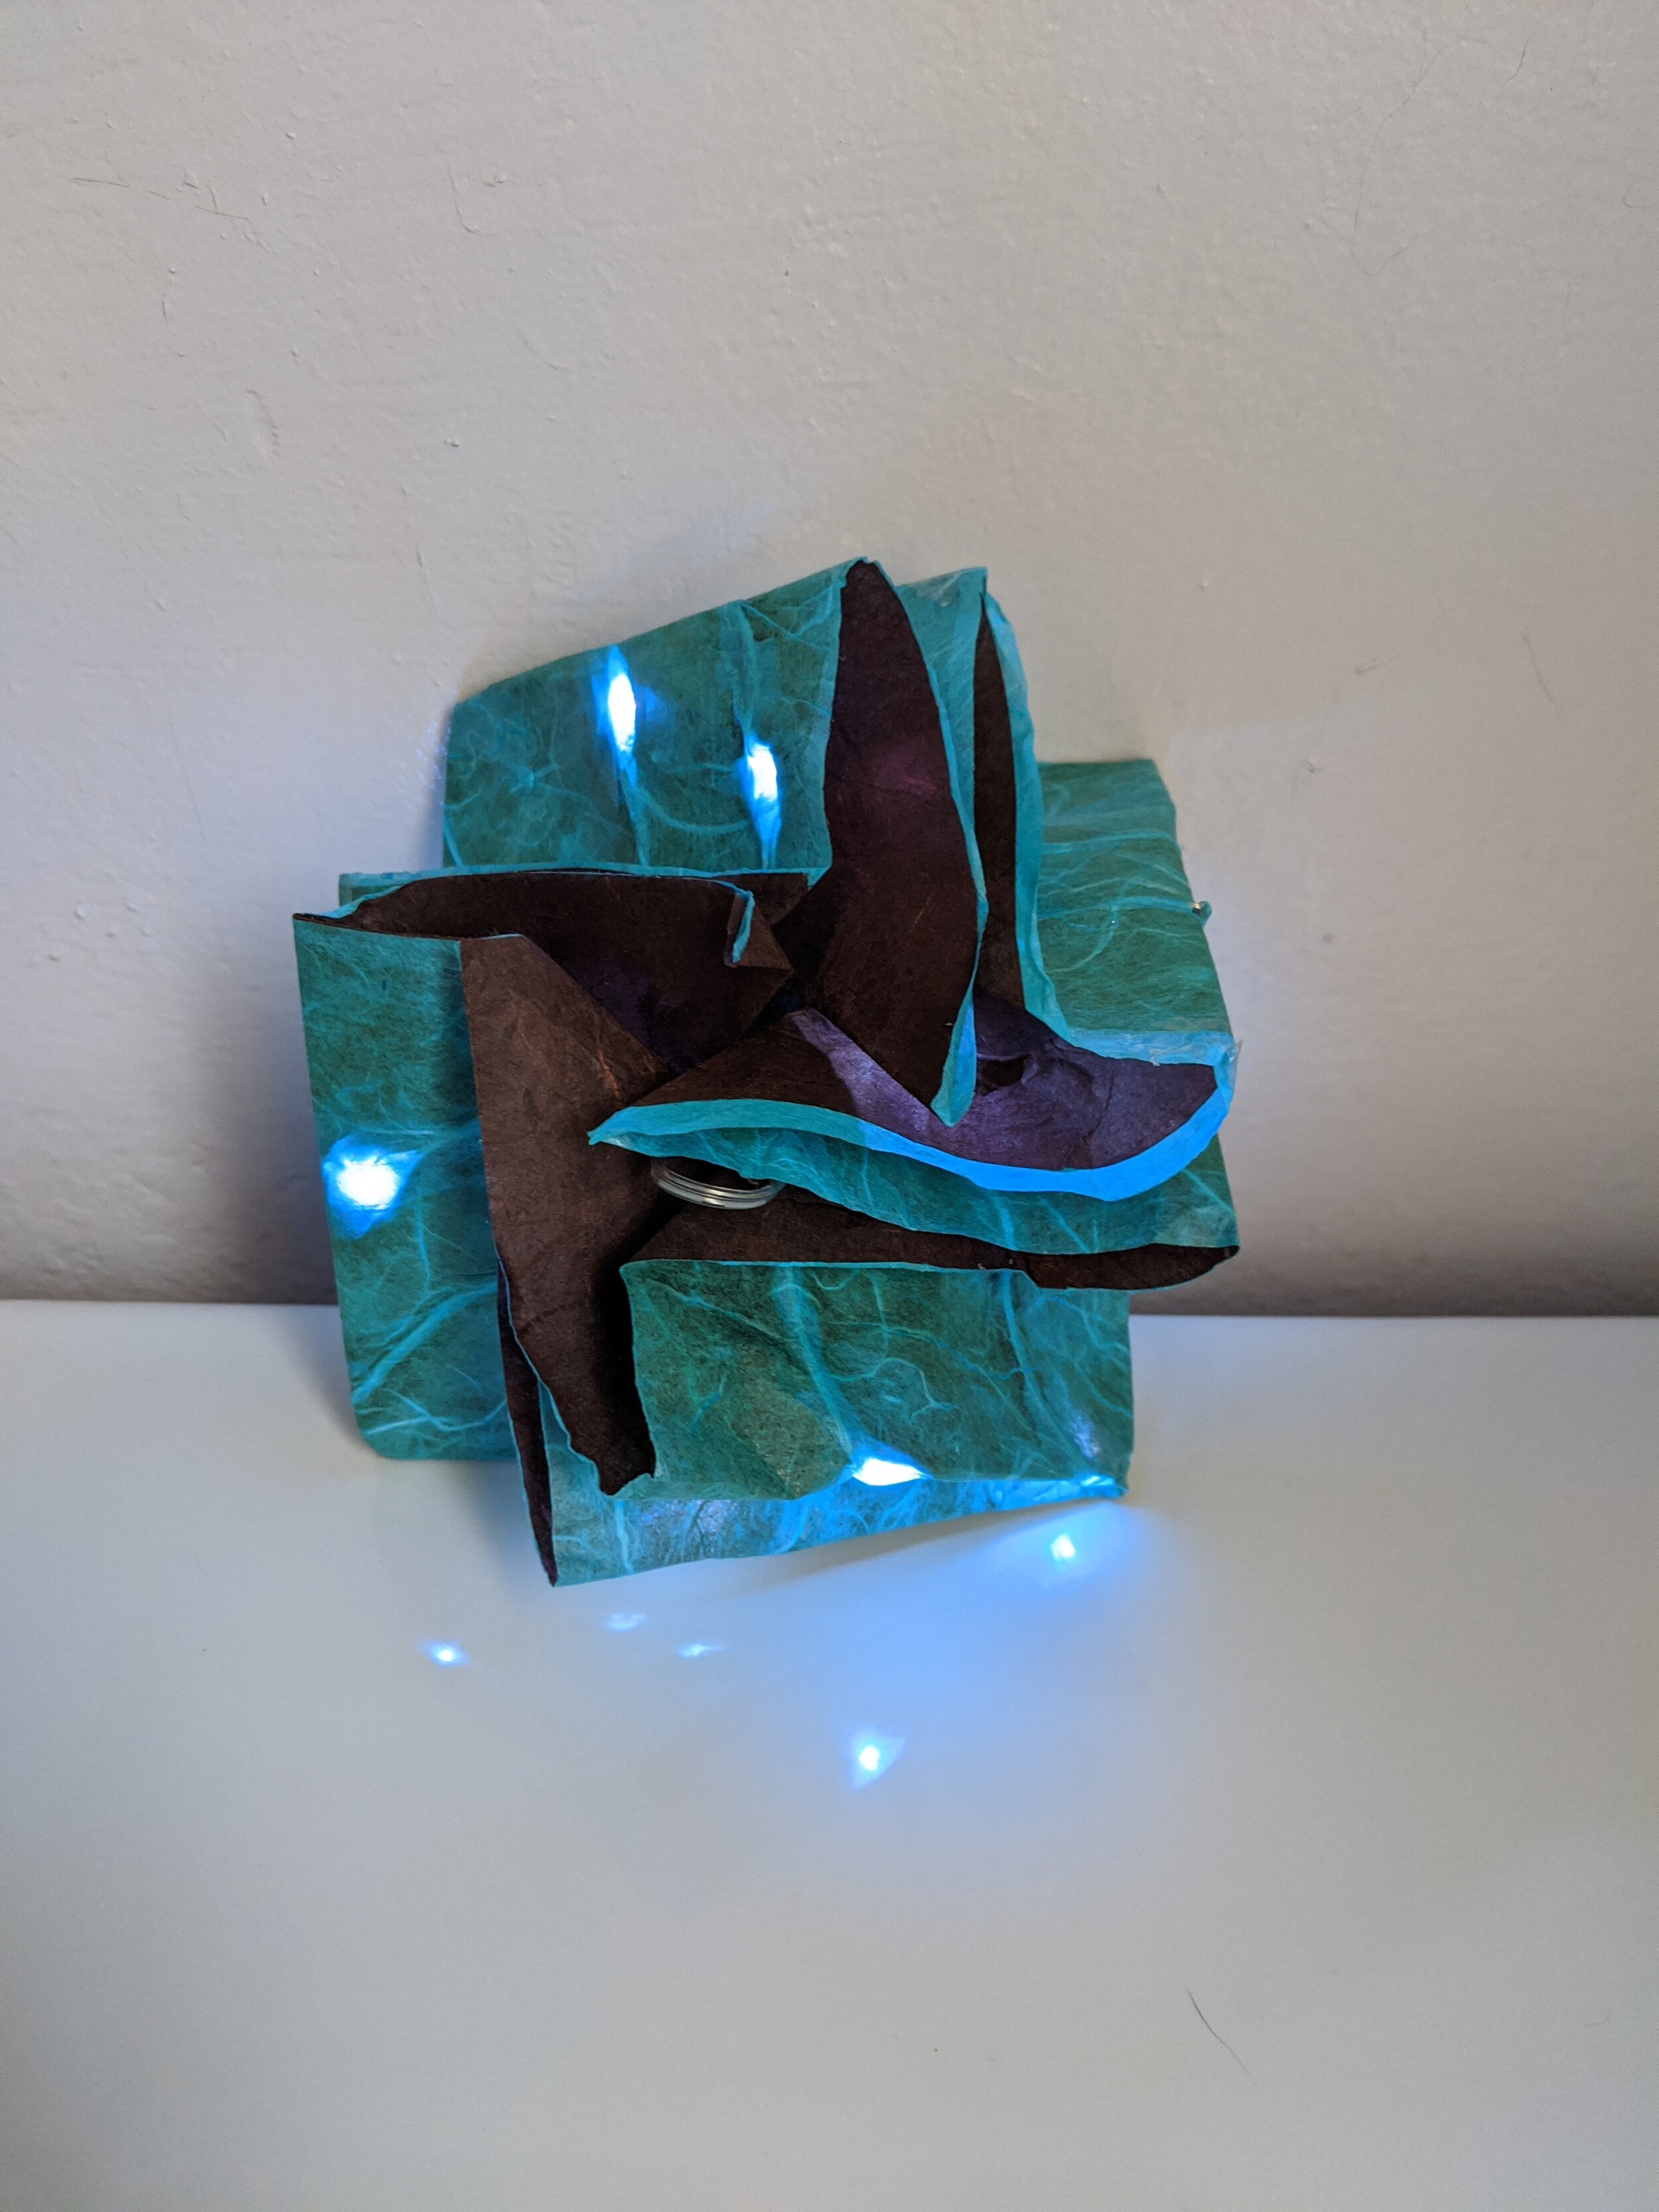
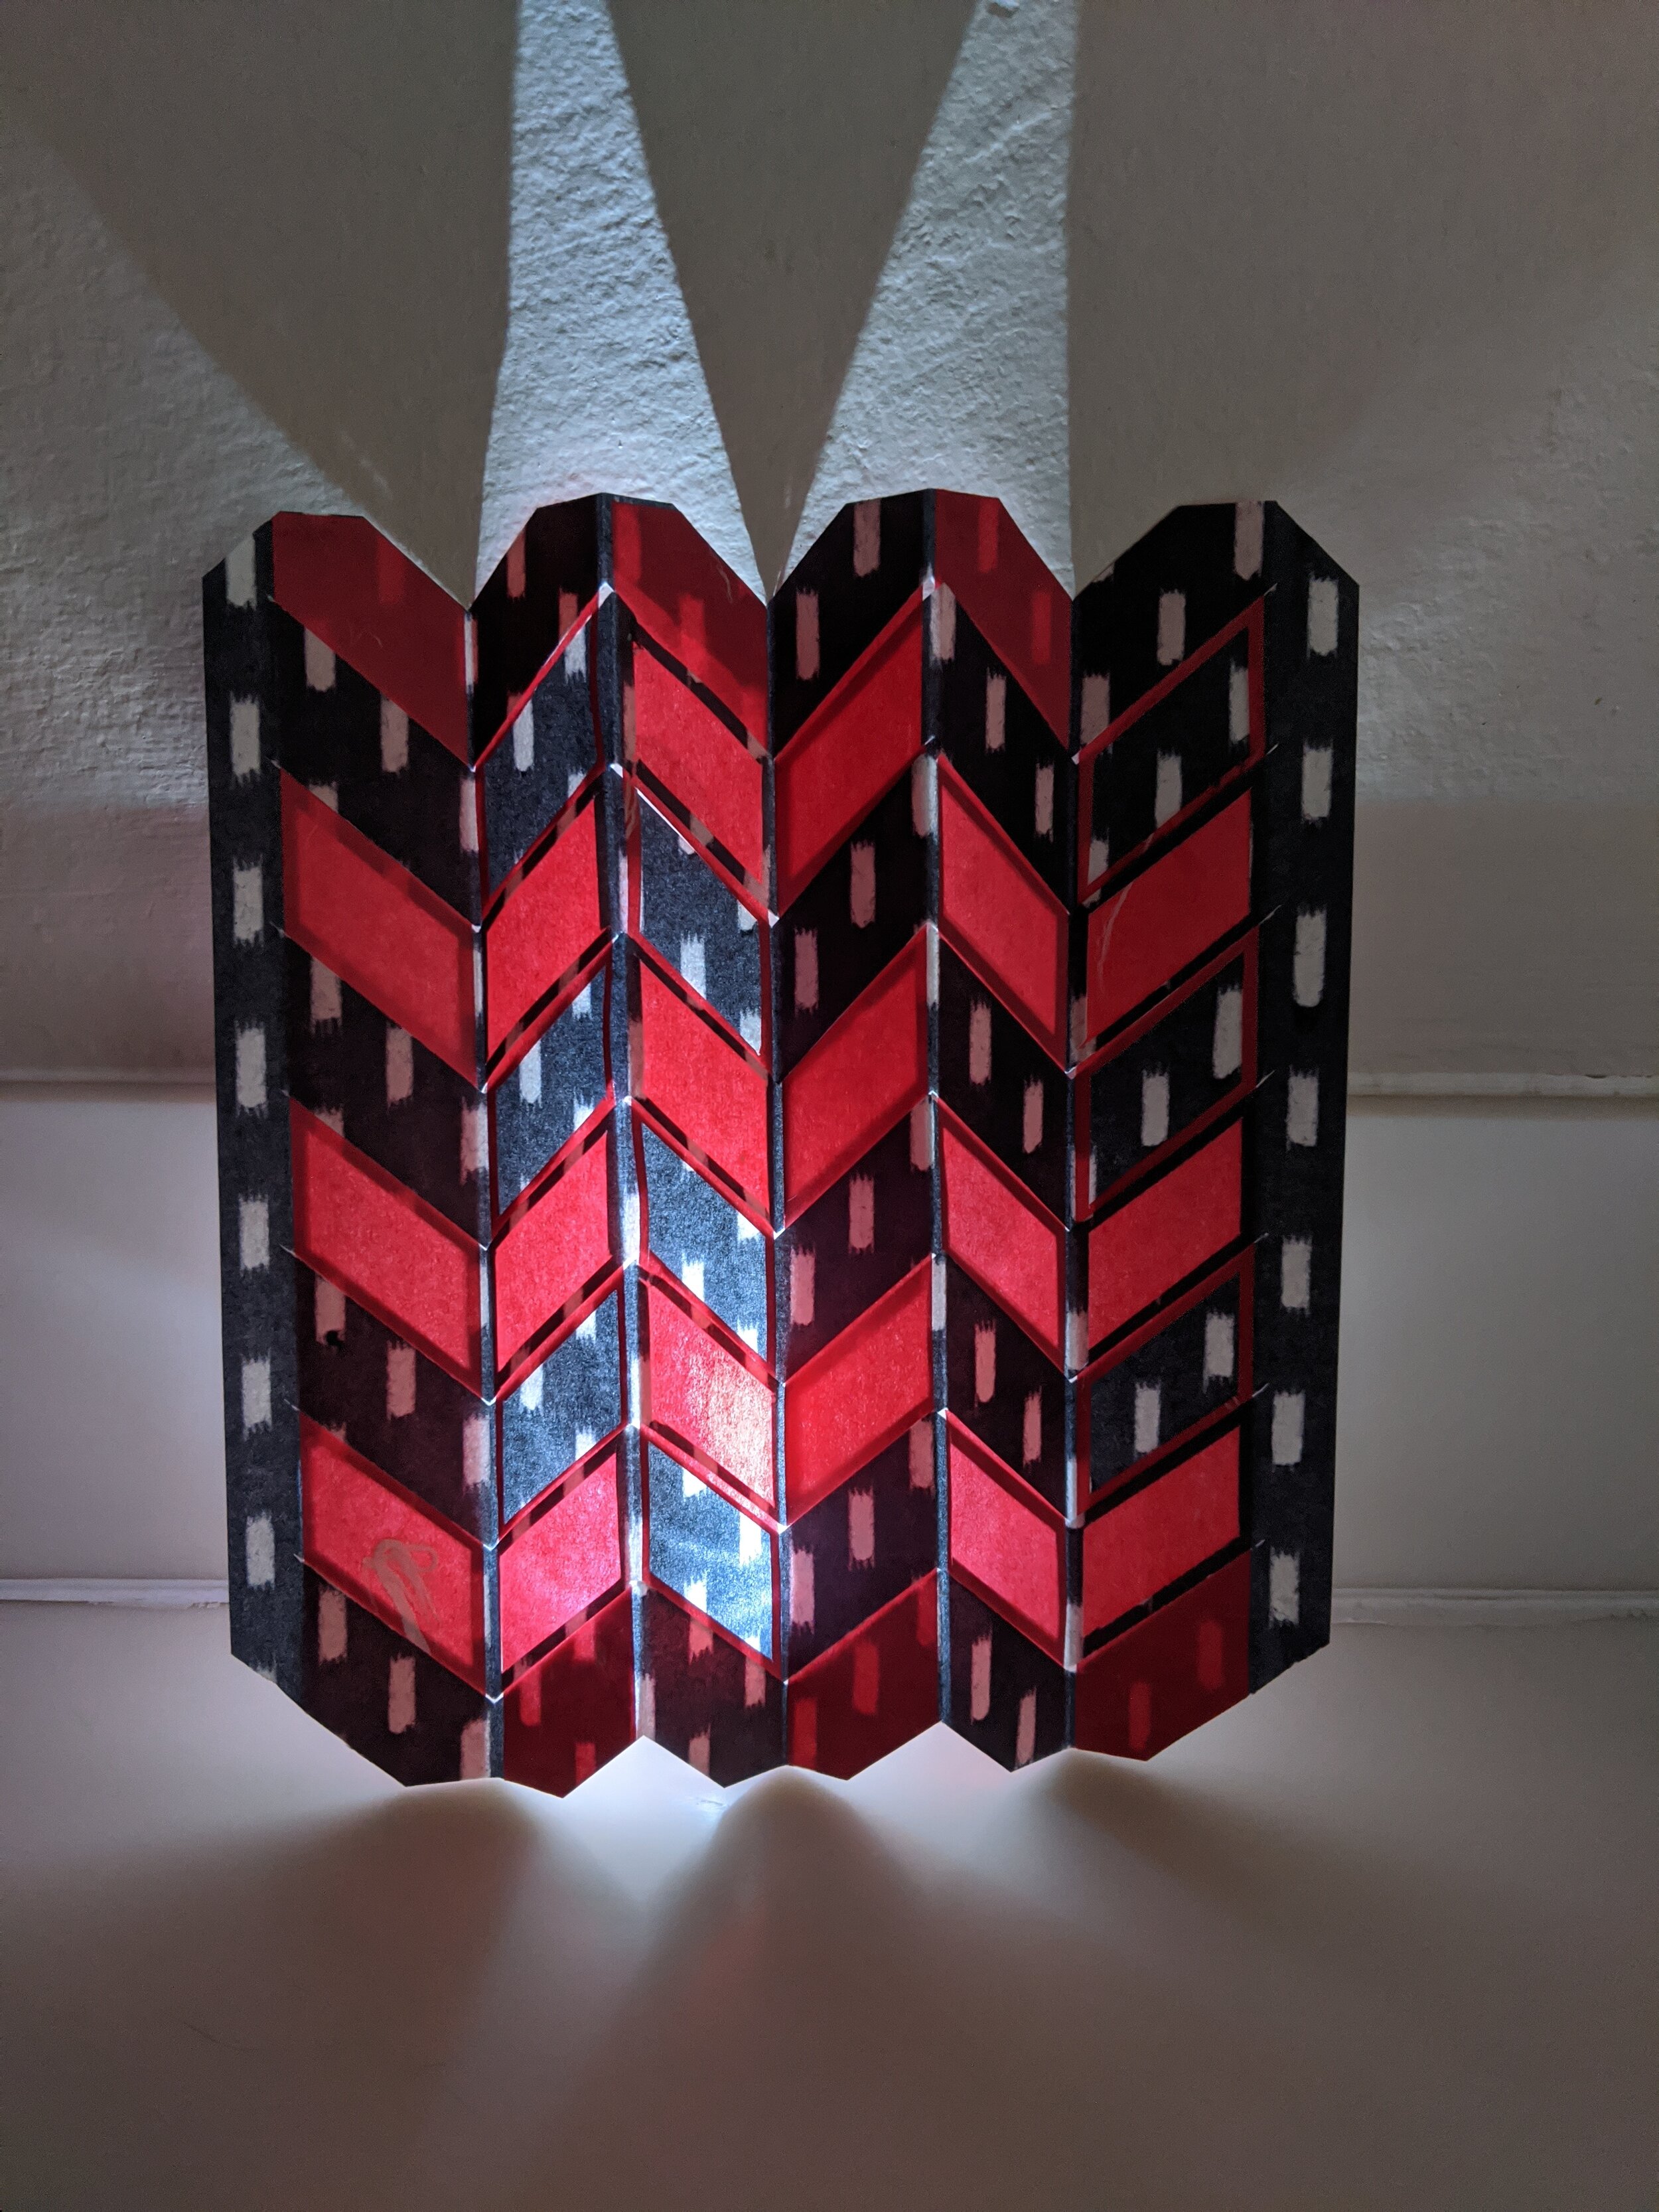
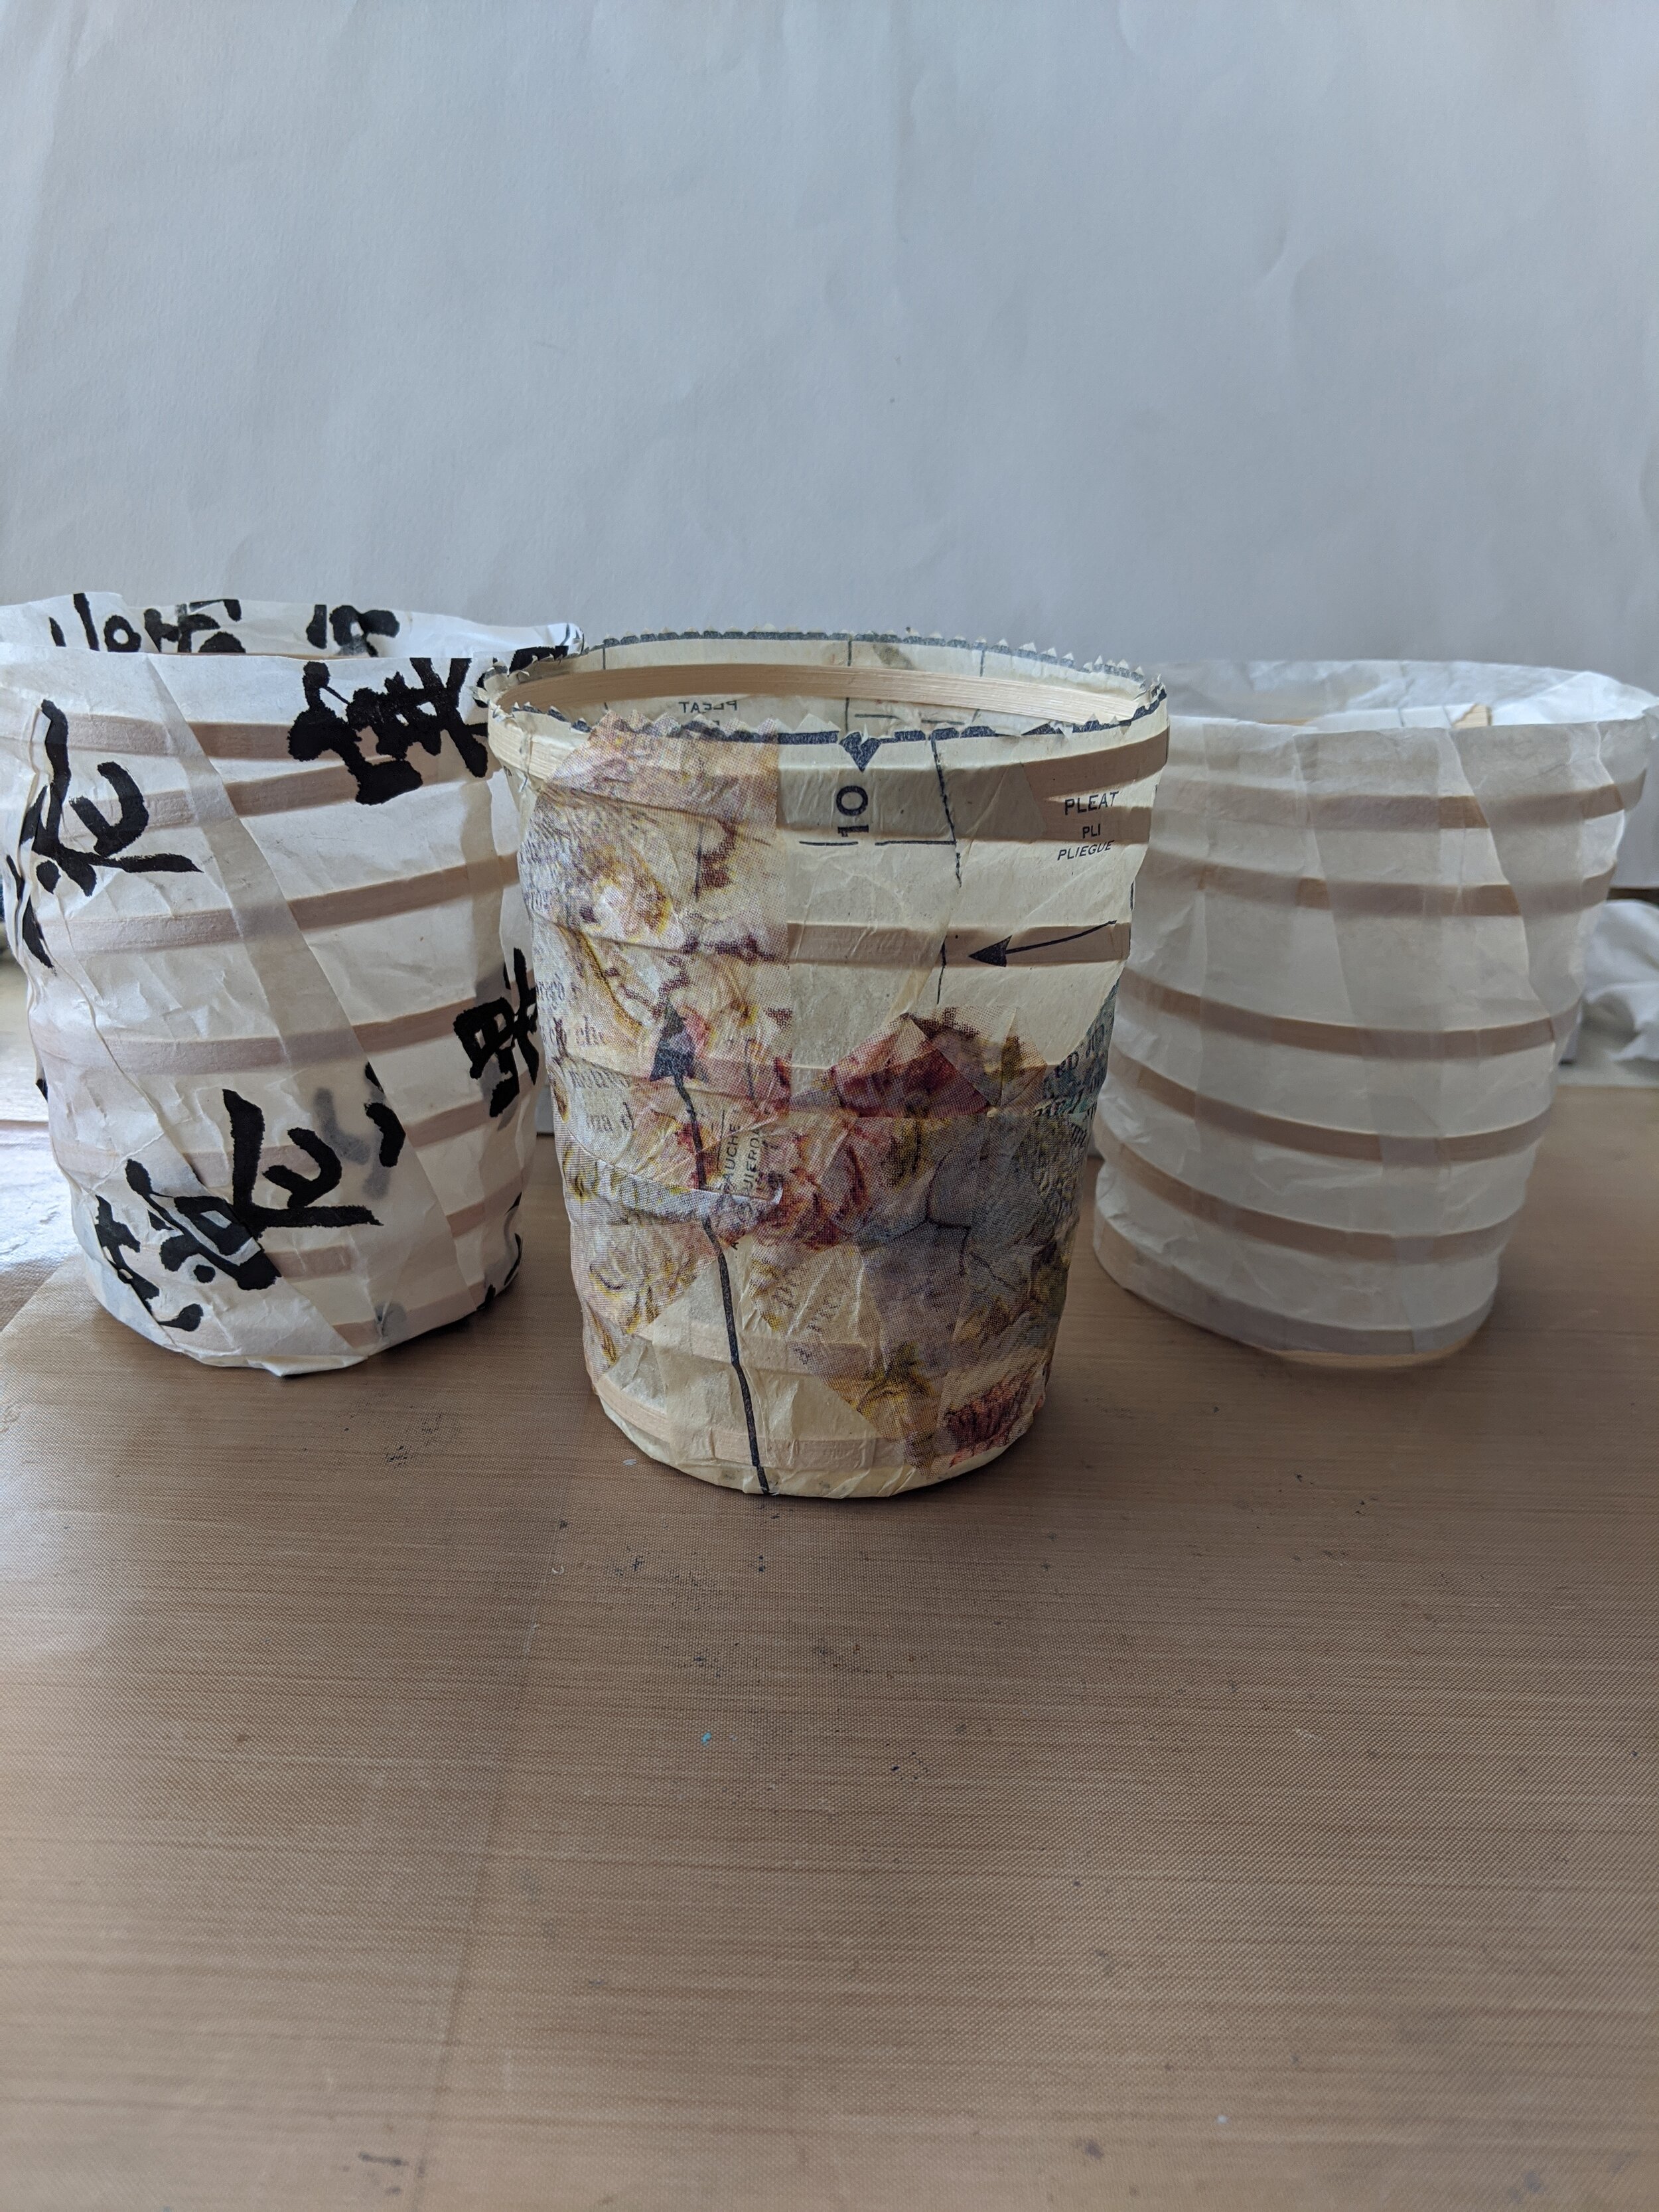
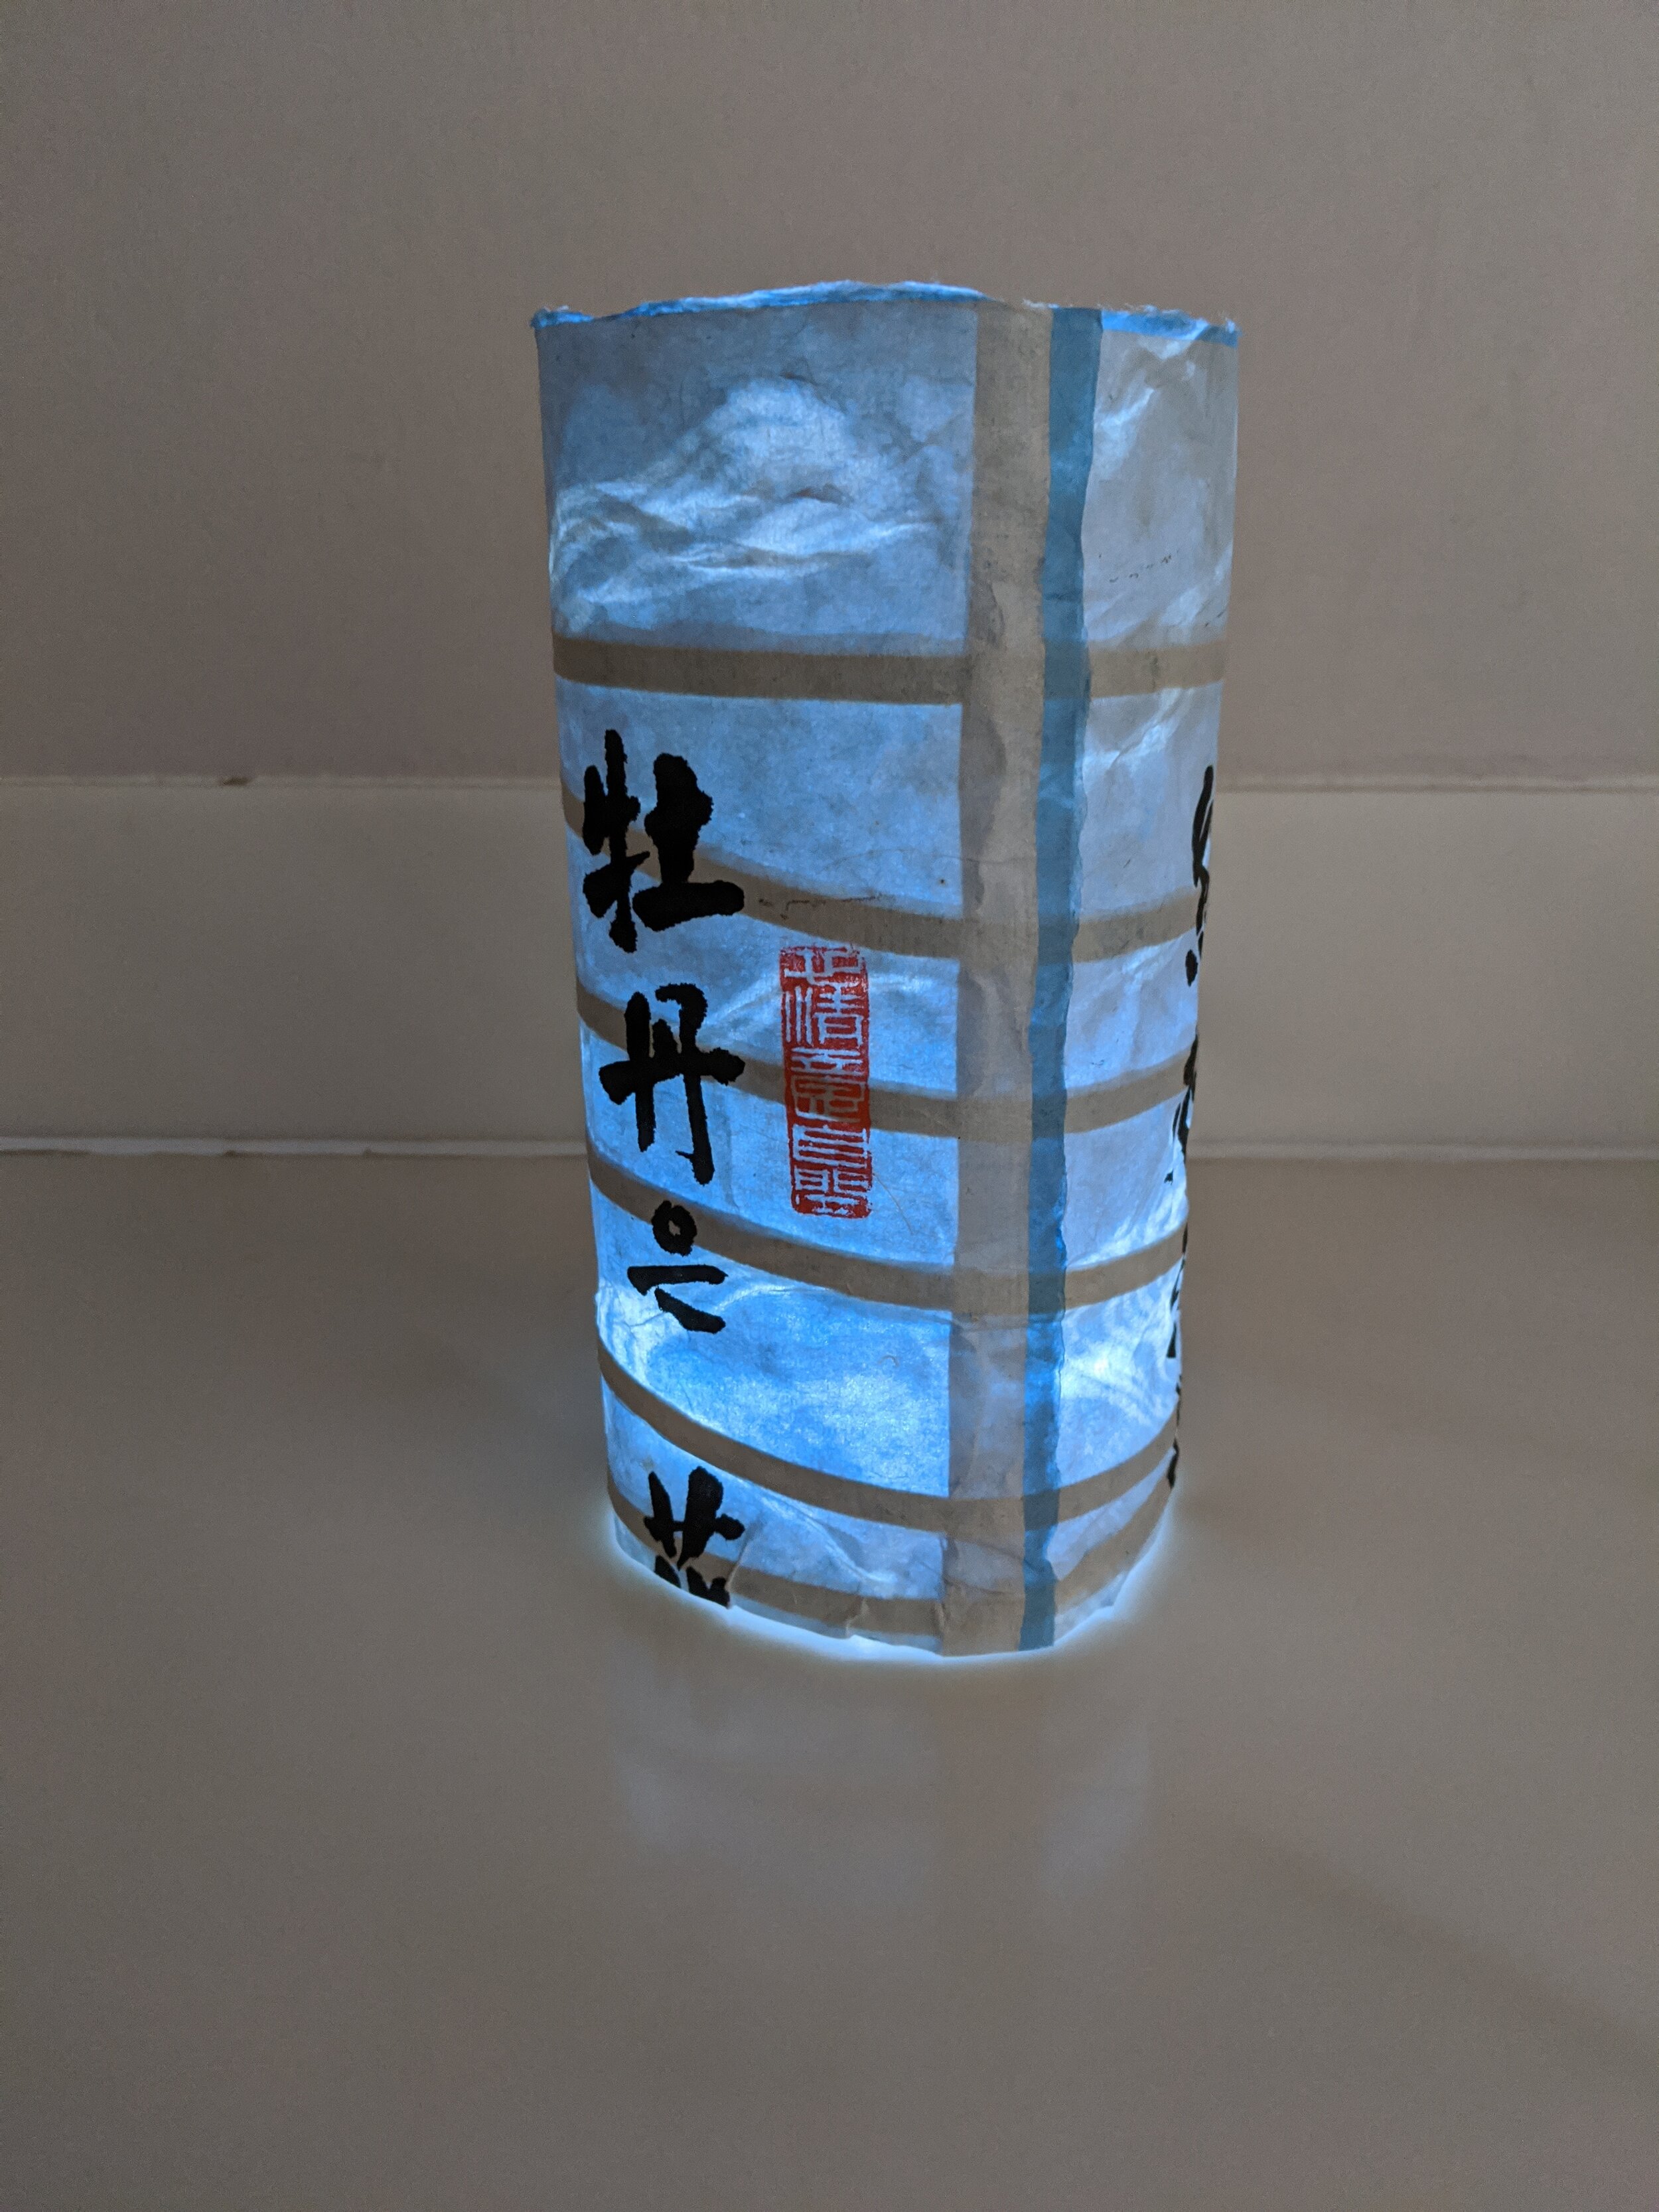
Today I got out some nice papers to fold into box tops to go with the white cardstock bottoms I folded yesterday. The red paper is a good quality wrapping paper, the blue and white is thick handmade paper from Cave Paper and the map is thin paper from an old atlas. The Cave Paper was perhaps a bit too thick, but it looks lovely. The thick papers require glue on each triangle section bounded by the mountain and valley folds in the diagram. The atlas paper only needed to be glued on the smallest sections before I tucked them behind the long side where the shell curls. I think it is a good idea to make the box bottoms from cardstock if you intend to put anything inside as the atlas paper is a bit light.

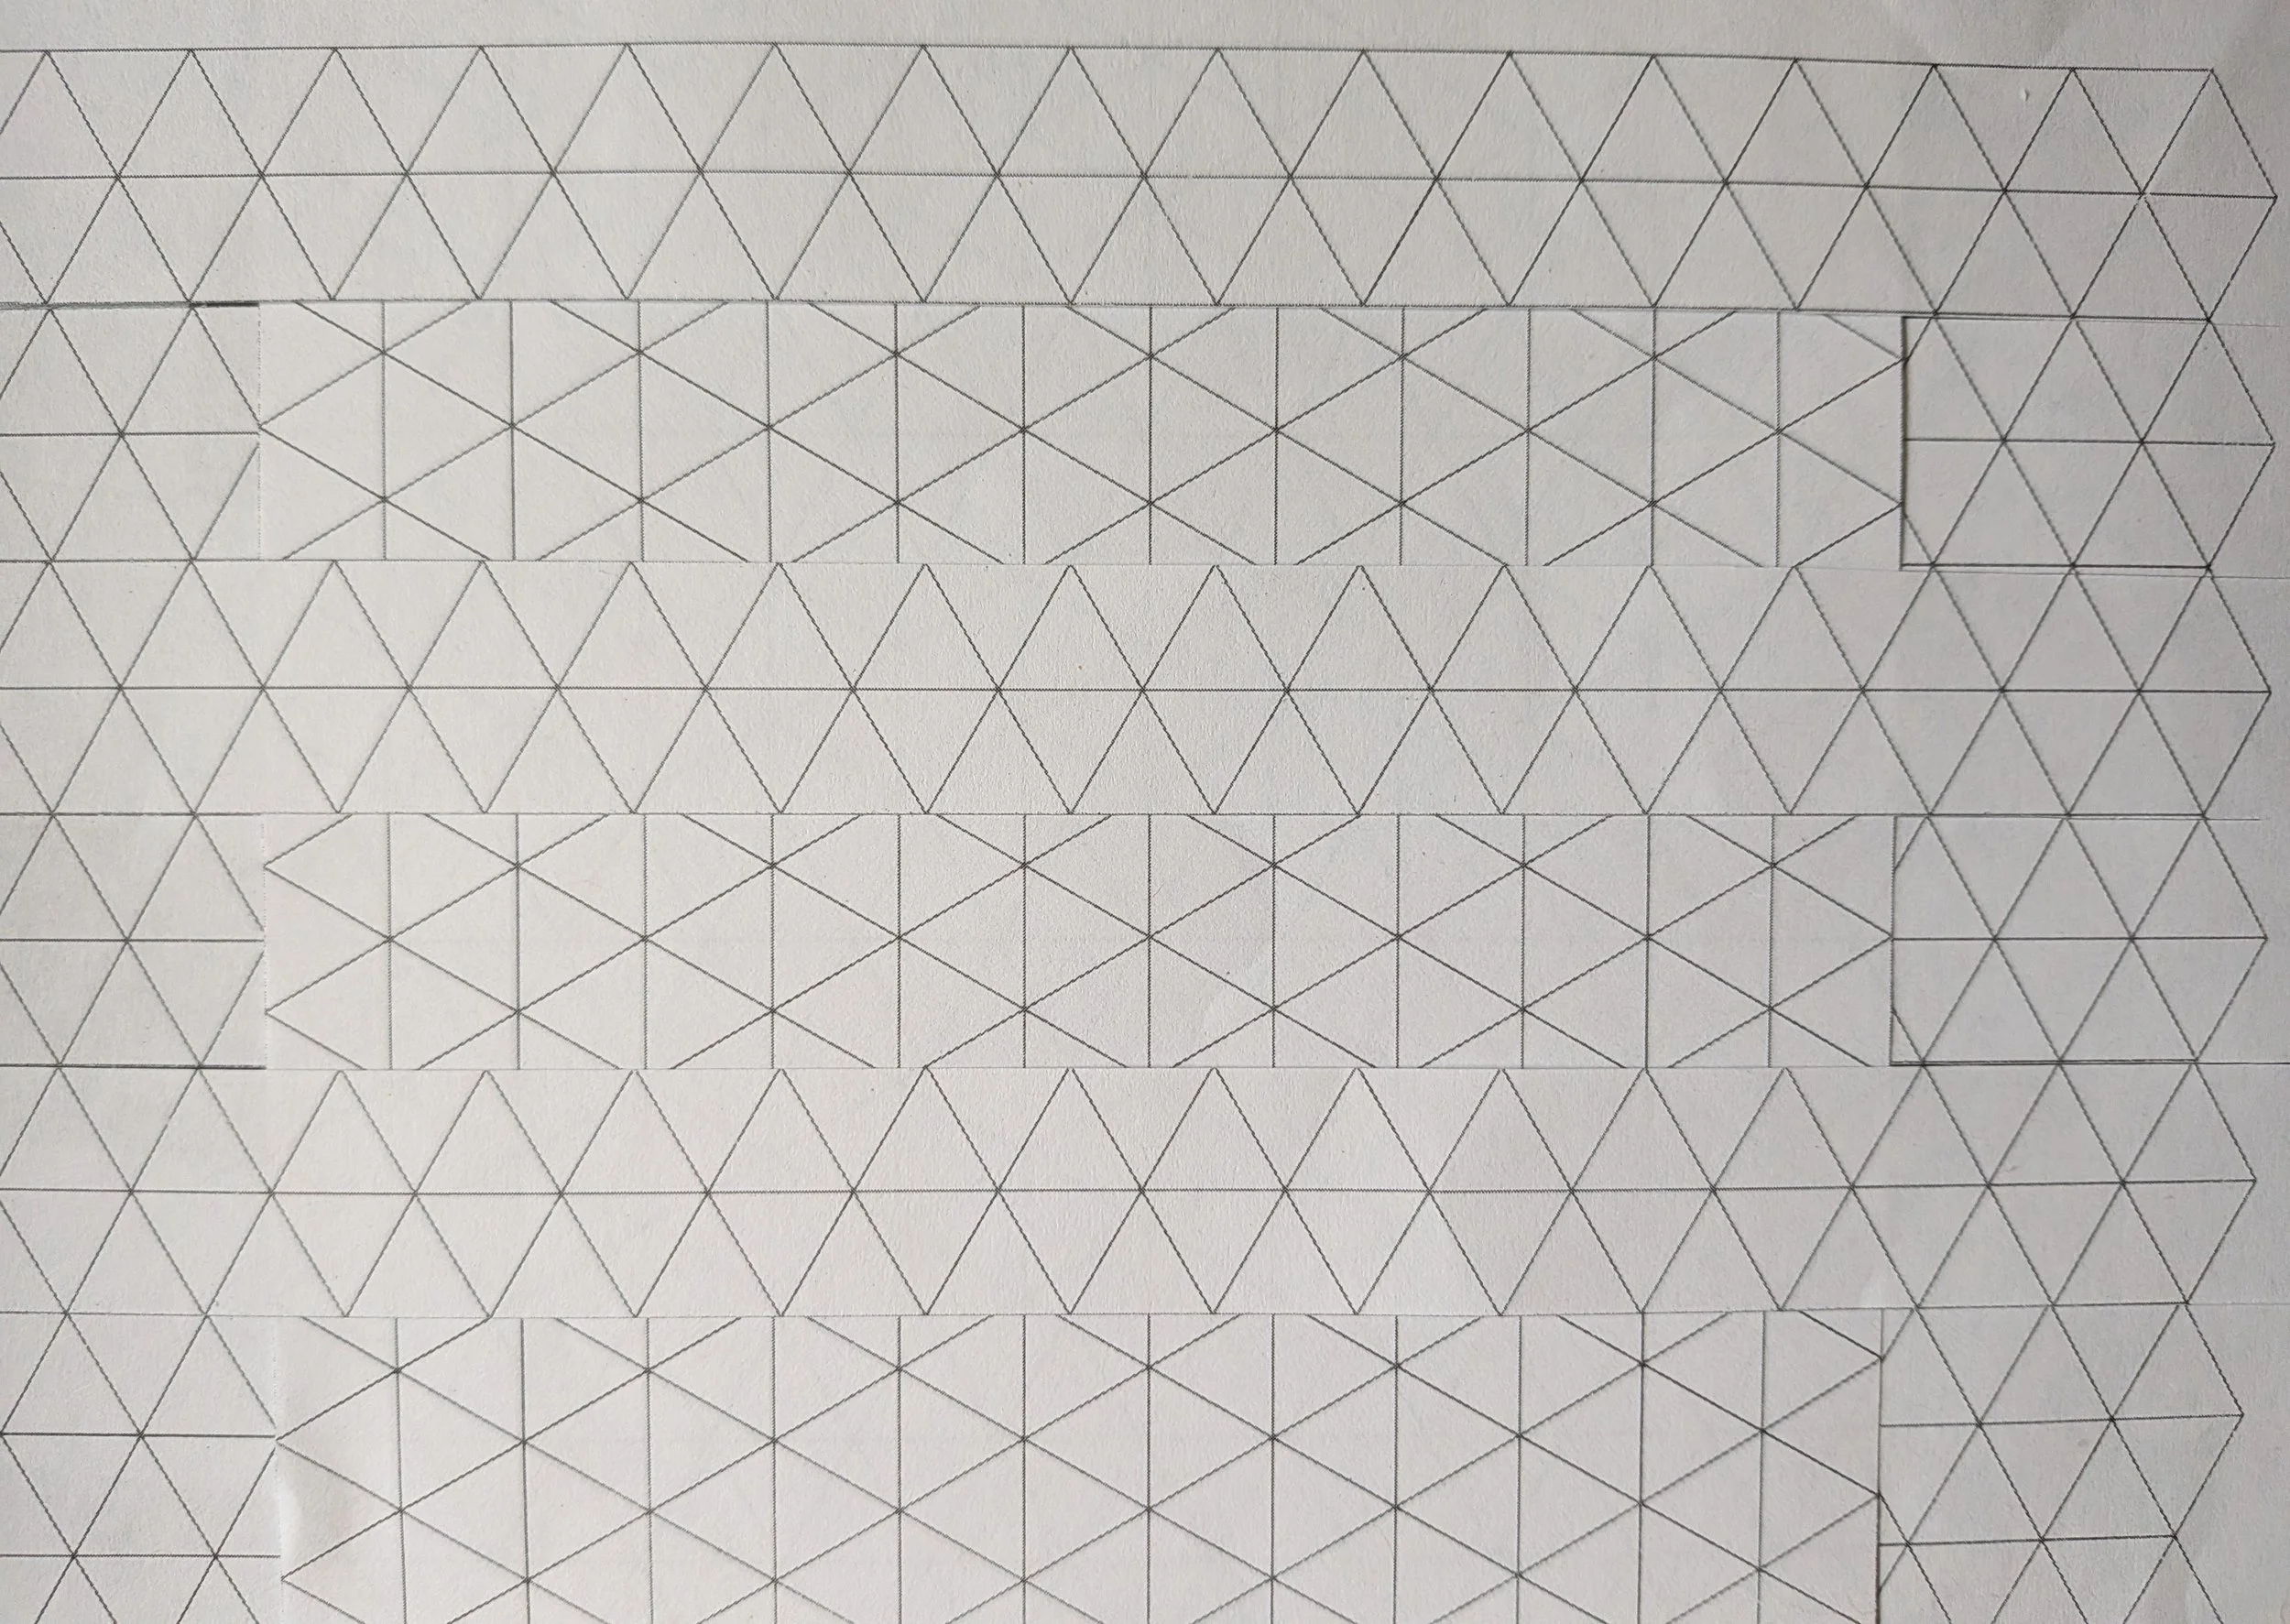
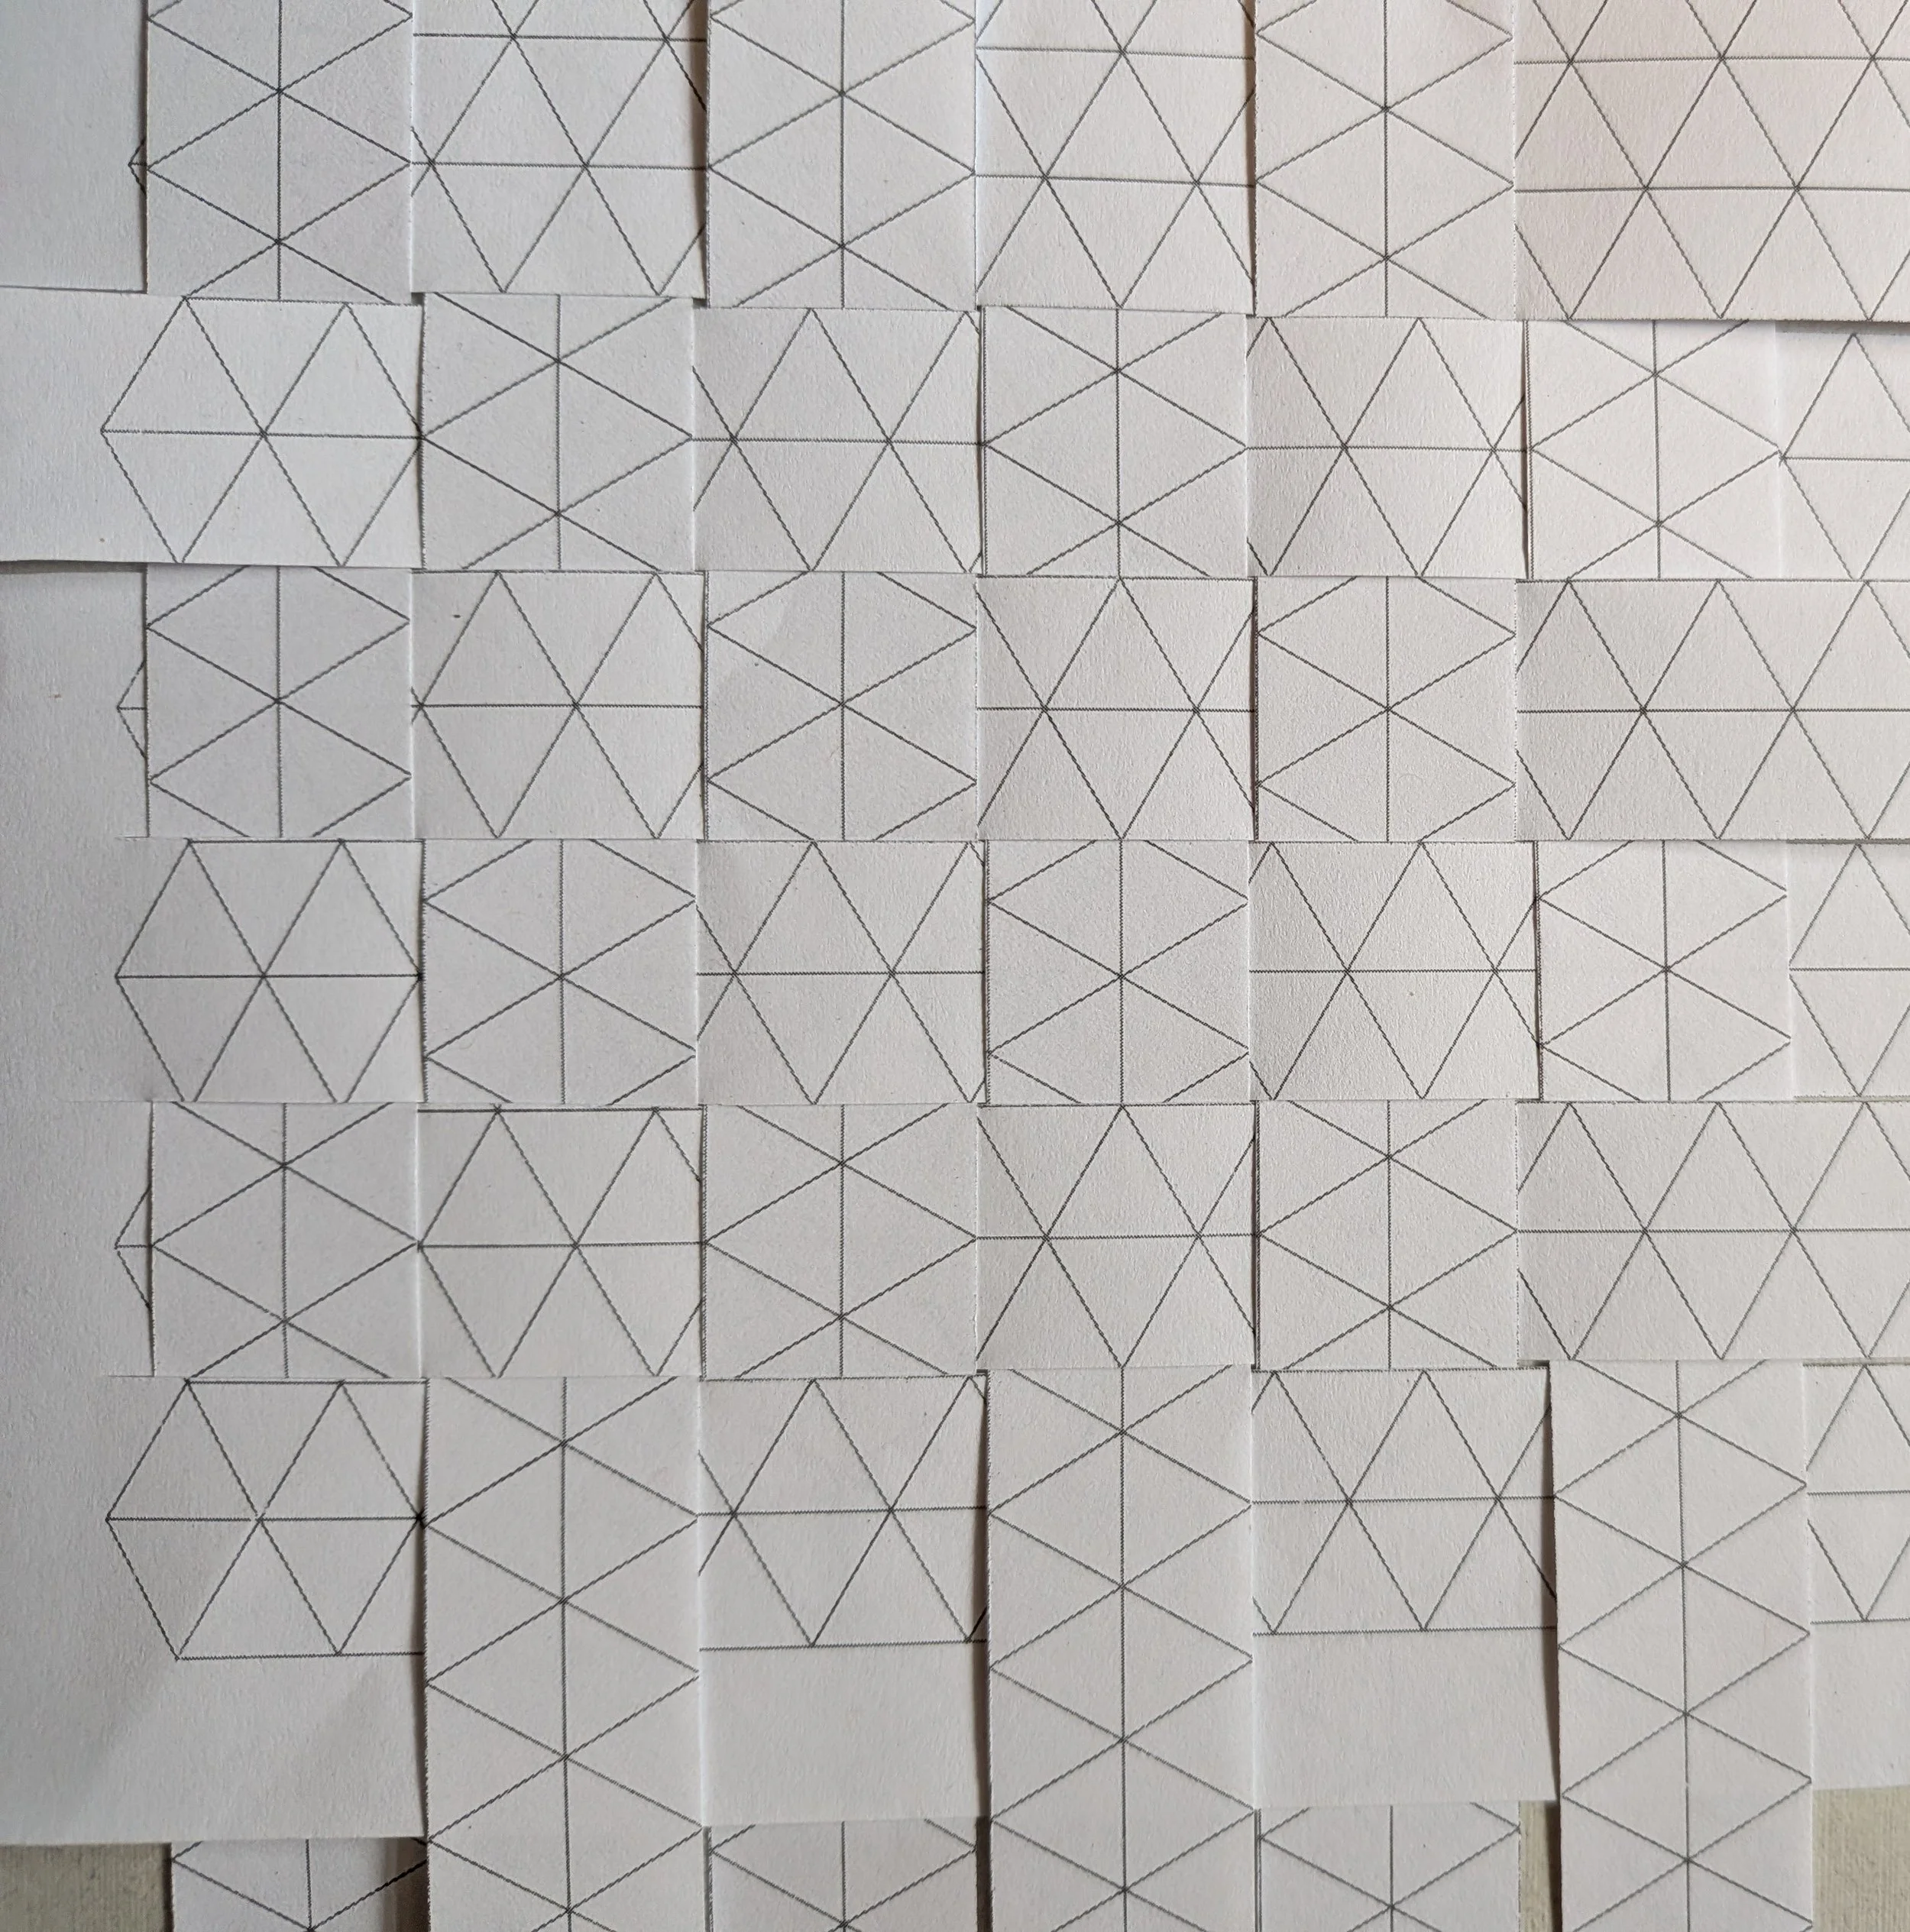
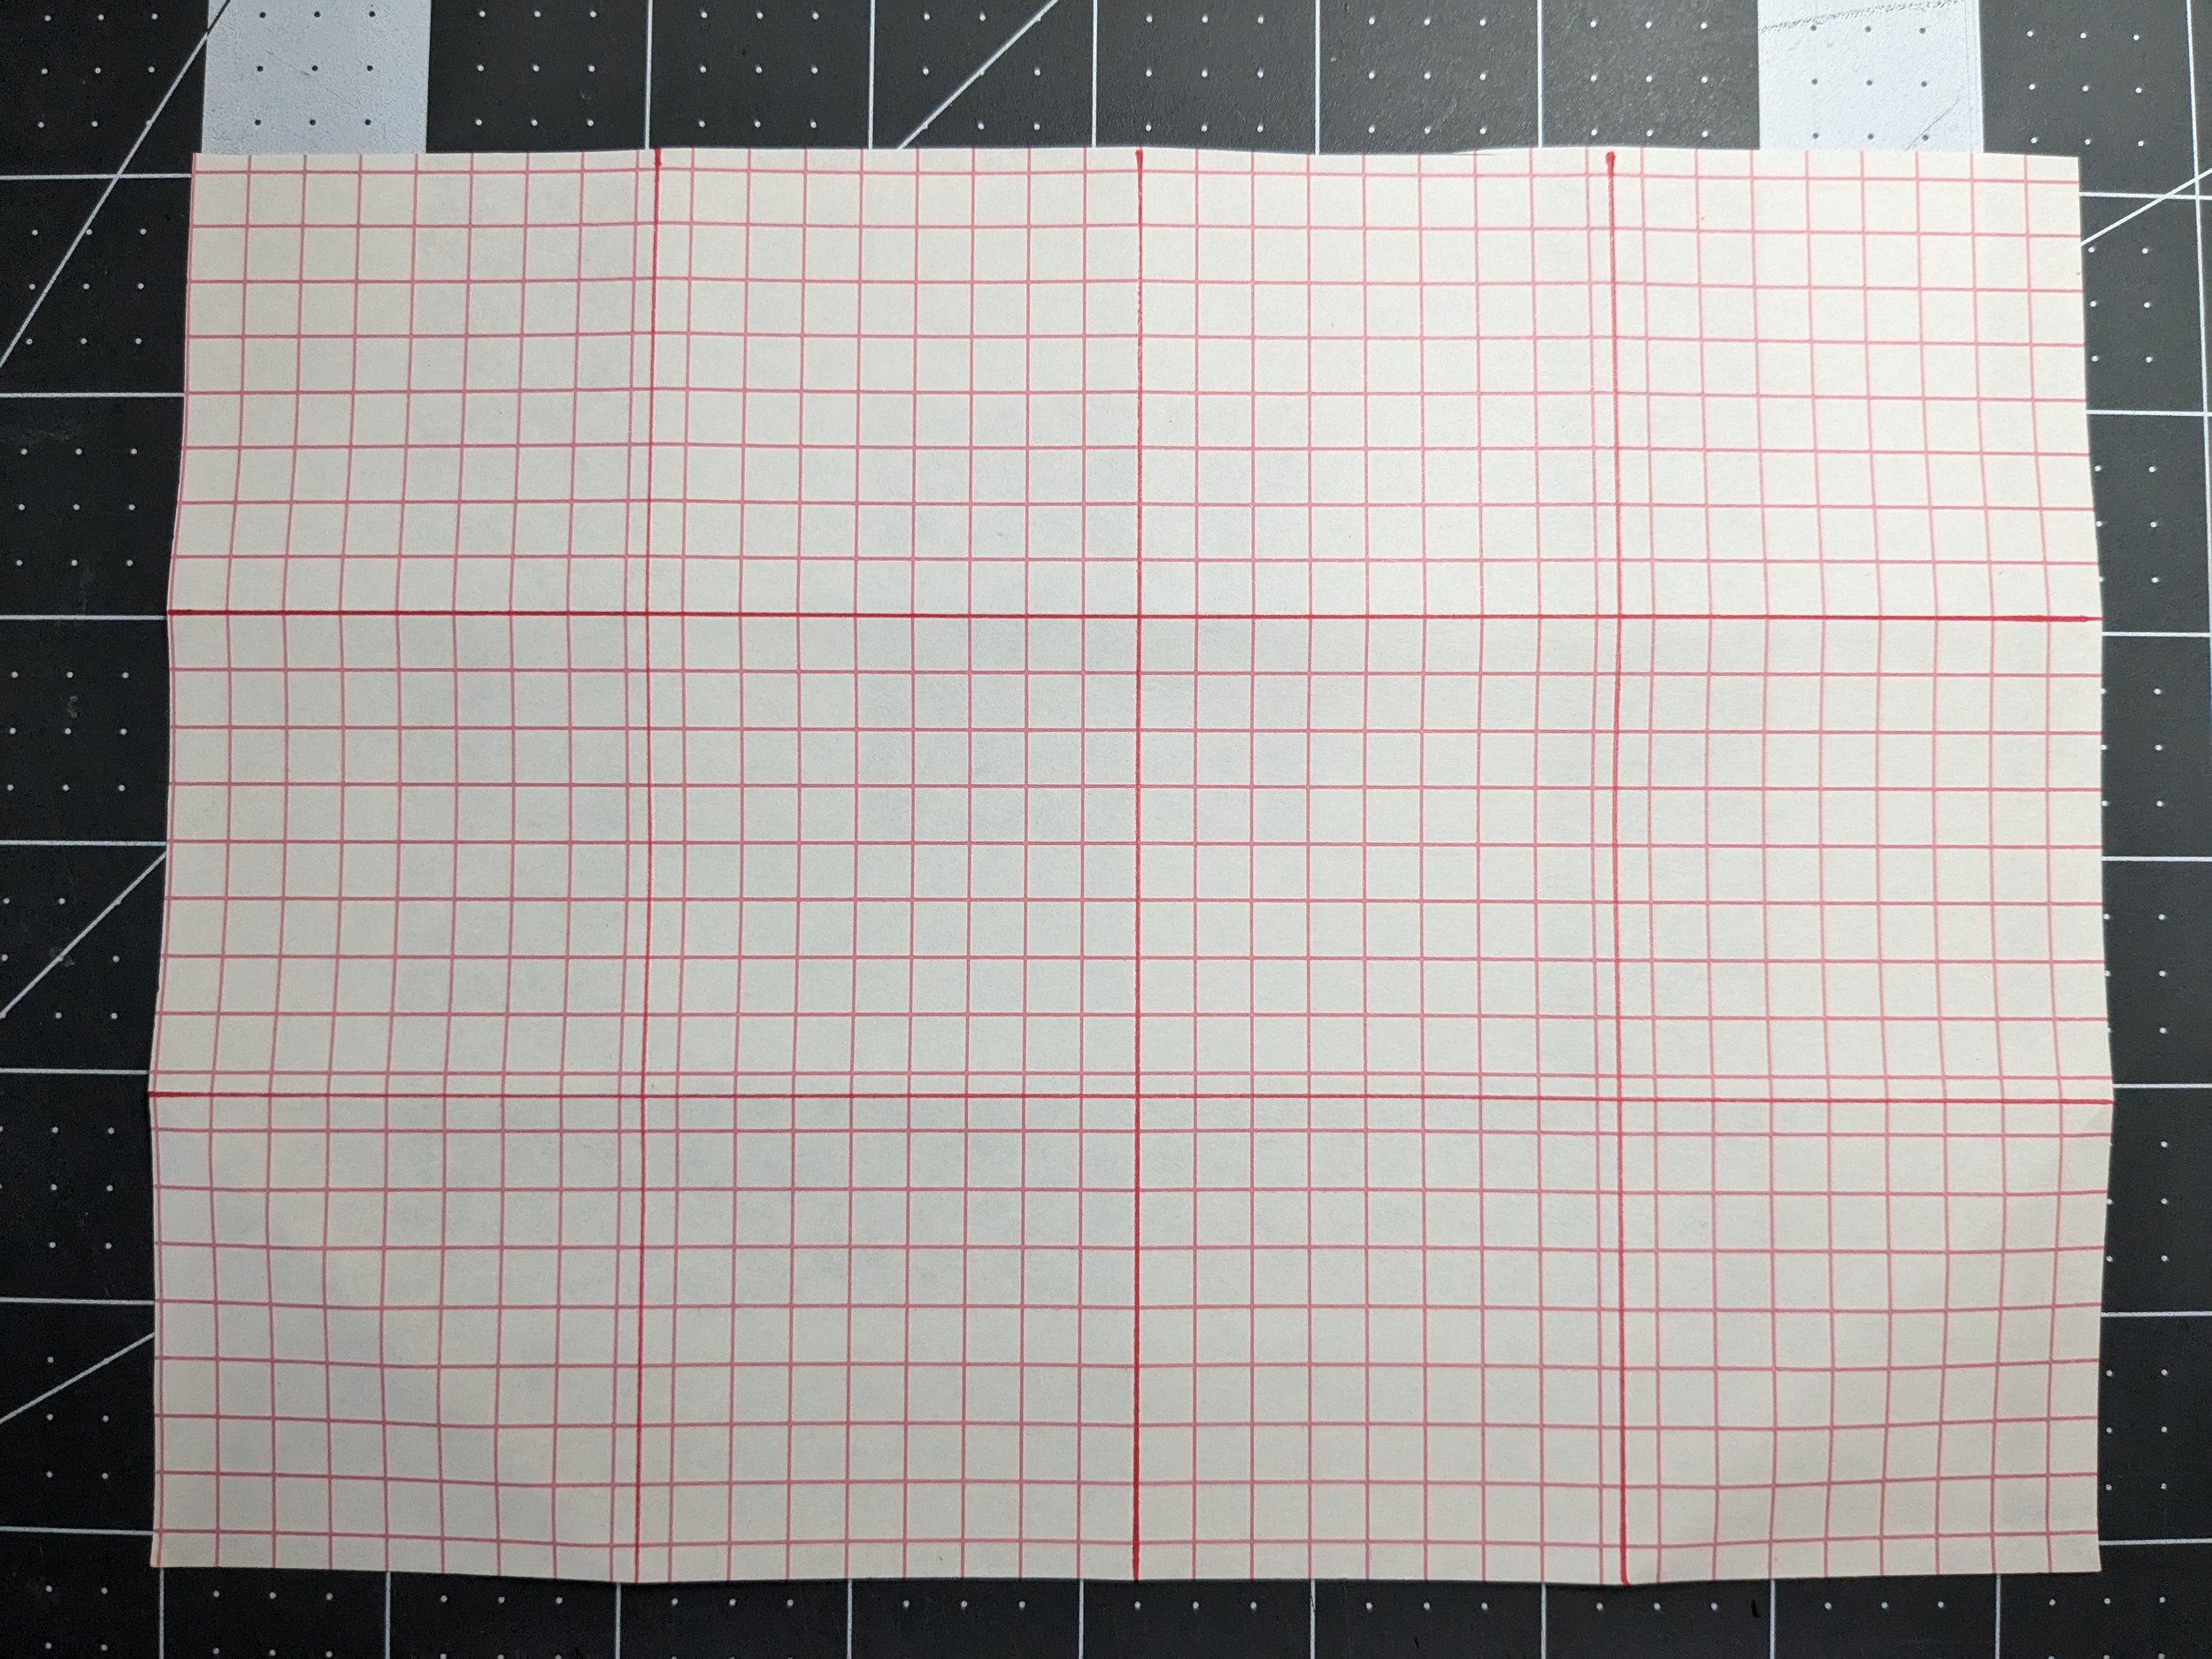
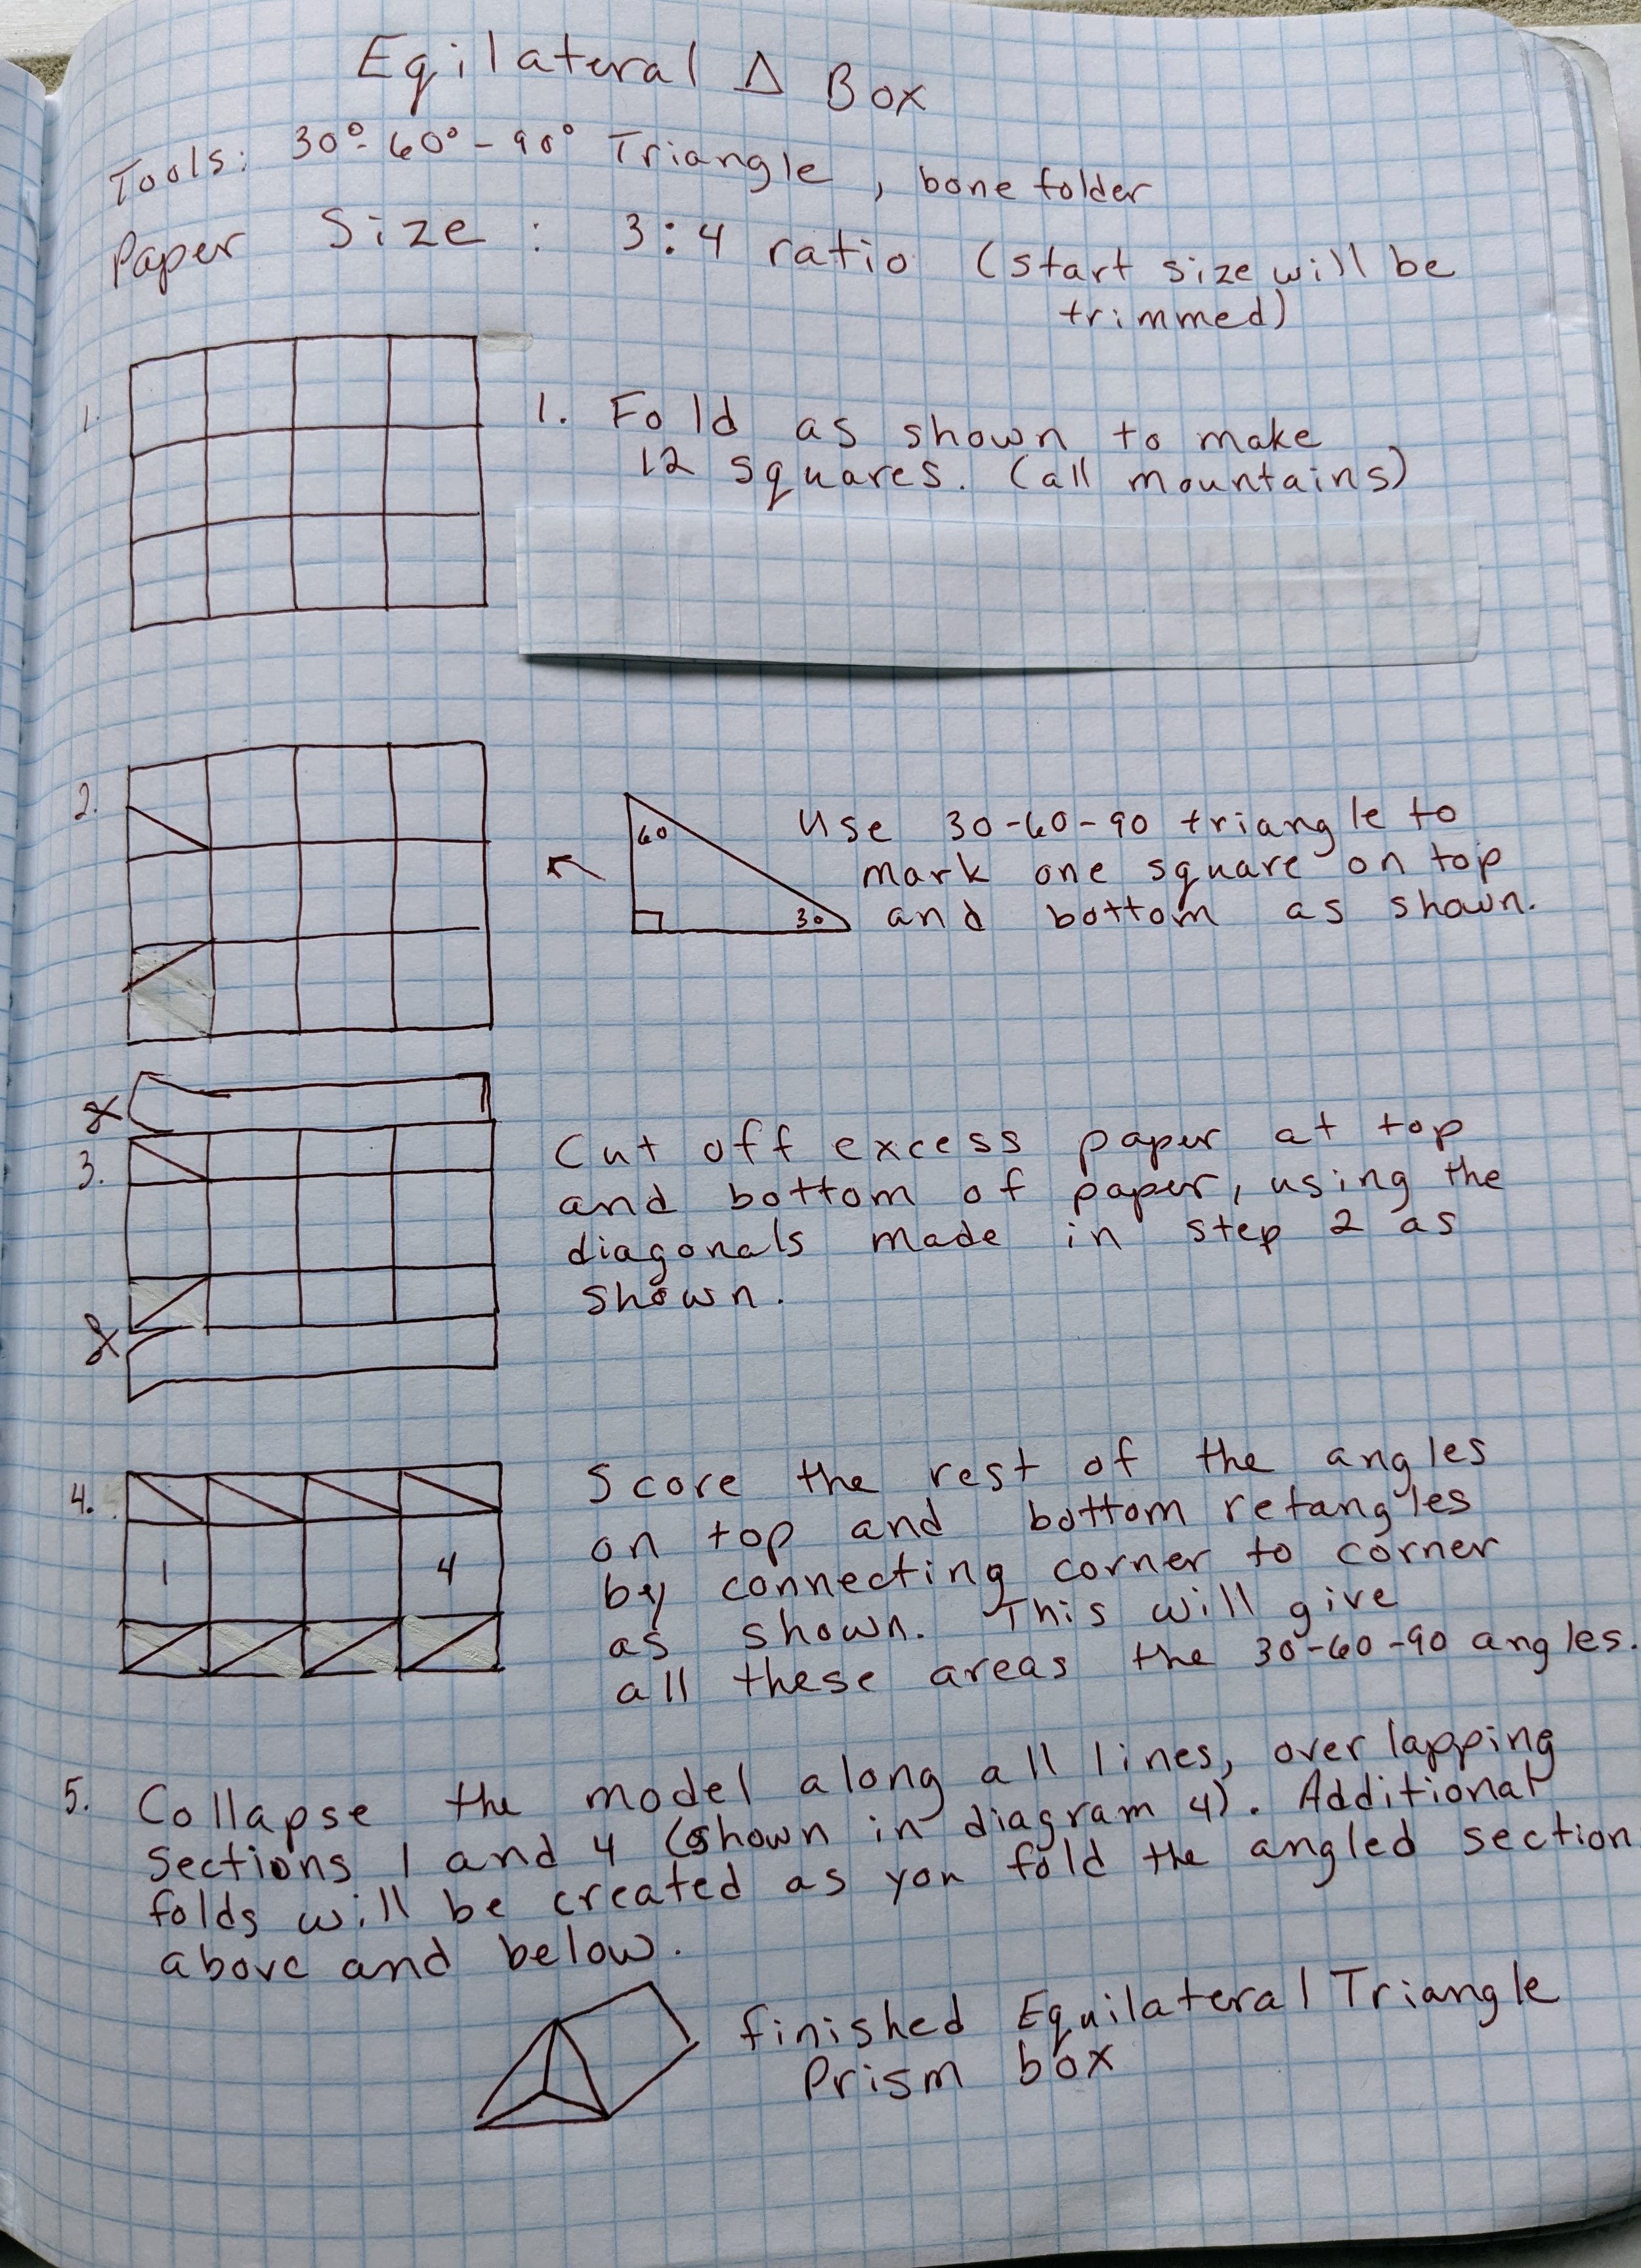
I hope you try making this project. You can print out this pdf on any 8.5 x 11 paper, then cut, score, and glue to create a box. If you are familiar with the nautilus fold from Tomoko Fuse, you can draw any acute right triangle, add the extra paper for the sides and begin folding. To make the base transfer the folds from the top to a second sheet of paper so your folds allign. Enjoy!

Fujimoto Cube Variations

Packing my holiday origami things reminded me that I want to make more sparkly paper cubes. I learned how to make the Fujimoto Cube in 2018 and then played around with other regular shapes like hexagons. Hexagon boxes are fun to make and just require dimensions of a 30-60-90 triangle to get the spiral folds right. To make a hexagon box, start with paper that measures 10 7/8 x 9.5 inches. Yesterday (January 4, 2023) I decided to try a pentagon as well. It is a bit more challenging as there are an uneven number of sides, but with a bit of modification pentagonal prisms can also be folded. The pentagon can be made with paper that measures 6 x 9 inches. You need to trim off the top and bottom corners on the right as shown in the diagram. Below are the diagrams I created and some images of the finished boxes. I hope you will try making them for yourself. (Sparkly paper looks great, but any card stock weight paper will do.)

All three types of prisms.

Playing with Brass Shim

Lately I have been fascinated with a box of brass shim. It is as thin as paper, but harder to fold and once a fold is in place it is hard to unfold or reverse without breaking the metal. I am playing with how to fold some of my paper sculptures in brass without unfolding or reversing any folds. Here are some recent pieces and the paper sculptures that inspired them.

Cut, Pleat, Twist Process

I recently taught Paul Jackson’s Cut Pleats Across Cut Pleats technique applied to alter book pages at the Form and Function From Afar Conference. You can still sign up and watch the recorded content from three days of presentations. Here I am showing the folding and cutting steps we took to make the finished piece, which combines imagery from both sides of a sheet of paper on a single side. It is a magical way to transform paper and images into something new. The possibilities for pleat placement as well as alterations you can make after folding and twisting are nearly endless.

Begin with a sheet of paper that has contrast between side A and B. Here I am using a piece of marbled paper that is white on the back side. Begin folding with the colorful side face up. If you are folding for the first time consider using at least …

Begin with a sheet of paper that has contrast between side A and B. Here I am using a piece of marbled paper that is white on the back side. Begin folding with the colorful side face up. If you are folding for the first time consider using at least an A4 or letter size sheet of paper.

Fold the paper in half and then fold each edge to the center fold to divide it into fourths.

Fold the paper in half and then fold each edge to the center fold to divide it into fourths.

Rotate the paper 90 degrees and fold in half, then in quarters just like you did in step 2.

Rotate the paper 90 degrees and fold in half, then in quarters just like you did in step 2.

Turn the paper over and you will have a series of mountain folds, 3 horizontal and 3 vertical. We are going to concentrate on these folds for the next several steps.

Turn the paper over and you will have a series of mountain folds, 3 horizontal and 3 vertical. We are going to concentrate on these folds for the next several steps.

Create pleats by folding each mountain fold to the center point between mountains. Fold pleats in both directions.

Create pleats by folding each mountain fold to the center point between mountains. Fold pleats in both directions.

Rotate the paper 90 degrees and create pleats in the same was as before. You now have 9 pleats that intersect with each other at 90 degree angles.

Rotate the paper 90 degrees and create pleats in the same was as before. You now have 9 pleats that intersect with each other at 90 degree angles.

The next two steps are all about cutting. You will cut the pleats on the mountain folds between valley folds. Fold back the paper along a mountain fold as shown then cut the mountain fold perpendicular to it as shown. Repeat for all 9 intersections …

The next two steps are all about cutting. You will cut the pleats on the mountain folds between valley folds. Fold back the paper along a mountain fold as shown then cut the mountain fold perpendicular to it as shown. Repeat for all 9 intersections with the paper oriented as shown.

Here is what the paper looks like once the first set of cuts has been made.

Here is what the paper looks like once the first set of cuts has been made.

Rotate the paper 90 degrees and cut the other set of intersecting mountain folds as shown.

Rotate the paper 90 degrees and cut the other set of intersecting mountain folds as shown.

Unfold the paper and you should have + shaped cuts where the mountain folds intersect. There will be 9 of them.

Unfold the paper and you should have + shaped cuts where the mountain folds intersect. There will be 9 of them.

Now we will do a series of folds to help create the final magical reveal. Start with the first pleat as shown and fold down each section (there are 4 now that we have cut into the pleats), making them fold in opposite directions as shown.

Now we will do a series of folds to help create the final magical reveal. Start with the first pleat as shown and fold down each section (there are 4 now that we have cut into the pleats), making them fold in opposite directions as shown.

Stand the second row pleat up and fold down the four sections as shown, making sure they fold down opposite each other.

Stand the second row pleat up and fold down the four sections as shown, making sure they fold down opposite each other.

Lift and lay down the third pleat as before then rotate the paper 90 degrees.

Lift and lay down the third pleat as before then rotate the paper 90 degrees.

Lift the first pleat (the one nearest you) along the mountain fold and the two layers will open up revealing the image from the other side. This is the magical step.

Lift the first pleat (the one nearest you) along the mountain fold and the two layers will open up revealing the image from the other side. This is the magical step.

Repeat lifting and unfolding the second pleat in this direction to reveal the second row of images.

Repeat lifting and unfolding the second pleat in this direction to reveal the second row of images.

Finally, repeat with the top pleat to reveal the last row of imagery. Use a bone folder to gently press down the pleats.

Finally, repeat with the top pleat to reveal the last row of imagery. Use a bone folder to gently press down the pleats.

There are many ways to modify the finished piece. Here is an example of cutting curves on the four corners and the center rectangle that my friend Lauri showed me. Try folding back or forward the corners of each rectangle to modify it as well. You c…

There are many ways to modify the finished piece. Here is an example of cutting curves on the four corners and the center rectangle that my friend Lauri showed me. Try folding back or forward the corners of each rectangle to modify it as well. You can also fold fewer pleats or place them at different spots on the paper. The only rule you have to follow is that when two pleats cross they must do so at a 90 degree angle.

This blog is a supplement to the Form and Function From Afar Conference video. If you are having problems following with just the photos and text here I recommend you check out my video at the conference.

How to make a woven book

I am taking Helen Hiebert’s Weave Through Winter class for the third year in a row. I want to make the 30 days of weaving a bit more cohesive this year than in the past. To that end, I decided to make a book to house all of my pieces. That way they will have a similar size and can all be viewed together. The book is inspired by the weaving class itself. I created a woven book structure that is sturdy and looks nice on its own. Adding woven pieces will only make it better.

To make a woven book you need a page template, lots of paper ( I used heavy cardstock weight magazine pages), and some patience. Here are my results.

Template for creating the book pages. Feel free to change the sizes and number of warp and weft strips.

Template for creating the book pages. Feel free to change the sizes and number of warp and weft strips.

The finished book.

The finished book.

Another view showing the weaving.

Another view showing the weaving.

Beginning to weave the pages together.

Beginning to weave the pages together.

Weaving from another angle.

Weaving from another angle.

A finished spread. I will add a woven piece to one side of the page and leave the other side as is.

A finished spread. I will add a woven piece to one side of the page and leave the other side as is.

A different page spread. You can really see the weaving well here. Note how I alternate the weave between the two pages.

A different page spread. You can really see the weaving well here. Note how I alternate the weave between the two pages.

Form & Function From Afar Conference

I will be teaching along with 8 other book artists, conservators, and collectors at the Book Paper Thread online conference February 18-20. Sign up here for free and enjoy three days of book arts related content. The online classroom allows you to meet fellow students, share work, share tips and tricks, and much more. I hope to see you in the classroom.

Here’s a sampling of what I will be teaching:

Red Lantern Tutorial

I recently taught a demo for San Diego Book Arts that showed participants how to pleat, cut and twist paper to alter it. The video of the demo is here. I have been playing with the concept ever since and trying out different variations. I made a lantern using this technique in Helen Hiebert’s online class Paper + Light in the summer and it seemed like a good project for the winter holidays.

Using red vellum to make it festive, I created this video so that you can follow along and make the project as well. Below are some photographs of the different stages as well as my very rough diagram of the folds involved. I hope you will make this project with help from the video. Try changing the size of the paper and see how it changes the dimensions of the finished lantern (8.5 x 11 inch size works well if you don’t have any 12 inch paper lying around).

More Paper + Light

I am still taking the online class Paper + Light with the amazing Helen Hiebert. We are working with wire, LED lights, balsa wood, and so much more to create lanterns, bendable paper and more. Here are some more projects I have made in this wonderful class.

Bendable Paper:

Light embedded paper:

Sewn Lanterns:

Shadow screens:

Paper + Light: an online class by Helen Hiebert

I am in the midst of an eight week online class with Helen Hiebert. She is teaching us all about combining paper and light in different forms; some flat, some 3-D. It is a combination, not unlike alchemy, that is more than the sum of its parts. Each week I think, “this is my favorite form” and then we move on to a new one and I am smitten all over again. The other participants’ ideas and creations give me plenty of new ways to think about each assignment. The second 4 week class is opening soon so it’s not too late to join in on the fun.

Here are just a few of the things I have created so far. Enjoy!

My Bird Album

Recently I have been enamored with collage as you may have noticed in my 100 Day Project choice. I bought a lovely antique photo album that has blue flowers on the mats and thought it would make a nice place to create simple collages using some of my favorite types of ephemera. I used only birds, backgrounds (maps, music, or ledger pages) and labels with the bird’s Latin name. It was fun to make and I hope you like seeing the pages.